Pages

Wednesday, September 29, 2021

Make The Cards Challenge #35

 Welcome back friends!

It's time for a new challenge over on  Make The Cards Challenge.
Today we are having a Theme + 1 challenge ...


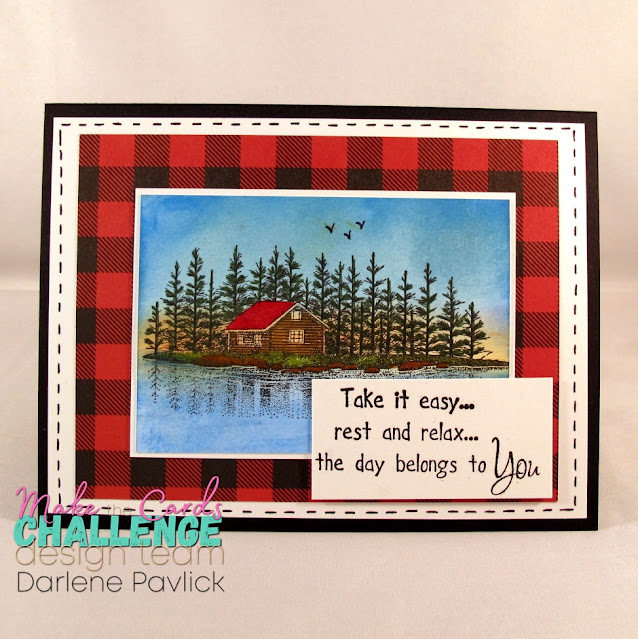
 As you can see I chose to create today's card using one of my all time favorite Stampscape Stamps.  'Country Life' can be described in a few different ways ... for instance, could be Life on the Farm or in this case, Life in a Cabin in the Woods.

I have been trying to use up some of my scraps so sadly I can't tell you whose plaid designer papers I used today but when I saw our theme I knew exactly where to go for the start of my project.


I rarely use black card stock for my card base but it was the best choice for today with touches of white to draw more attention to the Buffalo paid and my image, which was colored using Tombow markers and TH distress oxide inks.  Faux stitching was done around the outer edge just to add yet another 'country' feel touch to my card.


Here's a peek at the inside where I've simply added a die cut sentiment.
This card would be perfect for a masculine birthday!

Challenges to share in:
A Place to Start Challenge September Challenge - Patterned Paper (10/2)
Crafty Sentiments Challenge - Anything Goes (10/4)
Crafting Happiness Challenge #115 - ATG (10/6)

 I hope you'll come join in our challenge fun ... here's the link for you one more time ...

Make The Cards Challenge

 As always . . .


Monday, September 27, 2021

3D Decoupage

 Hello Friends ... Happy Monday!

I mentioned last week that I have had a stack of these 3D Decoupage Stackables for ages and I am finally taking the time to put some of them together and create cards for upcoming crafts shows and OMG they are coming together so beautifully ... why have they been sitting collecting dust for so long???

Anyways ... this is one of the sheets I took separated by popping out the coordinating pieces and compiled to create the three cards I'm sharing today.  You can use dimensional tape in between the layers but I find that it's too high then and costs more to mail so I simply stack the layers as instructed and I think it looks very impressive in real life!

Here are the other two cards using this sheet ...

Going to be a busy week so I'd best get going!
If you have any questions on these cards please leave me a comment and I'll do my best to get you an answer.  Many of these sheets I'll be using/sharing in the near future come from an International company that is no longer in business but I'm sure there are other companies who carry this type of 3D decoupage sheets.

Thanks SO MUCH for stopping by today!
Wishing you a FABULOUS week ahead ... as always,


Sunday, September 26, 2021

What's on your work table?

 Hello friends ... Happy Sunday!

Before getting started on anything 'new' today in the crafting cave, I decided to gather together the few unfinished items that were sitting on the work table and get them finalized.  

The card above only needed something to fill in the white space to the right of the snowflake die cut panel.  I noticed the stack of 'peel offs' hanging on the pegboard and rummage through those to see what I had that would coordinate with the snowflakes.

I found a holiday sheet with this adorable Santa face to added that ... then the sentiment and finally a few stars from another sheet of peel offs.  I was going to leave the Santa as it was but then decided to add just a touch of color using my Tombow markers.  VIOLA ... 


For this second card, I had created the traditional holiday colors shiplap panel a few weeks ago but then switched gears on the project I was working on at the time.   I went through the images I had purchased in Akron, OH at the stamping convention in the spring and the colors in this sweet image were just PERFECT!  I've matted it with gold foil paper, added a sentiment and once again ... VIOLA!

 I do have one more panel laying on the table that I need to do something with so I guess I'll get my brain working on the best way to quickly use that panel and hopefully share it with you later in the day. 

 Have a FABULOUS remainder of your day!

 As always . . .


Saturday, September 25, 2021

Purses - Purses - and more Purses

 Hello friends ...

If you follow my blog, you will know that I have a couple of craft shows coming up in November so I've been busy creating cards, tissue box covers and now ... PURSES!


I had only made a few of these earlier in the year using a more generic pattern but today they are all about the upcoming Christmas Season.  These gems would work great for that special 'little' Christmas gift you have in mind for someone.  Fingers crossed the folks at the craft show will be thinking along those lines!


As you can see, I was 'on a roll' and once I figured out I could get TWO purses from one 12x12 sheet of designer paper along with one sheet of 5 1/2 x 8 1/2 sold color card stock, I started an assembly line and am quite happy with the results.

The die set I have used for these adorable purses is the
Concord & 9th - Weekender Handbag die set.

Weekender Handbag Dies

Now comes the difficult part ... figuring out what to charge for these little gems!
Many times craft show goers just don't realize the time that goes into a project like this.
But like most of my goodies ... I will keep the price lower than most because after all ... I do this as a hobby not as a means of living.  Just to hear the Ooohs & Awwws when they see what I've created is priceless and makes it all worth while.

Challenges to share in:
Crafty Catz Challenge #565 - ATG twist/anything but square
Winter Wonderland September Challenge - Anything but a card
Paperminutes Challenge #710 - Anything but cards
The Holly & the Ivy Christmas Challenge - ATG Christmas

Here's wishing you a FABULOUS day ahead!

Thanks SO MUCH for stopping by ... as always,


Friday, September 24, 2021

More birthday cards ...


 Welcome back friends ... hope you're having a wonderful start to your weekend!

As promised, I once again have another trio of birthday cards created using another sheet of 3D stackable images.  I hope you find inspiration in today's designs.

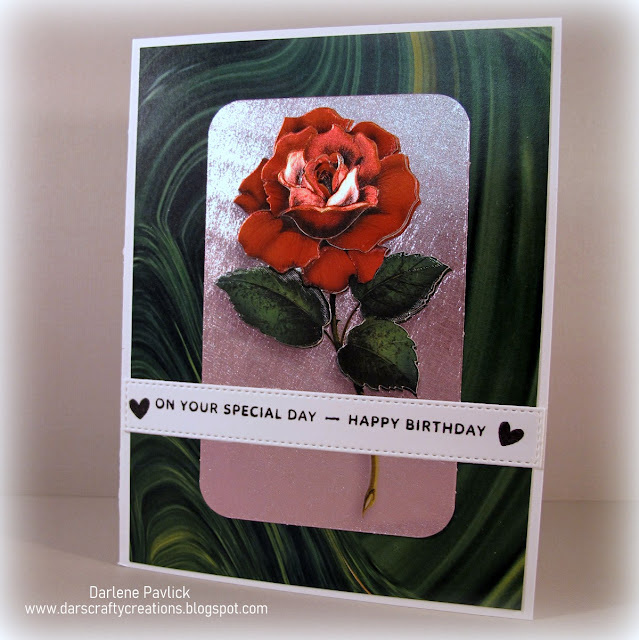
As you can see, this sheet of roses has a foiled finish.  This first card is actually not just the rose but the rose and the silver background panel ... then you build from there onto the rose.  The background was square, I simply rounded the corners to give it more softness.  


My second card I actually photographed at two different angles so you could see the 'shine' of the foiled paper used to create these stackable flowers.  I also used silver foil paper to die cut the Tutti Designs sentiment.  Here's a close up  ...


For this third card I've used a very simple design so as to really showcase this beautiful red rose.  I've used another panel from an Altenew 6x6 paper pad and  another die cut panel using The Greetery corner die I told you about in yesterday's post.

I just LOVE the dimension on these flowers and the shine from the foil paper makes them even more gorgeous.  You really don't need much more than this since they have a WOW factor of their own.

 Here's a close up ...


What ever you're doing this weekend, I hope you make time to do something that makes you happy.  We are headed to Pittsburgh tomorrow to have a family gathering to welcome our niece back from Indonesia where she has been working for our US State Department for the past 4 years.  Her next assignment is Cambodia so we are all wanting to spend a little time with her and doing it all at the same time will save her a lot of time trying to get around to see each of us.  

I hope you've found inspiration in today's designs!

 Thanks so much for stopping by today and as always . . .


Thursday, September 23, 2021

3D Birthday Cards


 Welcome back to my blog friends.
Today I'm sharing 3 birthday cards I created using another sheet of 3D stackables.  As I mentioned in a previous post, I've had these sheets for years and some of the companies I originally purchased them from are no longer in business ... but I know there are other companies out there that carry these sort of sheets.  

I didn't think to snap a photo of the sheet I used for today's cards but here are a couple of sheets I have to give you an idea when they look like.  Each panel pops out and as you can see, they are numbers so you know which panel comes next in the stacking order.
If you go in search of these sheets, be sure to make sure they are perforated pieces ... I have seen sheets like this that you have to cut out yourself ... you don't want to have to do that!  (ask me how I know! lol)


Here are the other two cards I created from the same sheet . . .

The panels used on the left side of this card front are scraps from other projects. 
Also, I have several different shaped frames that have been die cut for one reason or another and then not used so I have them hanging on a hook and figured that would be a good thing to grab for today's card designs.    

For this card I simply attached my rose then added dimensional take to the back of the flower as well as the oval before adhering to my card front.  A sweet sentiment and this card is ready to go.
 

 For my third card I've once again used an oval panel from the hook to showcase my 3D yellow roses.  The background paper is another panel from my Altenew 6x6 paper pad collection and the green vines are a new (to me) die I recently purchased from The Greetery.  It's called 'A Side of Greens' die.

I'm in need of many, many more birthday cards for my sale boxes before the November craft shows so you'll be seeing more birthday cards tomorrow using yet another 3D sheet. 

I'm trying to get my stash built up and in the meantime utilize some of the product I've had sitting around here for years.  Time to show it some love!

 Thanks so much for stopping by today and as always . . .


Wednesday, September 22, 2021

Make The Cards Challenge #34


Welcome back friends!

It's time for a new challenge over on  Make The Cards Challenge.
Today we are having a Color challenge ...


 For my card today, I decided to create a little scene!

The brick background paper was in with my scraps and was a good start since the colors worked perfectly.  The window was created using a very old Poppystamps die called 'Grand Madison Window (#815).  I backed it with white card stock which I drew pencil lines on to mimic window blinds.  The kitties come from an Impression Obsession die set called 'Cats' (#DIE083).  My flowers on the front corner are Sue Wilson 'Queen Anne's Lace' (#CED1480) and my sentiment was created using the Memory Box 'Classic Uppercase Alphabet' set (#98361).

I hope you'll come join in our challenge fun ... here's the link for you one more time ...

Make The Cards Challenge

 As always . . .


Sisterhood of Crafters - Stencils


Hello my friends!

Today I have a card for the new challenge over on The Sisterhood of Crafters!

Our theme, chosen by Sistah Darlene (mwah), is:
 
STENCILS

 I had purchased this stencil way back in April at the Adventures in Stamping convention held here in Akron, OH every spring and FINALLY used it.  It's actually a 3 part stencil so I'm sure you'll be seeing more of it in the future.

It's by a company called A Colorful Life Designs
and this particular stencil is called Split Flourish Stencil.

Split Flourish

 I've used TH Peacock Feather Oxide ink  and have added White Nuvo Crystal Drops along the edge.  My sentiment is by Divinity Designs (used to be called Our Daily Bread) and is called Each Minute (#D227).

EACH MINUTE

  I hope you'll come join in our challenge fun at The Sisterhood of Crafters!

My 'sistahs' have created some fabulous creations to help inspire you ... 
be sure to pop over and check them out!

 As always, thanks SO MUCH for taking the time to stop by!


Tuesday, September 21, 2021

To Infinity and Beyond


Happy Tuesday Everyone!

I spotted a challenge blog that sounded like fun so decided to play along.  The blog is called Beyond the Blue and the theme this time around is to use a GALAXY BACKGROUND.  Well my background was very easy as I used one of the 6x6 sheets in my Altenew 'Celestial paper pack'.  I bought several different Altenew 6x6 paper packs awhile back and am finally starting to use a few. 

 Then I instantly thought of Buzz Lightyear so googled him and found an image I liked ... printed it out onto a 4x6 panel of white card stock then did a bit of fussy cutting.

The sentiment on the front comes from a Pretty Pink Posh stamp set called 'Encouraging Greetings.

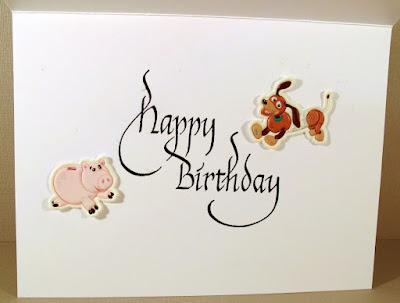
For the inside of my card I simply added a birthday greeting and a couple more puffy sticker Toy Story characters.  What a quick, easy & fun card to create!

Challenges to share in:

Dare 2B Artzy September Challenge - Babies / Kids/ Teens

Dragonfly Dreams September Challenge - Birthday (10/12)
The Fairy and the Unicorn Challenge - ATG Fantasy
2 Sisters on the Blog Challenge #54 - Children's Card

 I hope your week is off to a great start!

Thanks so much for stopping by and as always . . .


Monday, September 20, 2021

Leaves will soon be falling!


  Happy Monday All!

Thanks so much for stopping by today!  I've really become fond of the CAS design style so when I saw the latest challenge over on the Addicted to CAS challenge blog, I just had to join in.


 I die cut the maple leaf die from a very old Spellbinder set then got a bit messy!  I haven't used my gilding flakes for years so thought this would be a good opportunity to use them.  

I used the Cosmic Shimmer 'Gilding Flakes - Autumn Leaves' and mixed in a little of the 'Cosmic Shimmer 'Aurora Flakes'.  I used the Cosmic Shimmer - Flake & Glitter Flue but don't know that I did it exactly as I should since I did have a bit of a mess lol.  Guess I should have jumped onto Youtube before beginning lol.    I still think it turned out to be a very pretty card.

When thinking about my overall design, I had walked past the extra frames I had hanging on the pegboard and that's when THIS design was born.  I've used a sentiment from the Simon Says Stamp! 'Thoughtful Messages' stamp set for my sentiment (the little heart is also in the set).  It was stamped using Tim Holtz 'Wilted Violet' Distress Oxide ink.

 A couple other challenges to share in are:

Alphabet Challenge - L is for Leaves
Country View September Challenge - Leaves Begin to Fall
The Card Concept Challenge #159 - Fanciful Fall

Thanks so much for taking the time to stop by!
I hope you have a FABULOUS week ahead!

 As always ...


Sunday, September 19, 2021

Holiday Tissue Box Covers

 Happy Sunday Everyone!

Yesterday I spent a little time in my crafting cave and decided to work up a few more tissue box covers.  This time, the theme is Winter/Christmas.  Hope you like them!

As I'm writing up the description on these tissue box covers,
I realized I had purchased this heavier two-sided holiday paper for a specific reason ...
and, it was not for tissue box covers!  Hmmm Ooops!

I hope I have enough of each design left to make what I had originally planned ... time will tell ... stay tuned!  LOL

I think this first box cover would be great to have sitting out all winter long ... don't you?

Here are a couple for the holiday season.

As you can see, the trim along the lid and the bottom of the box is different.  It just happens that is the reverse side of these designer paper sheets (12x12) so I thought I'd use the reverse as an accent on both of these holiday boxes.

Aren't they cute?

Challenges to share in:

Winter Wonderland September Challenge - Anything BUT a Card
Crafty Hazelnut's Christmas Challenge #560 - Anything Christmas
My Time To Craft Christmas Challenge #18 - Inspirational Image (I went with the colors)

 Christmas 24 Challenge #39 - Add some holly


 More craft show goodies to come so I hope you'll stop back!
Have a wonderful week ahead!

 As always ... thanks for stopping by and ...