Hello Friends ...
Recently I've been working on Tissue Box Covers for an upcoming craft show and I always end up with a stack of 12" x 3 1/4" strips (that's just how it works out with the dimensions needed from a 12x12 sheet of decorative paper for the boxes). In the past I have used some of those scraps for a simple coordinating card but I saw this technique somewhere online and it's another great way to use up those scrap panels.
I shared a few cards I made the other day here on my blog using this same technique and I just happened to think today you might like making some panels for yourself ... Lord knows we all have scraps laying around.
I've cut my strips in various widths 1/4", 1/2", 3/4" ... it's totally up to you.
Let's get started . . .
First I gathered a few panels that would color coordinate and these papers happen to be double sided ... but this works with single sided papers to, you might just need to grab a few additional panels to get the number of different strips you'd like.
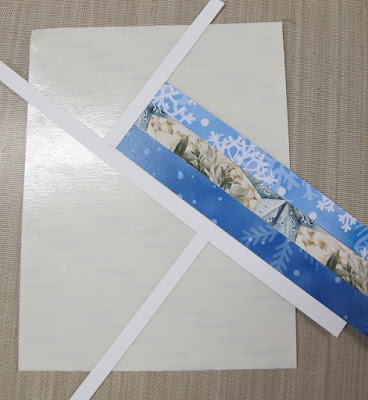
You will need a panel of sticky sided paper and a couple narrow strips of solid coordinating cardstock to create the grid you will follow ...
Now comes the FUN ... start laying out your pattern using your various decorative strips and doing one grid at a time. You can keep each grid the same design (as I have here) or you can simple put them down in a random pattern ... choice is yours.
You can wait until the end or as I like to do, after each grid is filled in, you can cut off the excess and use what pieces fit onto your next grid.
Here is what my finished panel looks like ...
And, here it is positioned onto a card base just waiting to be decorated with a sentiment or whatever additional elements you want to add.
Isn't it pretty! I just love using this technique as you will see over the course of the upcoming 2025 year lol!
Hope you give it a try and please let me know if you use it and post a project ... I would LOVE to come visit your blog and check it out!!
As always ...
Happy Crafting and Hugs from Ohio!
Darlene


So pretty! Thanks for the tutorial!
ReplyDeleteOh, wow, thanks, Darlene! I know I have this technique bookmarked somewhere, but I love this pictorial and will bookmark it, too. Someday... I sure would like to have a good sit down with it. Hugs!
ReplyDeleteIt is a neat sketch and you used such pretty papers, thanks for sharing how you did it
ReplyDelete