Tuesday, July 17, 2012

Cheery Lynn Designs

Hello everyone and HAPPY TUESDAY!

Today I have a card I made especially for the WHITE on WHITE challenge over at Cheery Lynn Designs.  Joan at Joan's Gardens carries this line of dies and I just LOVE them!!!  Being a lover of the 'vintage style', these dies lend themselves perfectly to that style with all the intrigue doily dies and even dies to make your own flowers (as I've done here).

The nice thing about a design like this is that you can turn it either direction ... depending upon which way you need/want to put the inside verse.
This card is A-6 in size and I've used the following products:

Paper: White 80# cardstock
Accessories:  Craft Concepts 'secret garden' embossing folder, White organza ribbon, Momento 'Angel Pink' dye ink (ME404), Martha Stewart 'Branch' punch, Pop Dots Memory Box 'Whimsy Circle' #98154
CHEERY LYNN DESIGNS dies:  Italian Flourish Doily Die DL103, Cuties1 - B149, Exotic Butterfly DL113, Olive Branches B147

A few other qualifying challenges are:
Cards Galore Challenge - White on White
Lia Stampz Challenge - Anything Goes
Simon Says Stamp & Show - Anything Goes

Thanks so much for taking the time to stop by today and I hope you've found inspiration in my work!  I have a couple things in the works right now ... Putting together some BIRTHDAY BLOG CANDY and working up a requested tutorial on the DOUBLE DUTCH cards.  So please be sure to stop back!
Hope to see you soon ... I'd better get to work!

HUGS from OHIO!
Darlene

Monday, July 16, 2012

Joan's Gardens Challenge

Happy Monday Fellow Bloggers!
Did you get a rain storm last night??  WOW!  The wind, lightening & thunder was scarey here in Ohio ... but sure glad we finally got some rain ... it was dangerously dry around here!

Last evening (after a fabulous dinner out with hubby for my bday) I decided to sit down and create a card for the current challenge at Joan's Gardens.  Thankfully it was an EASY recipe this week ...
  • Make a four layer card
  • Use ivory and green
  • Use only a stamped image
  • Use a sentiment
 So here is what I've come up with.  Very easy peasy but yet looks great!
Items used are:
Paper:  Old Olive Green cs, White cs
Stamps:  Endless Creations (flowers), Impression Obsession (sentiment)
Accessories:  Versafine black ink, Momento 'bamboo leaves' ink, Cuttlebug embossing folder, Kaiser pearls

That is all I have to share with you today!  
I really MUST get back into the groove around here ... 
Thanks so much for stopping by and please know how much I appreciate you taking that precious time out of your busy days to drop in and leave me encouraging words!

HUGS from OHIO
Darlene

Sunday, July 15, 2012

How Did I Ever Get THIS OLD??

Hello my friends!
Yes ... today is my birthday and I am now officially of RETIREMENT age!  
How in the world did that happen??  LOL!
(BIRTHDAY BLOG CANDY COMING THIS WEEK!)

It's been a very BUSY week for me so we're keeping my birthday a bit low key (I need to catch my breath)!  But hubby and I are headed out shortly for a nice dinner.
No cooking for me today!  YEAH!!

Anyways, I have a few things I'd LOVE to share with you!  As you know I made a quick (5 hr drive) trip to Indiana to Joan's Gardens on Thursday to visit with Joan and her designer Selma Stevenson.  Selma is from the state of Washington so needless to say, doesn't get in town too often.  


Bette Henson from Illinois [behind Joan] and I [behind Selma] met at a workshop at Joan's a few years ago and have continued to stay in touch ever since.  We arranged once again to get to Joan's early so we had some extra one-on-one time before the other ladies arrived.  How blessed am I to have met these lovely ladies!!!  

And here's the entire group that was able to drive in to spend some fun time with Selma and pick her brain on how she continues to make those AWESOME paper flowers.  She was kind enough to spend time with us sharing some of her helpful hints & techniques.  She sure knows how to make it look easy!!

Something else on my agenda this week was the Annual Ladies Tea sponsored by the Little Beaver Historical Society over in Darlington, PA (my home town).  My cousin Beverly is on the board and started this lovely event three years ago.  Each year the theme is different and the fabulous array of food is unique and delicious!

(Cousin Beverly)


The theme this year took us back to Civil War time and shared the story of the part Darlington, PA played in the movement & protection of slaves with our various underground railroads.

This young lady (Sarah) dressed in period clothes (from a trunk in the Historical Society) and told the story.  She was FABULOUS ... you could hear a pin drop in that hall and during her story she truly portrayed her character (tears and all) and believe me there wasn't a dry eye in the crowd during it!  
 
This very talented couple also live in the area and sang some of the negro slave songs and told us how there were hidden messages in the songs and the character references in connection with the Bible.  They were fabulous also and I truly enjoyed the day.


Beverly has been kind enough each year to have me come and set up my cards for sell.  Sales weren't all that great this year but that's okay ... it was fun to see some of my repeat customers again and enjoy the program.

Thanks so much for stopping by and I wish you a fabulous week ahead!

HUGS from OHIO
Darlene

Wednesday, July 11, 2012

The Sisterhood of Crafters Challenge

Well here we are at MID WEEK again and that means time for another fun challenge at 
Today's challenge is:

LET'S HEAR IT FOR THE BOYS
(Create a Masculine card or project.)

and we are sponsored today by 
BONIBLEAUX DESIGNS
Did you know that Boni is one of the Founding Sisters at The Sisterhood~!!

Today I'm using one of Boni's awesome DUDE images called Under Carriage Craig.  My SIL is a mechanic and is always available if I have car trouble so I thought this would be an appropriate card to send him.
UNDER CARRIAGE CRAIG
I've used Prisma Pencils and Gamsol for the coloring on the car and Prismacolor Markers to color Craig.  A little tag with a Hero Arts sentiment, a touch of ribbon and Viola!  Oh yea ... needed a few brushed brass brads too ... kind of resembles those 'rivet' thingies!  LOL!

Here are a couple other masculine cards I had created a while back but have never shared on my blog.

 This card was created using DCWV design paper and K&Co epoxy stickers.  The fancy fold is called "Z-Fold" and I will be back another day with a tutorial on making this style of card. 

Now this was a REALLY QUICK put together creation.  It's an A-6 Gate Fold card which is extremely easy to make.  The base card stock is cut 6 1/4" x 9" and scored (normally at 4 1/2) but for the gate fold I've scored from each end at 2 1/4".  My GONE FISHING digi is from LEJ Designs and the fish stickers are by TPC Studio.

A few qualifying challenges:
Shopping Our Stash Weekly Challenge - Extra Fold or Pleats (cards #2 & #3)
Top Tip Tuesday - One for the Men

We hope you'll come join in the fun and if you need inspiration ... be sure to pop on over to The Sisterhood and check out what my Sistahs have created!

HUGS from OHIO
Darlene

Monday, July 9, 2012

Just having fun . . .

WOW!  What a busy week I have ahead of me!!  
But before it gets TOO CRAZY, I wanted to quickly share with you a card I made over the weekend.  Recently I won 3 fabulous images from LEJ Designs and this 'lovely lady' is one of them.  The actual name of the stamp is 'Summer Sun Ellen'.  And since their current challenge at LEJ Designs Challenge Blog is fabulous flowers, I decided to play along.   I have paired her with another fun digi (castle) which was a freebie over at Pattie's Creations Design Challenge

Using WORD software, I created a little 'beach scene' ... now that's what I call a SAND CASTLE!!!
I've used prismacolor markers for my coloring with the exception of the sky and I used chalk for that.  The flowers are prima and the greenery was created with a Martha Stewart 'branch' punch.  My background paper is from a DCWV mat stack.
Well like I said ... busy, busy, busy this week so this post will be short & sweet!

Here are a few additional qualifying challenges:
The Crafty Pad #178 - At the Seaside
 Pile It On - Shore Thing
Simply Create Too - Summer/Vacation
Sweet & Sassy - Beach/Sand

Hope you all have a fabulous week and thanks so much for stopping by today.
HUGS from OHIO
Darlene

Sunday, July 8, 2012

Tiddly Inks Challenge

Happy Sunday my fellow bloggers!
Recently I was fortunate enough to win some adorable digi images from Tiddly Inks so I thought it only fitting that I check out their current challenge and play along.  Here's what I have created for their Red/White & Blue challenge using a Tiddly Inks image called "You and Me".


Aren't they an adorable couple?
My background paper came from Can You Dig It (another fun challenge blog) and I've used Prismacolor Markers for my coloring.  My sentiments are from the Inkadinkado (97892) Wedding clear stamp set, flower is Prima and the gingham ribbon is from Michaels.

Here are a few other qualifying challenges:
Allsorts Challenge #162 - Red, White & Blue
Raise The Bar - Red, White & Blue
SJ Crafts Monthly Challenge - Red, White & Blue
Divas by Design - Red, White & Blue
Perfect Sentiments Challenge - Red, White & Blue (+sentiment)

Thanks so much for stopping by today!  I can't express how much I enjoy your comments and visits!  It truly means the world to me!!  
HUGS from OHIO
Darlene

Saturday, July 7, 2012

Joan's Gardens Challenge

Time for another 'challenging' challenge at Joan's Gardens!

Here's the requirements for this week's challenge:


  • Create a card very similar to Selma's Card
  • Use an embossed background
  • Use a lace border
  • Use Selma's tutorial to create flowers
  • Use Pink and White

I didn't have the same die to use in creating my roses as Selma did but I did acquire a new McGill PN64503 'Floral Petals' punch at Archiver's yesterday so couldn't wait to try it out!  I think it worked pretty well ... except for the smaller roses ... need more practice with those!  


Here is a list of items used on this card (those in red were purchased at Joan's Gardens):
Marianne Design DS0908 Designables Embossing Folder
Marianne LR0156 & LR0157 leaf dies
Cheery Lynn Designs B147 Olive Branches
Cheery Lynn Designs B117S Fanciful Flourish Small
Memory Box 98267 Quinn Flourish
Martha Stewart Doily Lace Border punch
McGill Black Mat
PunchBunch Flower Making Kit
Momento 'Angel Pink' Dye Ink
Sponge Dauber
Glitter Line Pointy Pliers
Pink Organza Ribbon
Pink/White satin ribbon from Joann's


If you've never tried Joan's challenges, you really need to pop on over and check it out!  Her designer Selma is AMAZINGLY talented and the QUEEN of flower making.  I have to say that these challenges certainly DO CHALLENGE ME!!  Which is awesome in my mind!!  Thanks Ladies!

Want to hear something exciting???
Next week I'll be making a quick trip out to Joan's Gardens (Indiana) to link up with Joan, Selma and a few other crafting friends for a day of chit-chat and picking Selma's brain on techniques & style ... before rushing back home to attend (and sell my cards/projects) at a Ladies Tea held in Pennsylvania.  I can't wait to see Joan & Selma again ... always good fellowship at the Fricker House!

Other qualifying challenges:
Catch The Bug Challenge - Anything Goes
Craft Your Days Away Challenge - Doilies and Lace
Craftymess challenge - Ribbons and Lace
Digi Design Challenge - Pile on the Flowers
Chocolate, Coffee and Cards - Anything Goes
Inspire Me Friday (Joyful Stamper) - Always Anything Goes
Our Craft Lounge - Die Cuts
Sarah Hurley Challenge #69 - Dimension & Texture
Paper Pretties - Any Occasion Card

Well that's it for me today!
The thermostat show 98 degrees here in Ohio (4:00 pm) ... shew!  Sure is HOT!
Hope you are staying cool and enjoying your weekend!

HUGS from OHIO
Darlene

Thursday, July 5, 2012

Shelly's Images Challenge w/Special Guest Designer

(EDIT:  Remember to leave me a comment on this post to be eligible to win  a $3 Shelly's Images Gift Voucher ... 
Winner will be drawn July 18th)

Hello Everyone!
I hope you had a fabulous, safe July 4th.

Thursday means another fun challenge at Shelly's Images and starting today, our challenges will be changed to TWICE a MONTH ... the 1st and 3rd Thursdays of each month.  Remember there is always a new Technique/Tutorial Tuesday prior to those TTT challenges.

Today's challenge theme is:

"WHAT THE TEXT?"
(use text/sentiment on your card/project)

Since I am the Design Team Lead for today's challenge at Shelly's Images, I have the pleasure of inviting a SPECIAL GUEST DESIGNER.  So, without further ado, I'd like to introduce you to SASSY (Sue).

SASSY'S SECRETS
Sue is from the UK and her design work is gorgeous!  I especially am inspired by her quirky stories and vintage creations.  I always come away with a big smile on my face after visiting this 'Sassy' lady!
FYI ...
You'll want to be sure and pop over to Sassy's Secrets and leave her a comment because she will be giving away a $3 Gift Voucher for Shelly's Images Store to ONE LUCKY commenter ... and ... I WILL BE DOING THE SAME so be sure to leave me a comment too.

Before I show you what I have created with today's featured image, here's a sneak peek at Sassy's creation ... it is GORGEOUS and you  can see more photos when you visit her blog.


NOW .. just so you know ... I went a bit crazy and made TWO projects for today's challenge which makes this posting even longer (sorry).
Using the featured image "DAISY 1".   I have manipulated it a little bit using WORD to showcase two flowers vs one, and I have placed Shelly's "Thinking of You" (coming to the store soon) in front of the flowers.  SU watercolor pencils and blender pen were used for coloring and I added a touch of Momento 'Bamboo Leaves' green ink onto the tips of my yellow Prima flower.

My 2nd creation is a 4"x6" TAG card with a pocket front.  (I will be doing/posting a tutorial for this "tag style" card within the next couple of weeks.)  I have printed, colored and cut out "Daisy 1" in order to place the stem down inside the pocket along with my homemade tag using a Crafty Secrets image.

The inside of my tag card showcases Shelly's 'Daisy 1" image again for my sentiment.

So there you have it!
Remember ... you have THREE (3) chances to win Shelly's Images digi stamps.  
  • One winner will be chosen from the entries to the challenge at the Shelly's Images Challenge Blog ($6 gift voucher).
  • One winner  will be chosen from those who comment on Sassy's Secrets Blog ($3 gift voucher).
  • One winner will be chosen from those who comment HERE on my blog ($3 gift voucher).
Here are a few qualifying challenges:
Cooking It Up With Katie - Lace a Summer Flower (card #2)
The Paper Shelter #71 - Flower Power
Simon Says Stamp Challenge - Tags or ATC (card #2)
Stampavie and more #171 - Lots of Flowers (card #2)
The Pretty Little Ribbon July Challenge - Tags (card #2)
 Clear it Out Challenge - Anything Goes [use something Yellow] - card #2 ribbon is more than 3 years old
 Jackson's Digital Expressions - Anything Goes [use flowers] card #2
LEJ Designs - Fabulous Flowers
Sassy Cheryl's - Anything Goes

WINNER CHOSEN 7/18/12
Thanks SO MUCH for stopping by and have a FABULOUS day!
HUGS from OHIO, USA
Darlene

Tuesday, July 3, 2012

Tutorial - Gift Card Holder

Today I have the pleasure of sharing a Tutorial over at Shelly's Images for Tutorial/Technique Tuesday so thought I'd share it here on my blog too.  You can find several AWESOME tutorials at Shelly's Images that the design team have shared.  There's even a 'button' in the sidebar taking you directly to the Tutorial Library... be sure to check it out.

Here's a quick, cute & easy Gift, Money or Business Card Holder tutorial!

Here is the 1st holder I made a long time ago.
Thank goodness I put the instructions inside it for safe keeping & future use!
I saw it online ... sorry I didn't write down where!

HERE WE GO!

I've used 2-sided designer paper.
Main panel - 6 3/4" x 4" ... score one end at 2" for top flap.
Side panels - TWO at 2" x 3" ... scored every 1/2" and accordion folded.
(You can also round your corners if you'd prefer ... I have only rounded the top flap on my sample today.)


Attach Scor-Tape to each end flap on your accordion folded panels.

Then adhere as shown below:

Then fold inward and attach the other side as shown below:

For the 'closure', I find these sticky back velcro circles work perfectly!!

HINT:  If you stick the neg & positive sides together when you take them out the pack ... then position it on the 'lid' where you want it ... you simply fold down the lid onto the main holder and you'll have it positioned exactly where you want it!

I find these awesome Prima sticky back studs & pearls work perfectly on the front.  Either by themselves (as on my 1st sample) or with other embellishments ... choice is yours!

 Suggestions for it's use . . .
1.  gift card/money holder that you can send in the mail or 
hand deliver
2.  great for carrying along some of your business cards 
in your purse
3.  add a little chocolate treat or two for 
each of the ladies attending your 
next crafting get together
4.  add a treat and love note to hubby's lunch box
5.  teacher's appreciation day gift
6.  stocking stuffers
7. tooth fairy pouches

etc., etc., etc!

So here's my finished sample for today! 

I'm in the process and making up a variety of these little goodies for a Ladies Tea I have coming up on July 14th.  I think they'll like them ... here's a few I have ready to go.


Okay ... gotta go!  As you know hubby is now retired and he's yelling down the steps that he wants to go somewhere before it gets any hotter!  Whew!  Just got this posting done in time!  LOL!
Catch you all later!  Enjoy your day!
HUGS from OHIO
Darlene

Monday, July 2, 2012

Linky Party at Crafty Secrets & Update on Vintage Chair Redo

Hello my friends and Happy Monday!

I want to tell you about a new Linky Party & Give Away going on this week at
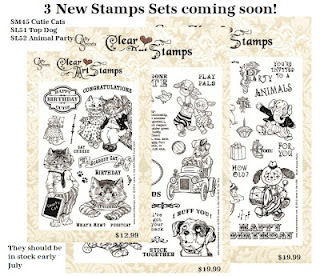
Beside their Linky Party they also have a great Giveaway for their 3 NEW animal theme Clear Art Stamp Sets!  To enter just leave a comment on this post and tell Sandy which set you like the best.

Here's a sneak peek at these new sets.


I have created a couple cards for the Linky Party and since I was having trouble uploading them to my gallery over on Splitcoast Stampers, I thought I'd share them here on my blog too.  I'll try again over at SCS later in the day ... after all, it is MONDAY!!!

The 1st card I made is a 'Double Dutch' fold card using Crafty Secrets - Clear Art Stamps  
SEASIDE 
(Medium-SM17)

Open View - Sand Castle is an EKSuccess sticker.

My 2nd card is a 'GATE FOLD' card using Crafty Secrets - Clear Art Stamps
DOWN ON THE FARM
(Large - SL35)


Open View

* * * * * * * * * *
Well, I got the chair painted over the weekend ... what do you think?
I'm still pondering what to do to showcase the beautiful scroll work ... thanks to all who left me comments and ideas!  It's NOT too late to leave me a comment!   I so appreciate you taking the time. 


This paint is amazing and does such a fabulous job!  I think I just might have to send an email to the company and share my 'advertising' with them!  Who knows maybe THEY will pay for my next painting project!  LOL!  Speaking of paying ... did you know that you have to show PROOF OF AGE when purchasing spray paint now!  WHAT is this world coming too???   (of my gosh ... I sound like my mother with that last statement!!)

Well that's it for now!
I have more to share but don't want to OVERWHELM you,
so I'll come back later with more crafting tid bits to hopefully inspire you!

Have a GREAT one!!
HUGS from OHIO
Darlene

Sunday, July 1, 2012

A vintage chair . . .

Happy Sunday Friends


I found this vintage chair at a flea market in Amish Country (Walnut Creek) last week while spending the day with my friend Gretchen.  I (and another lady) spotted it at the same time and I decided to keep looking around and if it was still then when we came back then I'd buy it.  WELL ... obviously it WAS there and now it's mine and will soon have a new home in my guest bedroom.  After applying the 1st coat of paint I realized I forgot to take a BEFORE photo ... hence the Black/White picture ... Grrrrrr!

A shade of purple is the color I will be starting with and see what happens from there.
Hubby has suggested painting the spindles various 'vintage' colors but I think I'll wait until I find the seat cushion I want and draw inspiration from it for additional decorating.  Our guest bedroom is done in lavendar & mint green so I want to keep those colors in mind.


This chair has some beautiful detail  ... not sure if I should do 'something' with that or just leave it the solid color.  At time of purchase, it was painted white with a 'blue' chandelier painted in the center of the opening in the scroll work.  Yuck!  So I did my best to SAND off the chandelier since I didn't think it really fit the chair style.

Any ideas?
Leave me a comment.
I would love to hear your thoughts.

Have a FABULOUS day!
Hugs
Darlene