Showing posts with label CropStop Blog. Show all posts

Friday, September 14, 2018

Crop Stop Blog Guest Designer

Hello my friends!
How excited am I to once again be asked to Guest Design for the
If you are not familiar with the CropStop Blog or Store
you owe it to yourself to pop over and check 'em out!

The card I have created to share with you today can be used for a variety of occasions or just as a note card.  The 'deer' little scene I've created makes me smile ... I hope it makes you smile too!


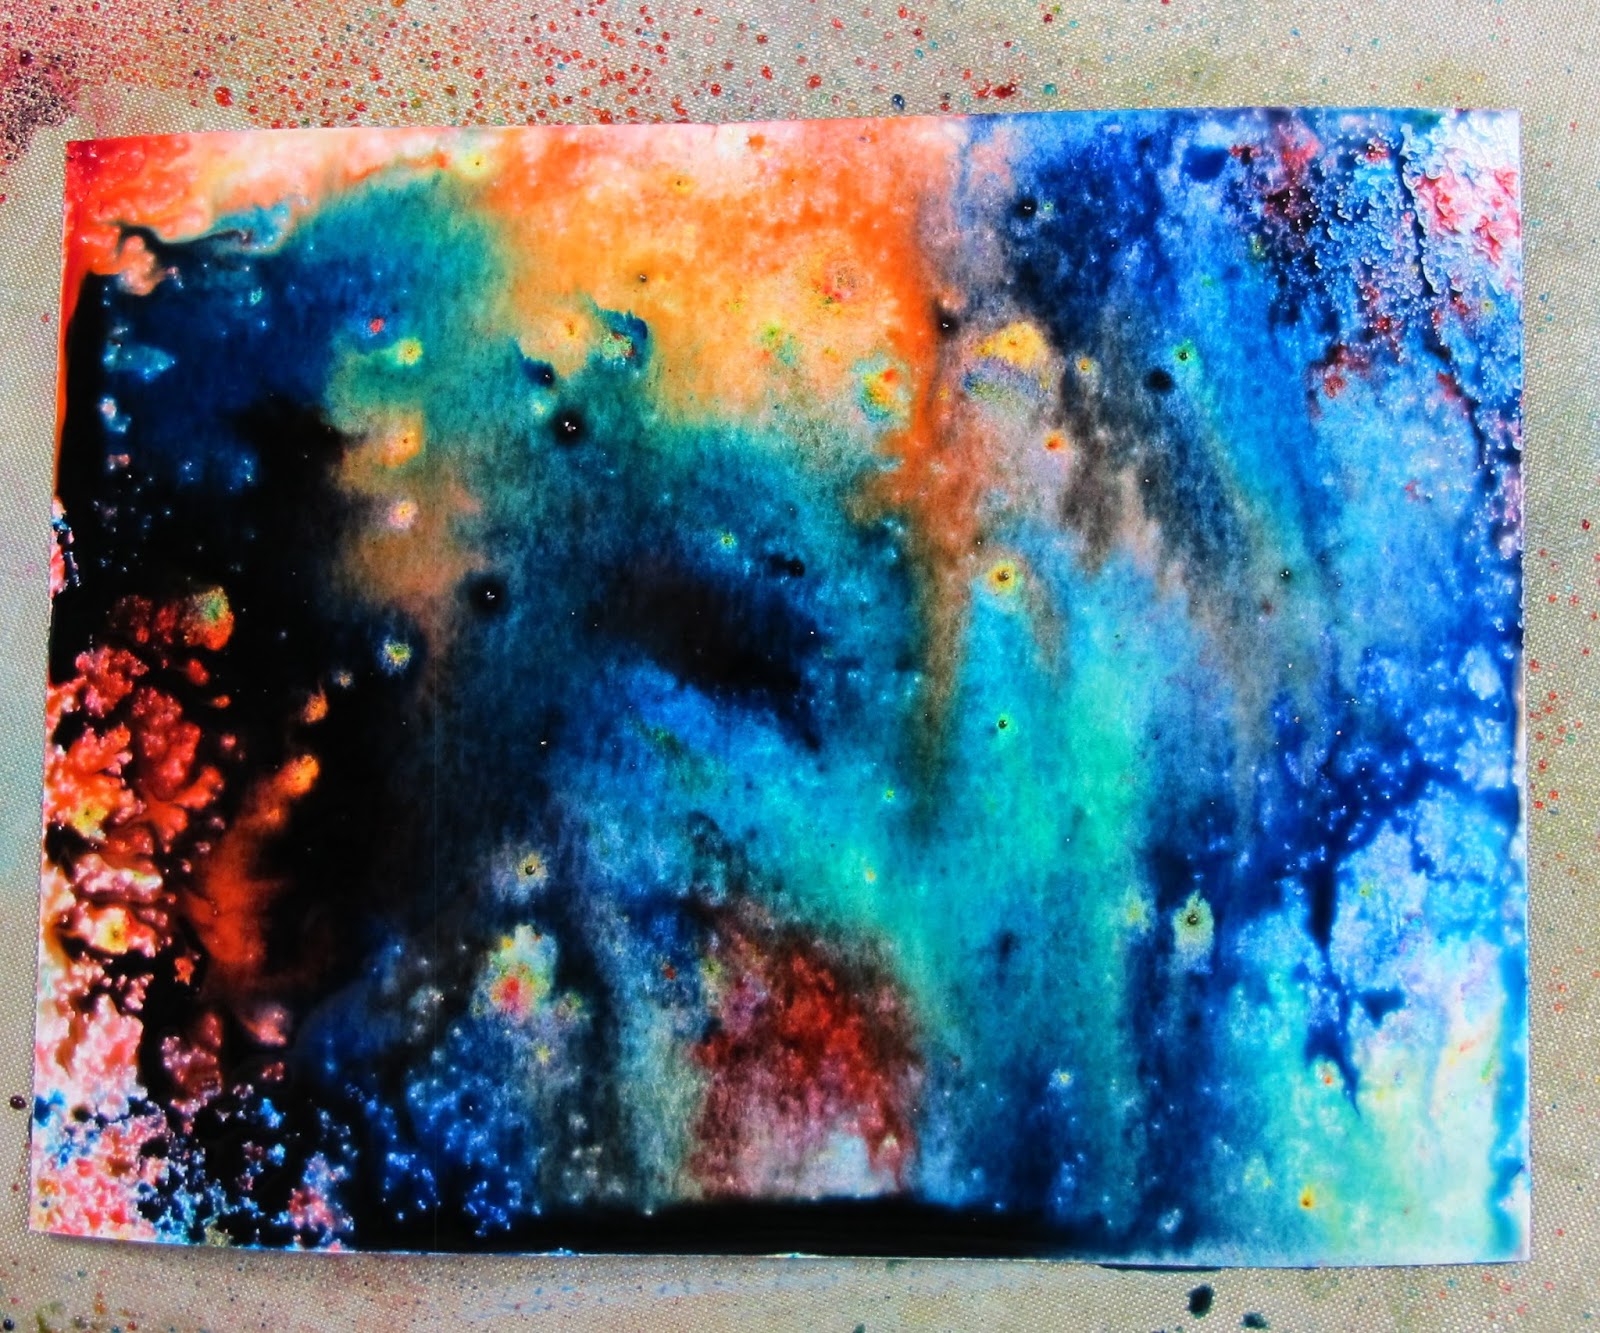
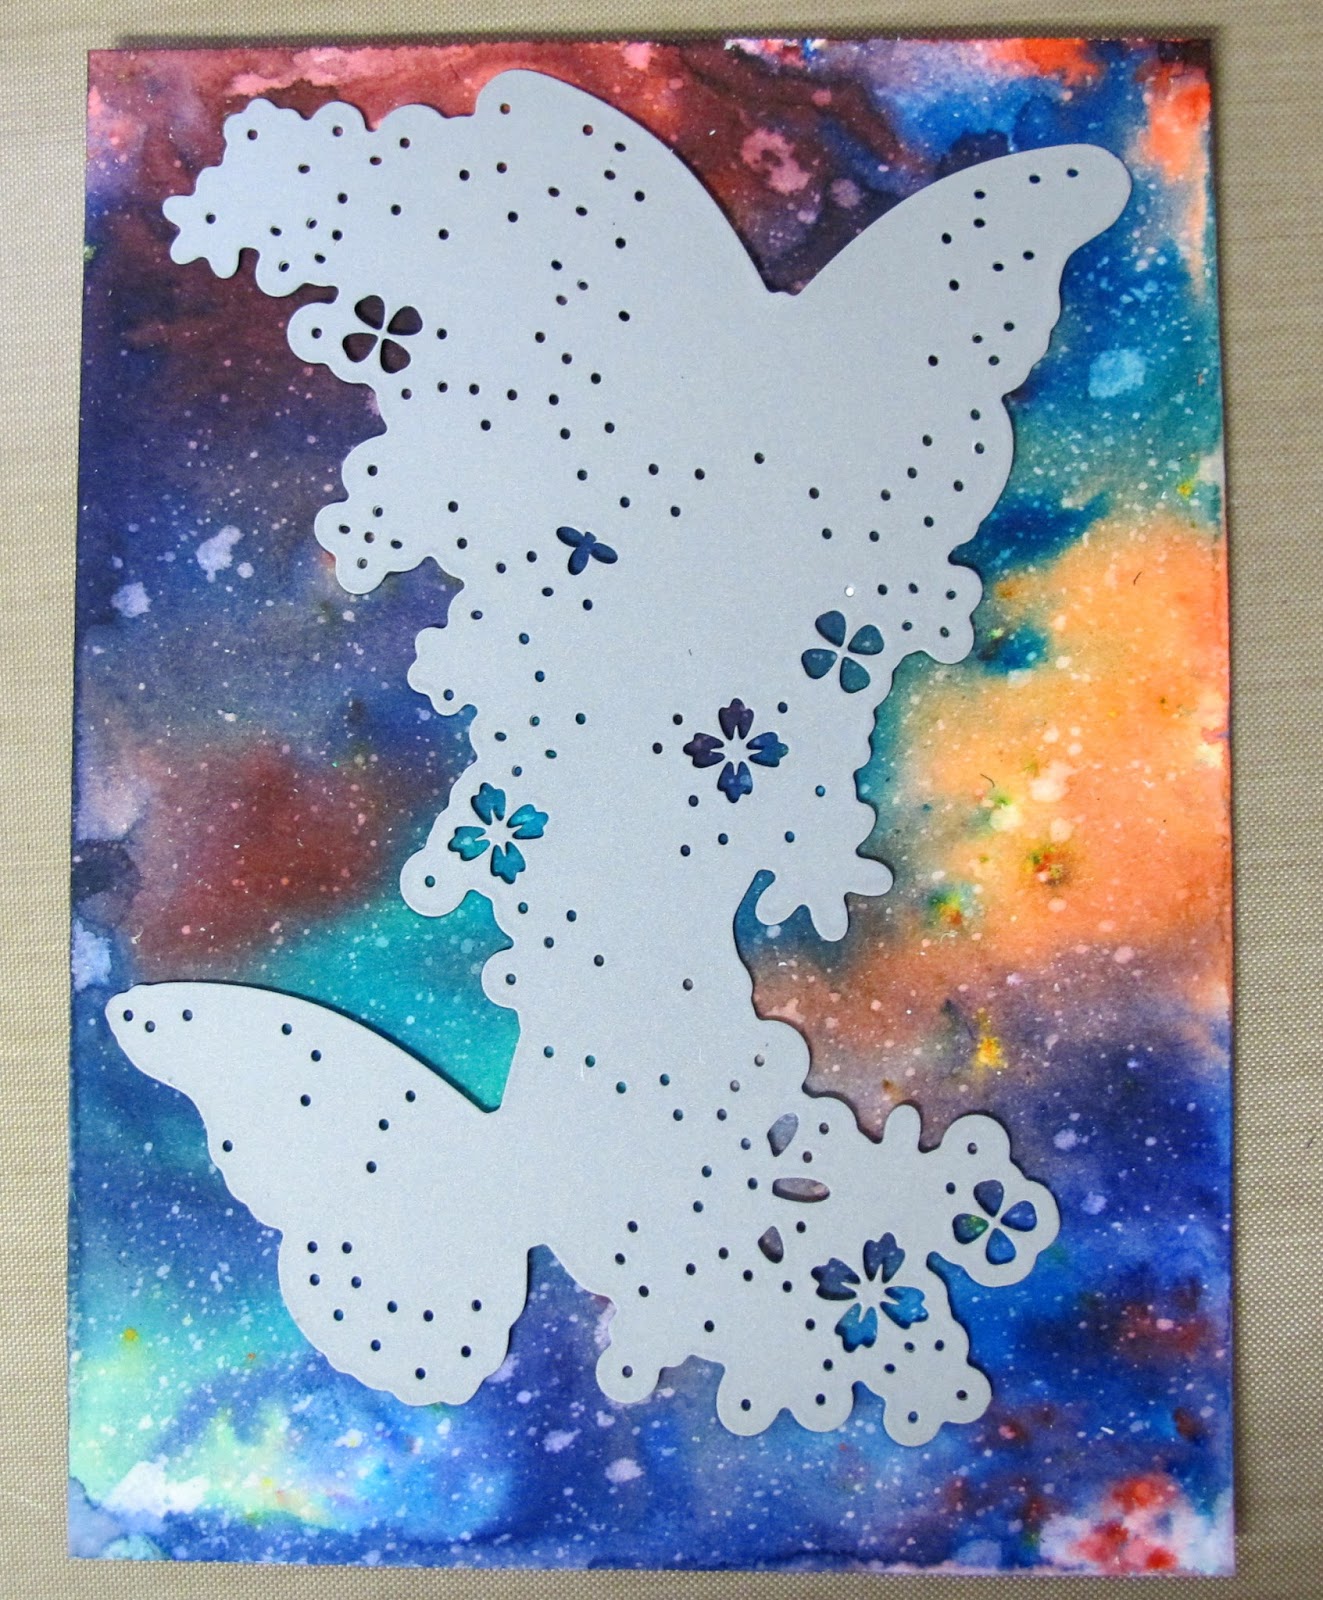
It all started with the background utilizing inks and embossing.


For the embossing,  I used a Darice 'Cloudy Sky' embossing folder and did a little outlining with a white Gelly Roll pen to help add even more dimension to my clouds.


While the Memory Box 'Deer in the Trees' #99275 die cut was still in the paper, I did my coloring using Spectrum Noir Alcohol Markers.


Isn't this new Memory Box 'Woodland Bridge Frame' (#94039) awesome?  I love the bridge concept and I turned the little deer into a 'fawn' by putting the spots on his rump!  More coloring done with the same Spectrum Noir alcohol markers and inks.


I wanted to create dimension in the scene so I've cut out 3 additional 'Deer in the Trees' die cuts and glued them all together with the colored one on top.


My sentiment is by Sue Wilson but you could use any number of stamp or die sentiments.


Crop Stop Product Used:
I hope you've enjoyed today's creation!
Thanks again to the CropStop Team for inviting me to Guest Design with them!!
Please pop over to the CropStop Blog for more wonderful inspiration!
And, be sure to check out their store!!

Challenges to share in:
Brown Sugar September Challenge - All creatures great & small
Die Cuttin' Diva's Challenge - Any Animal
2 Crafty Critter Crazies Challenge #18 - ATG animals

Thanks so much for stopping by and as always . . .


Friday, July 13, 2018

BEE Happy ...

Happy Friday Everyone!

I so excited today!  
I've once again been asked to guest design for the CropStop Blog.  YEAH!!

Here's what I've created using products they carry in their store.


It all began by creating my focus flower which is 'Daisy Delight' by Memory Box.


I've die cut it twice from white card stock then colored the popped out pieces of the one panel using Spectrum Noir alcohol Marker CT4 and then colored second panel which will be my outline piece using Spectrum Noir alcohol Marker JG1.

 After coloring, I die cut my framing panels using the 'Wrapped Stitched Frames' also by Memory Box.  I've used the largest frame for my actual frame but used the next size down 'inset' to adhere my flower to.  Once I had the outline adhered I then pieced in the yellow flower petals.

 Next came my background panel.  I wanted to use coordinating colors with my focus flower so I used Tim Holtz distress oxide inks and watercolor paper.  I actually used Lucky Clover & Amber but as you can see where the green & yellow combined, I ended up with blue!  It happens!  Duh!  LOL
I used Scotch ATG adhesive to adhere my background panel to my white card base.  
Then, started building my layers.  Next came the large frame  ...


Then my focus flower panel which was popped up using mounting tape for added dimension.


Lastly, I added this adorable little 'Bee' by Elizabeth Craft.
It too was popped up using mounting tape.


Here's a peek at the inside using the frame that was cut from the second largest frame in the set (used the inside cut out portion for the focus of my card) and the sentiment/bee are from Inky Antics.


If you're not familiar with the you really need to  pop over and check 'em out!!

Challenges to share in:
4 Crafty Chicks Challenge #411 - ATG / Twist - Life's A Picnic (where there's a picnic, there are bees lol)
Aud Sentiments Challenge #207 - Flowers + Sentiment (mine is on the inside ... see photo)
Crafting with an Attitude Challenge #41 - ATG
Crafting by Design Challenge - ATG
Pause Dream Enjoy Challenge # 28 - ATG

Thanks so much for stopping by and as always . . .


Friday, April 20, 2018

CropStop Blog - April Guest Designer

Hello my friends!
How excited am I to once again be asked to Guest Design for the


If you are not familiar with the CropStop Blog or Store
you owe it to yourself to pop over and check 'em out!

BE ADVISED!
The CropStop Blog has had to resort back to their OLD blog after having
extensive issues with their Wordpress blog back in February!
Please tell your friends who are curious what's going on with CropStop of this change.  They can not even get into their blog to make the announcement of this issue!
Thanks for your help in spreading the word!

Today I have an ocean themed card to share with you.  Hubby & I are planning a trip to the islands in May so that's what is on my mind at the present time.  


 This card all began with the background panel which I created using Tim Holtz Distress Oxide Reinkers and watercolor paper.   Of course, where would I be without my Craft Sheet ... I have one designated strictly for this type of project as you will see in the photos below. 


I spritzed my paper with water first, then put a few drops of the oxide reinkers on my craft sheet and started 'swishing'  it on with a paint brush.  Spritz with a little more water then dry it with your heat gun.
I wanted to have a water bubble affect in the water so I spritzed it with  water being careful to have both little and big water droplets.  The longer the water sits on the panel, the more color it will pull up when you blot it with a paper towel.


Now comes the fun of pulling the other elements together for this underwater adventure.


 It was only after I adhered my ribbon die panel that I decided to enclose this element with clear panels cut from die cut packaging.  I find so many uses for this packaging material and this is one of them.  


So I adhered a clear panel to the back and another to the front then placed 3M dimension tape to the back.  I positioned my Angel Fish onto my 'water' background then placed my 'Graceful Branch Panel' over top.


Glue Dots were used to adhere the front clear panel so I simply snipped the flowers from another Petal Ribbon panel and glued them over top.  This coordinated the piece and hid the glue dots perfectly.

Here's another look at the finished card . . .


Crop Stop Product Used:
I hope you've enjoyed today's creation!
Thanks again to the CropStop Team for inviting me to Guest Design with them!!
Please pop over to the CropStop Blog for more wonderful inspiration!
And, be sure to check out their store!!

Thanks so much for stopping by and as always . . .

Friday, November 17, 2017

CropStop Blog - November Guest Designer

Hello my friends!

I'm so happy to be back once again as the Guest Designer at


If you are not familiar with the CropStop Blog or Store
you owe it to yourself to pop over and check 'em out!

Today I have a winter/holiday card to share and a fun technique for creating dimension on your creations.


Can you see the dimension on the faerie & the winter scene?
I will share close ups a little further down in this write up.

But first,  to create the background for my Poppystamps 'Winterland Faerie', I used the panel that popped out of the Memory Box 'Gentle Horizon Oval' and colored it using Tim Holtz Oxide Distress Inks (Broken China, Faded Jeans).  I stamped the 'broken china' oxide ink onto my Craft sheet, spritzed with water and dragged my panel through ... dried with my heat gun then dragged it through again the other direction and dried again.  Around the outside edge, I used Sponge Daubers with the 'faded jeans' oxide ink to add the touch of darkness.  This background panel will be 'reinserted' into my 'Gentle Horizon Oval' die AFTER I have created my dimensional oval.


To create the dimension I've referred to above, I simply die cut my scenic die 4 times and glued them one on top of the other.  This not only saves on adding all those little bits of dimensional tape but it also helps me use some of the mountain of white scraps I have in my stash.  Plus, the ENTIRE die cut has EVEN dimension.


Next I reinserted the blue (pop out panel) into my dimensional die and held it in place with just a few narrow strips of Scotch tape.  Once attached to my card front it will be adhered securely with strips of Scor Tape.


Here's a close up view so you can see the dimension.


The 'Winterland Faerie' was done basically the same way but I did however do something a little different with her wings.

I die cut the faerie twice.  Once from red glitter paper and a second time from white card stock.  I actually die cut from white card stock a total of 3 times.  Glued the white panels together then adhered the red glitter faerie to the top.  Again, giving dimension.

In order to keep the red glitter wing panels solid, I simply smeared a touch of white glue on the back with the pop out pieces still in place.   Once dry, I glued the white wing panel on top of the red.

I used a small piece of dimensional tape to the back of the faerie to which I adhered the wings ... then I added more dimensional tape to the wings & faerie to adhere to my winter scene card front.

Before adding my faerie, I created some snowflakes in the night sky using a white Gelly Roll pen.

For the background panel on my card, I cut a white card stock panel 1/4" smaller than my base card and embossed it with a Cuttlebug 'Snowflakes' embossing folder.  Using a large sponge dauber and Tim Holtz Oxide Distress Ink
(Broken China), I sponged around the edge of the embossed panel as well as the edge of my winter oval scene panel.

On a scrap piece of white card stock, I quickly sponged some 'Broken China' oxide ink and then die cut my sentiment using Sponge Daubers.  This way all the colors matched perfectly.

Here's another look at the finished card:


Product used:

Tim Holtz Oxide Distress Inks (Broken China, Faded Jeans)
Poppystamps 'Winterland Faerie'
Memory Box 'Gentle Horizon Oval' 

I hope you've enjoyed today's creation!
Thanks again to the CropStop Team for inviting me to Guest Design with them!!
Please pop over to the CropStop Blog for more wonderful inspiration!
And, be sure to check out their store!!

Challenges to share in:
Fabrika Fantasy Challenge #15 - Wintertime
Daisy Chain Challenge #14 - Christmas/Winter
Noor! Designs November Challenge - Winter
The Paper Shelter Challenge #318 - Snowflakes

Thanks so much for stopping by and as always . . .


Friday, October 27, 2017

CropStop Blog - October Guest DT Spot

Hello my friends!

I'm so happy to be back for a second week as the Guest Designer at


If you are not familiar with the CropStop Blog or Store
you owe it to yourself to pop over and check 'em out!

Today's card started out a bit 'inky & messy' but I always LOVE  the end result with using the Ken Stewart  Color Burst to create a background or colorful panel for die cutting as I have done today.
What do you think??


Like I said ... a bit messy (at least I'm messy LOL) so be sure to use a designated Craft sheet when using this sort of product.  I use this same work area when creating with Tim Holtz oxide distress inks.

I first spritz my 6 x 4 1/2"  Watercolor Paper  with water then sprinkled on the color burst of various colors from the set.  Next came more water.  Letting it run, dabbing up the excess with paper towel, heat drying ... this was my end result.  Oh yea, once I had it heat dried, I spritzed again but quickly dabbed with a dry paper towel to achieve the water spots.


Next I positioned my Memory Box 'Dizzy Butterfly' die onto my colorful panel and die cut.  Positioning it in such a manner that I could use the outside edge of this panel as a matting for my focus image.   I also die cut the Memory Box 'Blooming Flower Frame' from teal green card stock to use as a background.


 Once I got started putting my design together, I decided to CUT both of these panels in half.  The frame was cut to extend the size and my Ken Oliver panel was cut in half and attached back together just at the border to make it a smaller panel for my dizzy butterflies.


I punched a few small butterflies from the excess Ken Oliver panel using the Martha Stewart '3-in-1 butterfly punch'.

Product Used:
Memory Box 'Dizzy Butterfly' die
Memory Box 'Blooming Flower Frame'
Martha Stewart '3-in-1 butterfly punch'

Here's another view of my finished card.  Nuvo white crystal drops were also used on the focus panel for added  texture.

Challenges to share in:
Colour Crazy Craft Challenge #43 - ATG
Crafting With Friends Challenge #53 - ATG
Creative Fingers Challenge #139 - ATG
Simon Says Wednesday Challenge #43 - ATG

I hope you've enjoyed today's creation!
I'm pleased to tell you that I've been asked to guest design for CropStop again on November 17th.   How exciting!   I'm honored and thrilled! 

Thanks so much for stopping by and as always . . .