Hello My Friends
WOW! Can you believe it??
DECEMBER 1, 2014
Where has the year gone??
Since it is the first Monday of a new month, that means it is once again time for a new
Linky Party at Crafty Secrets! This month, the design team is focusing on a these themes:
Calendars, Christmas and Cooking! You'll definitely want to check out what my team mates have to share with you this time around ... they continue to 'out-do' themselves month after month!! WOW! What amazing inspiration!
Remember, there is NO THEME for YOU to follow! You can create ANYTHING you'd like for this challenge as long as it has an item from Crafty Secrets/Heartwarming Vintage on it. Just as simple as that and
EVERYONE is a winner! Be sure to go to our
Crafty Secrets Blog for all the Linky Party details.
Before I share my project, I wanted to share this:
Cyber Monday! Save 30% EXTRA off all our Sale priced items now until 12 PM PST Monday, Dec 1/14.
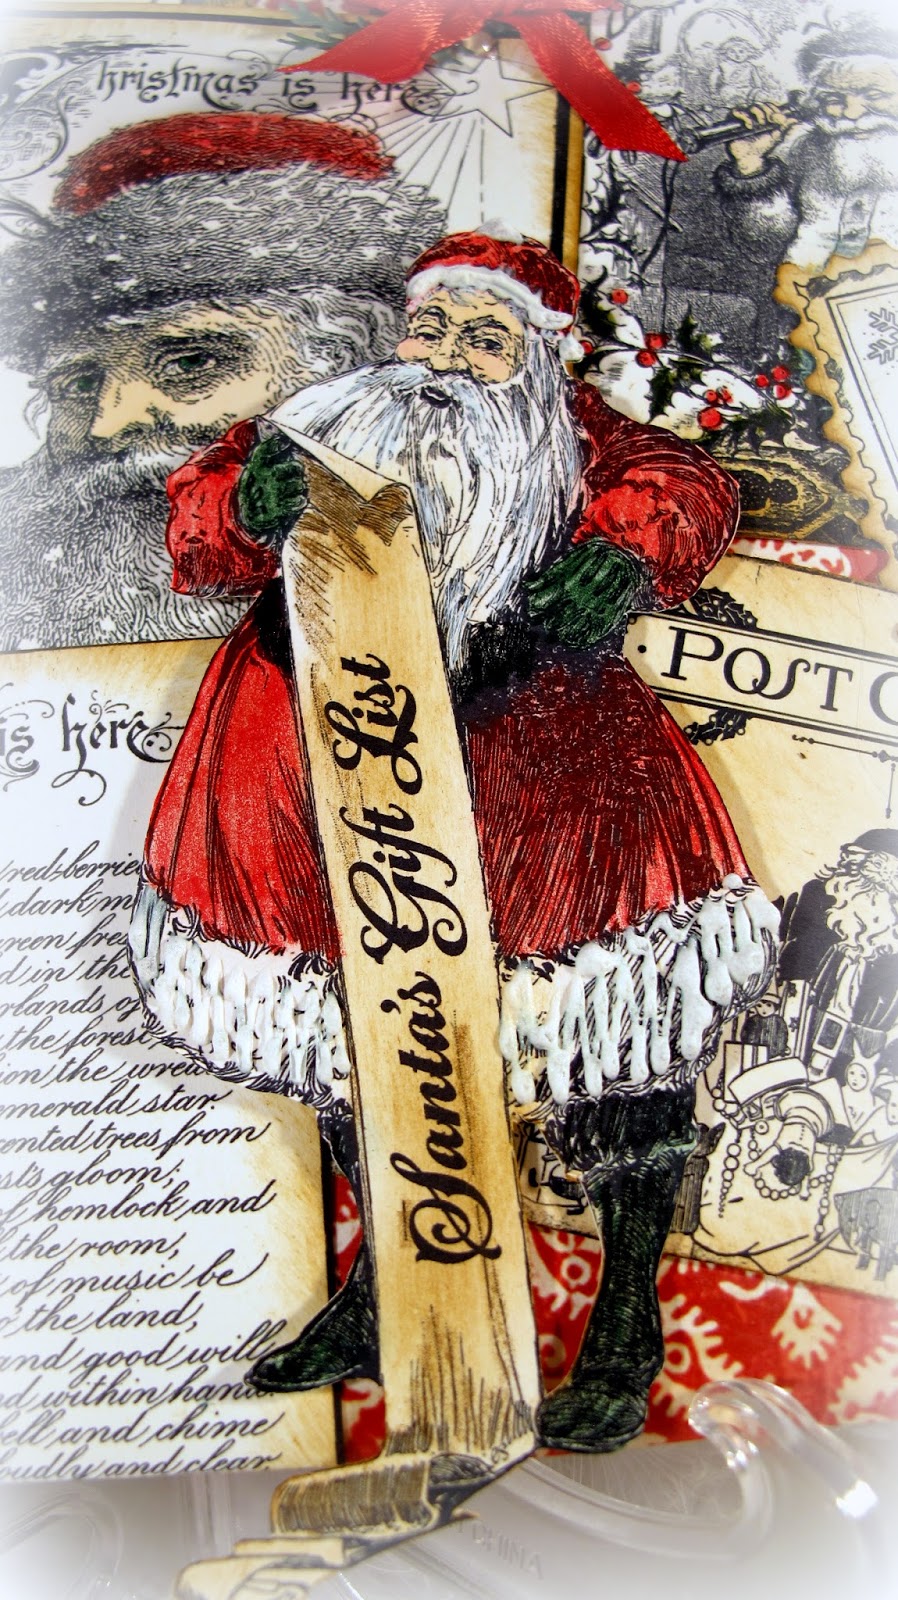
So many fabulous images and I used a lot of them on today's project which is an ALTERED CANVAS! I have grown to love doing this sort of thing and it's so easy when you have so many fabulous images in just one set to play with.
You say you've never tried doing this?? Well ... here's a few tips that I hope will help you when you try it for yourself! Then we will BOTH be addicted to this style of creating! LOL!!
What you will need:
8x10 white canvas
Crafty Secrets Vintage Santa Digital images
Crafty Secrets Vintage Christmas CD5 design paper
Tim Holtz Distress 'Tea Dye' Ink
ModPodge
Sponge brush
White glue (I use Art Glitter dries clear glue)
Scissors or Craft Knife (for fussy cutting)
Markers, chalks, pencils (for coloring)
Red ribbon/greenery of your choosing

STEP 1: Print images the size you wish, depending on how many you want to use as to the size you will print. I brought my images into a blank Word document keeping in mind those that I knew I wanted to fussy cut and/or pop up.
STEP 2: Cut your images and give them an aged appearance by sponging the edges with Tim Holtz Tea Dye distress ink. I decided to only use a small amount of 'color' and I picked
RED as my focus color.
STEP 3: Around the outside edge of your canvas, you can leave it plain, use paint, ribbon, or do as I did and antique the edges but simply applying ink from your pad directly around the outer edge.

STEP 4: Print the background paper of your choice. Crafty Secrets has some GORGEOUS paper designs in their Christmas CD sets ... both Vintage and Retro.
Cut to 8 x 10 size to fit the front of your canvas and adhere using Mod Podge and small sponge brush ... I use the matte finish.

STEP 5: Lay out your images to get an idea of which images will be 'under' and which ones will be 'over' ... then start applying them to your covered canvas using white glue (or the adhesive of your choice).
As you can see, on some of the edges I 'wrapped' it around and adhered it down ... others I let stick up. Be creative!!
Once you have all your pieces in place, (remember you can POP UP a few items like I did with my fussy cut Santa on the lower portion) or leave them flat.
To help pull in the 'touch of color' I added springs of greenery and small red satin ribbon bows that I created using my
Craft-Dee Bowz bow making tool.
The possibilities are endless on a creation like this! Give it a try! Get out those Crafty Secrets products and GO CRAZY!! Then be sure to come share it with us at the
Crafty Secrets December Linky Party!!
One more peek at my project with a few close-ups. Sorry for the long post but that happens when I want to share the HOW TO's with ya'll. LOL
Here are the links for my team mates ... PLEASE pay them a visit and BE INSPIRED!!
Crafty Secrets Design Team
I hope you enjoyed my creation/tutorial today and will come join in our challenge fun at Crafty Secrets! Now I need to get busy ... one more craft show for the year this Wednesday and I also have painter's here painting my kitchen before our Annual Neighborhood Christmas Party on the 14th! Oh my goodness ... I will have kitchen redo photos to share soon!
As always . . .