Tuesday, April 8, 2014

Singing Springtime Praises and a DT Call!

Happy Tuesday Bloggers!
Time for me to share another inspirational sample card using dies purchased at Dies R Us!  Have you checked out the new Dies R Us Store yet?  Oh what are you waiting for ... it's your ONE STOP SHOPPING SITE FOR DIES (great prices too)!

Before sharing my card with you, I wanted to make sure you heard the news!
There's going to be a *NEW* Dies R Us Challenge Blog beginning May 1st and we
are looking for a DESIGN TEAM!   
Do you like to create using dies on your cards/projects?
Well  why not give it a try!  
You can find all the details on our Dies R Us FB Page
in our Dies R Us Newsletter or on DTcalls.com.  
I've also posted all the information HERE on my blog!
Come give it a try!

Now ... on to today's card!
Today I am once again praising the arrival of Spring!
I've actually been watching the birds going in & out of our birdhouses, building their nests and getting them all ready for those young ones!
That was my inspiration for today's card using birds, branches and bird houses!


Memory Box - STENCIL - VinesAs you know, the main product line at Dies R Us is DIES ... BUT, they do have some other goodies available like the fabulous Memory Box Stencils that are also in stock now!  For instance, this 'Garden Vines' #88523 that I have used for the background on today's card.
By simply placing the stencil on a piece of white cardstock, I gently sponged various Tim Holtz distress inks over the stencil to create this sunset background for my card.
Another fun technique I used today was 'paper piecing' on the birdhouses.  I have so many scraps that I've been trying to use some of them every chance I get and since my ACTUAL birdhouse are decorated I thought why not do the same for today's card.

The dies used today are:
Impression Obsession #DIE058 - Love Birds
Cheery Lynn Designs #B178 - Flourish Leaf Strip
Joy! Crafts #6002/0137 (available during European Die Sale)

I just love watching the many birds we have here in N.E. Ohio, USA ... AND I love creating cards with the fabulous dies that are available at Dies R Us!

A few challenges:
Papertake Weekly - Spring has Sprung
Shopping Our Stash - Paper Piecing
2 Cute Ink Digital Stamps - Anything Goes
The Crafty Blogger April Challenge - Die Cuts or Embossing
Melonheadz Challenge - Time for Spring

Remember, you can pop over to the Dies R Us Inspirational Blog for new samples of creations made by the team using dies from Dies R Us every week ... Monday through Friday!

Have a FABULOUS DAY!!!

Monday, April 7, 2014

Crafty Secrets April Linky Party & DT Challenge

Happy First Monday of the Month Blogging Friends!
With that being said, that means it is once again time for a new monthly Linky Party at the Crafty Secrets Blog.  Remember, you have 1 week to play (no theme for you ... create ANYTHING as long as you use Crafty Secrets/Heartwarming Vintage products) and you could be our $50 winner!  Also be sure to come and check out all the fabulous sales going on at the store!!!!!


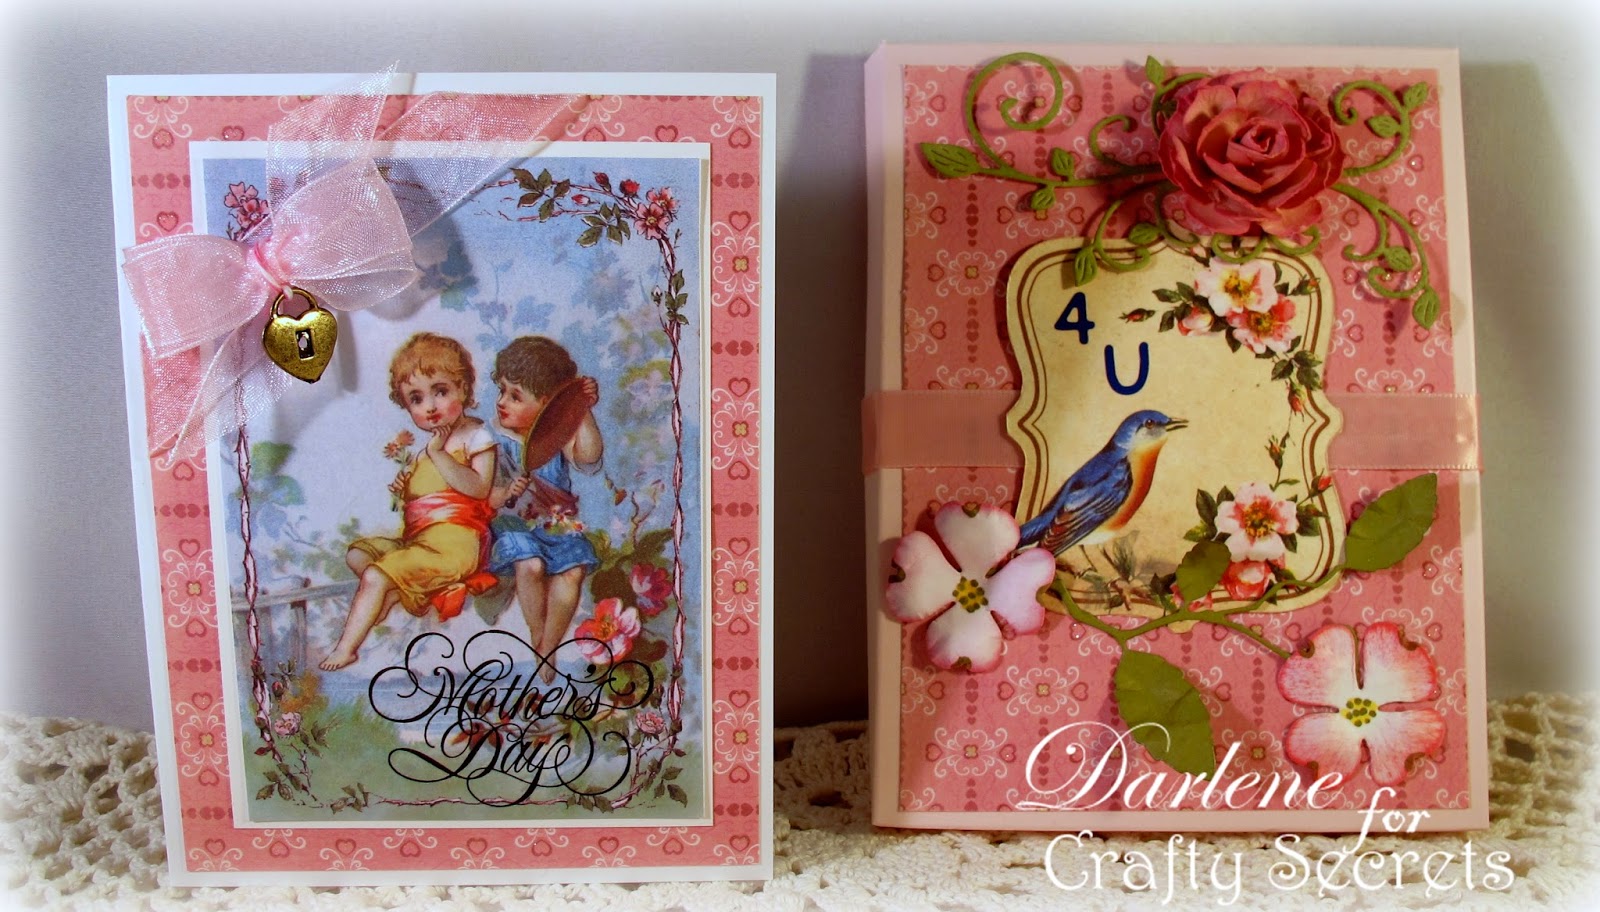
Today I've created a Mother's Day Cards with coordinating box.
My tutorial will be on creating the box.
I've actually made two sets to share with you today.


CARD
BOX


GIFT BOX for A2 Size CARD
You will need:
2 sheet of 8 1/2 x 11 card stock
Scoring Board w/scoring tool
White Glue
Red Line or Scor Tape Adhesive


To create the BOTTOM of the BOX ...


To create to TOP (LID) of the BOX ...
 This is the piece that is a LITTLE LARGER ...
 NOTE that the one end is cut differently ... for attaching to the box bottom.
 

 This view is actually UPSIDE DOWN!
(sorry ... I'm Polish! LOL)
It was easier for me to lay the lid down flat 
then sit the box end on TOP of what would become the outside lid flap.
Where the two adjoin to make it a 'hinged' style lidded box.


Now it's time to have some fun ... DECORATING!

The FOCUS images on both the card and the box come from the Crafty Secrets T-21 Digital Garden Printable Sheet.  The background paper is Crafty Secrets DP-104 Digital Radiant Paper Collection.  The Mother & Child image came from the Crafty Secrets HVB5 Girls Alphabets & More Booklet and the 'Mother' panel on the card came from the Crafty Secrets Joys of Life Booklet (sorry, no longer available).

Other items used on this card/book creation are:
Cheery Lynn Designs 'Polynesian Sails Oval' die set
Cheery Lynn Designs 'Love' die set
Cheery Lynn Designs 'Pretty, Pretty Bows' die set
Cheery Lynn Designs 'Gardenia' strip die
Kaiser Pink Pearls
MS 'Branch' punch
Offray Pink Satin Ribbon
the Paper Studio 'Spare Parts' metal lock

I mentioned earlier that I had made two sets to share with you.  Here are photos of the second set:

The main image on this card and the inside verse both came from the same T-21 Digital Garden Printable Sheet as the first card set.   AND, there are still several images remaining on this fabulous sheet to fulfill more card making needs!


Sorry for the lengthy post but I'm afraid that is due to my procrastination on purchasing (and learning how to use) a web cam for videos.  LOL ... once again my AGE makes me reluctant! Maybe I'll tell hubby that's what he can buy me for my birthday!  Yeah, that's a good idea!!  LOL!

Need more inspiration and want to see more amazing tutorials?
Well, please pop over and visit my Crafty Secrets Team Mates ...
A few other challenges to share in:
Jellypark Challenge - Mother's Day
~Jo's Scrap Shack #44 - Anything Goes
613 Avenue Create #66 - Anythings Goes Optional Twist - Sights/Sounds/Smells/Tastes of Spring
Challenges 4 Everybody - Anything Goes
Cheery Lynn Designs - Anything Goes
Pile It On - Feminine

Thanks so much for stopping by, and I hope to see you at the Linky Party!
Remember ... ANYTHING using ANY Crafty Secrets / Heartwarming Vintage Products
and
there are freebies available on our sidebar if you are new to Crafty Secrets!!
Have a GREAT DAY!!
Did you tell your kids how much you LOVE them today???


Spring Time Colors with Squigglefly

SPRING is in the AIR!
Finally!  LOL!  And, I'm lovin' it!!

Hello my friends!
Today at Squigglefly, our challenge is to use some 'Bright Spring Colors'.
With my daffodils ALMOST ready to bloom, yellow was the first
Spring color that came to my mind!
Then of course, the pink & purple tulips that are also
planted in my front flower beds are starting to make their way through the mulch also.
So, that gave me the color palette I wanted to use on today's card.

This beautiful 'Spring Bouquet Cup' is by Pamela Lehto.


I've used Spectrum Noir Alcohol Markers for my coloring and SU Crystal Effects for the shine.

SCARY STORY!  
I had my card all put together when I decided to add the 'shine'.
On my shelf was a bottle of SU Crystal Effects 
and a bottle of Aleene's Paper Glaze (which had been there for awhile!)
WELL, I decided to use the Aleene's for a change.  Gave it a little shake, then a little squeeze and PLOP out came a very watery, then clumpy pasty MESS!  
OMG ... did I just ruin this entire card???
My bone folder was laying there ... so I quickly began scrapping the ooy-gooy mess
from my card front and praying I wasn't going to have to start all over again!

In front of me was a very large, very WET bouquet cup ... was it ruined??
Oh well ... I went ahead and opened the Crystal Effects and put it on my cup, saucer & tulips figuring that if it didn't dry properly THEN I was start all over again!  
THANK HEAVENS, when it dried it was just fine!  SHEW!!!!  That was a close one!!!

NOTE TO SELF:  Finish the image ENTIRELY before adding to the card front next time!


I fussy cut the image then adhered the bottom flat and popped up the top
portion onto a Spellbinder scallop oval panel. 

 Anyways LOL ... please pop on over to Squigglefly to see what my team mates have created for your inspiration today and then please come join in our challenge fun!!


 Recipe:
Papers:  SU design paper, white cs, bright pink cs, black cs
Accessories:  Spectrum Noir alcohol markers, SU crystal effects, White Gelly Roll pen for faux stitching, Offray purple satin ribbon, Prima flowers, Stampendous diamond dots, Fiskars swivel craft knife for fussy cutting,  pop dots, Spellbinder Scallop Oval dies

Sunday, April 6, 2014

EGGS ...

Happy Sunday Afternoon All!
Over on the 'Our Beautiful World' blog ... their sharing theme today is EGGS.
You'll have to go over and take a peek ... some fabulous & unique photos/stories!


The first thing that came to my mind when I saw the theme 
were the deviled eggs we made for our Easter Dinner last year.
Of course, I spotted this idea on Pinterest (The Bragging Mommy) and just had to have a go at it!
Hubby & family thought they were pretty neat too!

I thought I had a pretty picture of them when they were all finished and on the table
but I can't seem to locate it so guess I'll just have to go with this one.

They looked so festive on our Easter table and tasted good too!
Hubby has his own 'filling' recipe that includes bacon bits & cheese.
So we used his recipe for the inside and this fun coloring twist for the outside!

I have a friend from PA on her way so I'd better get moving!
HUGS to you all!
DARLENE

Saturday, April 5, 2014

Sharing my organized mess . . .

Happy Saturday my friends!
Craft Hoarders Anonymous is having a very unique, FUN and informative challenge going on right now through the end of the day Sunday.  I just couldn't help but enter into it!

It's called FIFTH MONDAY FEATURE!
For every month that contains a fifth Monday, they do a FEATURE WEEK and a LINKY PARTY!

The design team members will take turns sharing their storage tips and solutions. Each of them will share how they store their hoard! Three designers will share each "fifth week" during the year! You will get to peek into the design team's craft spaces and see how they manage to "contain" their hoarded supplies!

Plus you will have the opportunity to share your own storage solutions, tips, ideas, etc., by linking up! One RANDOM WINNER for March will win the prize.


WELCOME TO MY CAVE!
Here are some of the ways I store my 'hoard' ...

 Basically, I have HALF the basement of our home (well it does flow over to the other side two where I have all the cases of my cards and my light box set up for photographs).
I can seat 8 ladies down here for a fun crafting get together.
But most of the time I'm just SPREADING out and playing by myself!  It nice to have this much room so I can spread out my folders/binders for design team work.  This is how I keep organized on upcoming DT and Guest DT obligations.  (trust me, it doesn't always look this neat!!  lol)

THIS is where I spend a lot of my time ...
on the computer, coloring images and making flowers. 

Hubby built me this wonderful stand up work table with cubby hole shelving.
(lol ... can you say RIBBON ADDICTION!)


On the wall that goes upstairs, he put up pegboard.  This way, I can
hang a lot of my embellishment.  My thought was ... If you can see them ... you will use them!  
Of course, I have so much stuff, I'm not going to live long enough to use them all!  
Unless I make it to about 200 years old!  LOL!

 I LOVE these 3 drawer stackable cases!  
This is how I store a lot of my design papers as well as my stamps.
You also see on the right side of the photo that I have some 12x12 paper shelves.  I was lucky enough to get in on a good buy when one of the local stores went out of business several years ago.
I have printed labels for each of the case drawers which makes it not only look 'uniform' but also helps this feeble mind remember where I put stuff!! 
(that way I don't have to open each and every drawer every time I want something!  LOL)


The colorful middle section are 8 1/2 x 11 clear boxes that I keep my card stock in.
With being in the basement I was concerned about the moisture (humidity) with all the paper so I decided to keep it separated in these clear boxes.  However, our dehumidifier works very well and I'm happy to say I don't have a problem with paper curling or anything like that!


These clear cases also come in 12x12 size so I also use them to store my Christmas papers & stamps in.  That way when it comes time for those holiday cards, I have everything together and see what I'd like to work with. (trust me ... this is NOT all my Christmas stuff!)   On this shelf I also have some of the 8 1/2 x 11 cases with Christmas embellishments, glitters, pearls, holiday ribbons.  
Last but not least is my die cutting/embossing station.
You see in the back are bins filled with clear cases of Spellbinder dies.
The Martha Stewart colorful binders house all my 'other' dies from other companies.
The RED binder is actually a variety of companies but the dies are all CHRISTMAS themed!
The black and blue binders house all the other 'goodies'. 
( I must admit ... the black binder next to the red one is actually empty sleeves with the magnetic panels READY for NEW goodies.)
These binders and clear sleeves can be purchased at Staples.  I use the smaller binders ... they also come in 8 1/2 x 11.  The magnetic panels are actually purchased at Lowe's/Home Depot and they are Furnace Vent Covers.  They come 3 in a pack and are easily cut to size with your paper cutter.  The magnetic sheets are WHITE backed so I write the name/die # on the back for easy reference.

On the shelves of this stand you will find all my embossing folders and larger dies
like the Tim Holtz or the new Pop Up dies.

Okay ... that's it!  I'm sure you've seen enough.
It is fabulous to have this wonderful space I call 'MY CAVE'.
Let alone all the goodies I have to play with. 
I am so BLESSED!!!

Thanks for the visit!
DARLENE

Friday, April 4, 2014

Flowers for your Birthday!

Happy Friday All!
Another week draws to a close and I'd like to share a quick and easy birthday card I created using the Digital Garden Printable (T21) from Crafty Secrets.


There are so many beautiful images available on this Garden Printable 
that you can make yourself an entire set of cards in no time at all.  
Digital - Garden Printables - T-21


In fact, come back on Monday, when as a member of the Crafty Secrets Design Team, I will be sharing more creations using this same set of images for our April Linky Party!  PLUS I'll have a tutorial to share with you too!  What fun ... you won't want to miss it!

A few challenges to share in:
A Creative Romance - Spring Flowers
Craft for the Craic April Challenge - Something for Easter or Spring
Crafty Catz Challenge #225 - Springtime
Creative Corner Challenge - April Showers Bring May Flowers

Well, that's it for me today!
Wishing you all a FABULOUS WEEKEND AHEAD!!!
Seems that Spring has FINALLY Sprung here in Ohio, USA and I hope to spend
a little time in the sunshine ... what's on your agenda?


Thursday, April 3, 2014

DT Call for *NEW* challenge blog


Hello friends & followers!
In case you didn't see the announcement yet, there is a *NEW* challenge blog 
coming to blogland beginning MAY 1, 2014!

DIES R US CHALLENGE BLOG
and 
we are looking for a DESIGN TEAM!!


DIES R US DT CALL
We are having a DT call at Dies R Us for a
NEW Challenge Blog we are forming.


This call will run from Thursday, April 3rd to Monday, April 14th at midnight PST.  The DT will be chosen and if you are selected, you will receive an email in that regard.  Past DT experience is not required.

We are a company that handles strictly DIES, 
so please keep that in mind when applying for a spot on our design team.
 
Please submit 3 projects using DIES (cards, layouts, multi-media) 
via email to sales@diesrus.com.  Show us your best work.

Also please include the following in your email submittal:
  • Your name
  • Current Blog Address
  • Email address
  • Mailing address
  • Family/Work status - any children, pets, married/single, work full time, homeschool, etc. Anything you feel is pertinent that we should know about you.
  • Work published (What/when)- feel free to include image of work in your email.
  • Best way to contact you.
Requirements of a Design Team Member:   
  • Our challenges will be BI-MONTHLY and we will be divided into TWO teams which means, you will only be required to make ONE project a month.  BUT, remember, it MUST SHOW DIE CUTS by companies carried at the Dies R Us Store.
  • DT members will be expected to comment on as many entries as they can for the challenge they have a sample showcased in.
  • DT members need to have access to FB as well as a BLOG where you can share your creations and help promote the store.
  • Be active on other social media sites sharing the news about our store, inspiration blog and new challenge blog.
  What’s in it for YOU??
  • You will receive 30% off MSRP for products purchased at DiesRUs. 
  • You will receive more exposure of your beautiful work and traffic to your personal blogs by having your work showcased on our blog.
 
Sound like something you'd be interested in??
Get your submittal in before it's too late!
Team will be selected and notified APRIL 15th via email.
 

Outlawz Twisted Thursday

Hello Friends ... how are you?
Today I'd like to share with you a card I have made for my guest design spot over at 
The Outlawz Twisted Thursday Challenge.  
Remember ... this is an ANYTHING GOES challenge with a TWIST.  
Today's TWIST is to create using your favorite color!


Well, if you know me at all, you know my VERY FAVORITE color is PURPLE ... but what you don't know about me is that I also LOVE YELLOW!  
In fact, when we moved into our house I painted the kitchen YELLOW ... then I painted it PURPLE ... then I RE-painted it YELLOW again (all in a 10 year time span, lol).

Our sponsor this month is Nicecrane Designs and I have used one of the lovely bird images for the focus on today's card.  It comes from the FASCINATING BIRDS sheet.
These images are just fabulous for quick and easy card creating.
And can be used for a variety of themes!

Sharing with the following challenges:
Cheery Lynn Designs - Back to Nature
Creative Moments #39 - Anything Goes with Wings
Divas by Design - Anything Goes

Thanks for stopping by and I hope you've found inspiration in today's card.
Come on over at join in the fun challenges at The Outlawz ... 
a different challenge theme for each day of the week!

Recipe:
Papers:  White cs, SU design paper, Golden Rod cs, Old Olive cs, Blue Bayou cs
Accessories:  Nicecrane Designs image, Michaels ribbon, Cheery Lynn Designs B-117s 'Fanciful Flourish' die, Cheery Lynn Designs B-147 'Olive Branch' die, Cheery Lynn Designs B-338 'Black Eyed Susan' strip die


Tuesday, April 1, 2014

Need a chuckle???

Yep!  I'm back with a 2nd post for today!
It's such a beautiful day here in Ohio (actually washed windows today), and I probably should be doing more 'spring' cleaning but hey ... spring is just beginning so I have plenty of time!  Right???

Besides, I wanted to share a cute card I made to join in the challenges
at Classy Cards n Such (Silly or Fun Stamp) as well as Joan's Touch (pattern paper, use a stamp, corners).  Here's what I came up with ...


LOL!  Oh I know SO MANY that could 'relate' to this card!!
(myself included, lol)  What fun!

The stamped image is Inky Antics 'Worldly Women #3'.
I've colored her using Spectrum Noir alcohol markers but her dress is paper pieced!  The reverse side of the upper 'green' pattern paper from First Edition Paper 'Love Letters'.  The lower half paper is a scrap of Graphic45 'Secret Gardens'.
The dividing ribbon is a dark green Offray satin from either JoAnns or Michaels.
And the corner treatment is Cheery Lynn Designs B165 'Lace Corner Deco E'.

A few challenges to share in:
Loves Rubberstamps - Anything Goes

Well the sun is still shining so I'm headed outside for a bit to see how much 'outdoor' spring cleaning I can do!  Thanks for stopping by and hope you're having a wonderful day!


Simplicity At It's Finest . . .

Happy Tuesday Everyone!
So glad you've stopped by today!

It's my turn to share 'inspiration' over at the DIES R US Inspiration Blog and today I have a QUICK & EASY card for you!
If you're anything like me, no matter how many cards you have in your stash, you always need 'something different' that you have to make 'right away'.  Well, here's a birthday card that I think is both elegant and quick to create. 


I've used the following dies from the Dies R Us store.


I don't usually make this type of quick/easy cards but I LOVE how fast it came together and how elegant it looks. My choice of design paper today is from the Paper Studio ... Harper's Boutique.
The little pop of red comes from the single red flower I had left over from another project that was die cut  with the Cheery Lynn Designs Sweet William strip. And, red Stickles was used for the flower center and 'dotting' the 'I' and that's about it!
Like I said ... Simplicity at it's Finest!
QUICK & EASY too!

Here are a few challenges I'd like to share in:
Cards in Envy - Anything Goes WITH an A2 Card
Crafty Cardmakers - You've Been Framed
Paper Nest Dolls - Anything Goes
Use Your Stuff - Die Cuts
Alphabet Challenge - "D" is for die cuts

Thanks so much for stopping by today and I hope to see you again soon!