ATTENTION PLEASE

** FYI **
Two Old Bats and Sisterhood of Crafters Challenge Blogs will be closing their doors at the end of the year.
Showing posts with label Joan's Touch. Show all posts

Monday, September 15, 2014

Let's have some tea . . .

Hello my friends and welcome to Monday!
How was your weekend?  Mine was quite busy but very productive I'm happy to say!!

While strolling through Pinterest recently, I came upon the most adorable vintage tea pot images and just couldn't wait to create a card using one (or all) of them.  Today's the day since Joan at Joan's Touch has started up her challenges again and today's requirements are:

  • Do a vintage theme
  • Distress the edges
  • Add several layers


  • I'm just thrilled with how quickly this card came together for me this morning since I have another very busy day ahead of me!  
    With the Fall feeling in the air, it certainly has a way of putting you into a 'holiday' frame of mind so I went with a holiday theme for my Christmas red tea pot image.  And as luck would have it, I had several little things laying around from previous projects that fit right in to this card.  I.E. the paper doily which was cut in half as well as the corner die cut that didn't work the way I wanted it to on a previous card.

    Here are a few additional challenges I'd like to share in today:
    613 Avenue Challenge - Anything Goes
    Crafting When We Can Challenge - Christmas Come Early
    Make My Monday Challenge - Tea and/or Cake

    Thanks for stopping by today!  Gotta run!
    Have a great day!
    As always . . .

    Recipe:
    Papers:  White cs, BoBunny dp
    Image:  Pinterest
    Stamps:  Marion Smith Designs 'Tea Party'
    Accessories:  Wilton cake paper doily,  Graphic45 Twelve Days of Christmas Stickers, Tim Holtz 'Berry' distress ink, Wright lace, TH distresser, Poppy Stamps 'Katie Corner' die, pop dots, TH 'tea dye' distress ink

    Friday, July 4, 2014

    What a wonderful day!!!

    AGAIN ... HAPPY 4th of JULY to all my USA friends!
    It's going to be pretty quiet (with the exception of fireworks of course) around here this 4th of July weekend, but I was thrilled to be able to actually start my weekend off early with a visit from my daughter and 3 of her friends yesterday for a day of friendship and crafting.

    None of these ladies (except my daughter of course, lol) had ever been to our home so I was thrilled to share this beautiful home we've been blessed with and can't tell you what an uplifting day it was!  For all of us I think!  

     After a wonderful snack lunch consisting of Edamame Dip/crackers (recipe can be found by clicking on the recipes/canning tab above), Artichoke Dip on Ciabatta bread, Jarlsberg Swiss spread/crackers, Strawberries, Bing Cherries AND a glass of wine (your choice ... red or white, lol) ... we headed to the 'cave' and got busy creating!

    I wish I had taken photos of everyone standing around the kitchen island at lunch time!  The food was great but the chitter-chatter was even better!


    Carolyn (my daughter - 1st photo) is very crafty but just doesn't have the time to PLAY with owning her own business, an active family and a small farm that keeps her jumping!  So glad she took the day off to play!!

    Two of these lovely ladies (l.-r.  Jackie & Teresa) are scrapbookers and actually that is where I met them.  We used to all get together and 'crop' when my daughter was selling Creative Memories and had a little house called 'The Cropping Cottage' where we would gather for a full day of scrapbooking run once a month.  That is until LIFE got in the way and we had to disburse ...

    And here's Sandy!  I don't think Sandy scrapbooks and I know she doesn't make cards (routinely) but she is surely a talented lady in her own right!  Not only in the medical field but I've seen some of her 'handy work' and it's FABULOUS!

    I had so much fun introducing these ladies to the world of cardmaking and all my STUFF.  I told them to bring NOTHING but themselves since I had plenty to share and we would figure out what to do once they were here.

    The project we decided to play with was a STEP CARD using the Cheery Lynn Designs step card die.  They are new to the die cutting world so they were amazed with this clever creation!

    I had actually started on a step card for the new challenge at Joan's Touch so this idea worked perfectly.  I wish I had taken photos of their finished cards.  So DIFFERENT one from the other and all were FANTASTIC!!!  
    Here is my card for Joan's Touch where the requirements are:  Use pink, green & white ... Use a circle ... Flowers (homemade or purchased) ... and something from Joan's Gardens.


    I decided to make my flowers the focus of the card.  This way it can be used for a variety of occasions!  I really love playing in Joan's challenges because she gives me all the guidelines ... I just simply start 'throwing stuff together!'  LOL


    Recipe for my card:
    Papers:  Pink Bazzill, Mint green cs, Hunter green cs, White cs, First Edition Paper 'Love Letters' dp
    Accessories:  Kaiser pearls, Poppy Stamps #1023 'Massa Leaf Outline', Marianne #LR0116 'Frame & Swirls', Cheery Lynn Designs #B147 'Olive Branches, #B387 'Tiny Fanciful Flourishes', #291 'Mini Fanciful Flourish Reverse', #B310 'Shasta Daisy Strip', #DL276 'Mandy Doily', and #B348 'Step Card'

    A few challenges to share in:
    Artbymiran Challenge #9 - Anything Goes
    Brown Sugar Challenge - Anything Goes
    Sister Act Challenge - Anything Goes

    I know it's been a long post and I appreciate you sticking with me!
    Now go get those burgers ready to put on the grill, pour yourself a nice cool drink and I'll see you back here again real soon I hope!

    HAPPY 4th Everyone!
    GOD BLESS AMERICA!!

    Wednesday, June 18, 2014

    Light of the World . . .

    Hello Again My Friends!
    Yep ... two posts for you today!  Finally found a window of time to play along in some challenges.  


    The card I have to share with you was created for the fun technique challenge at Joan's Touch.


  • Use scenery stamp
  • Make a layer as I did above
  • any color
  • You must use a product sold at Joan's Gardens. 

  • This was a fun technique and one that I had totally forgotten about!  Love how it looks and I think my customers at the craft shows will too! In fact, I think I'll create a few more just for that purpose!
    Recipe for this card:
    Papers:  White cs, Black cs, DCWV Double Sided Basics Stack
    Image: Inkadinkado 'Down By The Seaside'
    Sentiment:  Our Daily Bread 'Light of the World'
    Accessories:  Spellbinder Nestabilities Seventeen, Kaiser pearls, Pop Dots, Spectrum Noir pencils, Versafine Black


    Joan used pop dots on all three layers for her sample card, but I chose to not pop up the bottom layer ... instead I decided to mat it onto black cardstock and build from there.

    Other challenges I'd love to share in are:
    Word Art Wednesday -Anything Goes
    Creating in Faith, Hope & Love - Anything Goes with a Bible Scripture
    Crafting from the Heart - Anything Goes
    Love to Create - Anything Goes

    Thanks so much for taking the time to stop by again today!  I hope you have found inspiration in my creations and will give some of these fabulous challenges a try!

    I have a landscaping crew outside doing the heavy gardening work for me this year (cleaning out the weeds, re-edging all the beds, mulching and removing some of the bushes that didn't make it through our harsh winter [sigh!]) so I'd best go take a peek at the progress. 

    Have a FABULOUS Day!!

    Thursday, June 12, 2014

    Wedding Season continues . . .

    HELLO MY FRIENDS!
    I've been having such a great time crafting today with Sisterhood friend Terri (Terri's Cards n' More),  that I nearly forgot to share the card I made for some of my favorite challenges.

    Here's Terri ... I introduced her to 'stencilling' today ... YEP!  Now she's hooked!   She also made some fabulous cards which she'll be sharing on her blog later today/this week.  We also watched a few videos (to refresh our feeble minds) on using the Elizabeth Crafts products and made some pretty awesome background for future creations.

    We just never know what we're going to get into when we get together and today it was stencils and glitter.  AND, NOW I REMEMBER why I don't do much with loose glitter!  YEP ... it's everywhere ... LOL!  Oh well ... we sure had fun and learned a few things along the way!


    ANYWAYS ... Here's the card I'd like to share with you . . .


    The challenges I had in mind when creating this card are as follows:
    Joan's Touch #17 - Black & White + Dimension + Scallops + Product sold at Joan's Garden
    Classy Cards n Such #36 - Make a Background


    I have to admit I've gotten hooked on making these little flowers.  They are actually supposed to be gardenias but mine somehow look more like roses!  Either way they are so easy and look so fabulous ... especially on a special occasion card like this Wedding card.  (All dies used are listed below.)
    And, of course you have to add some sparkle so I've added Diamond Stickles to the flowers as well as the background for the bride & groom.

    Here's an even closer look of the sparkle placement.

    Well, play time is over ... Terri has headed back home to make dinner for her hubby and I guess I'd better start thinking about doing the same here.  I'll be back a little later to share in a few other challenges.

    I'M BACK AND HERE ARE THE CHALLENGES I'D LIKE TO SHARE IN:
    Paper Creators Crafts - Wedding/Anniversary (entry #2) 
    Die Cut Diva's June Challenge - Yours, Mine or Ours?  (Ours - Wedding) [entry #2]
    The Crafting Cafe - Love and Marriage (entry #2)
    My Time to Craft - No Design Paper (stencil for background) [entry #3]
    CCEE Stampers - Roses
    ScrapbookerPhD Challenge #11 - Use your die cuts
    Southern Girls Challenge - Punches and Die Cuts
    Sugar Creek Hollow #88 - Here Comes the Bride

    I hope you've enjoyed seeing and been inspired by today's creation and will come join in these fun challenges.  OH and wanted to mention ... the stencil I used seemed sorta small for the background panel with this beautiful Marianne die set so I simple repositioned the stencil (once the original inking was done) around the outside border and sponged away ... gave it an entirely different look (almost zebra like, lol) and I like it!

    Thanks for stopping by and hope you've had as good a time today as I have!
    Aren't FRIENDS FABULOUS!!!  I'm so blessed!

    Recipe:
    Papers:  White cs, Black cs
    Dies:  Marianne #LR0236, Die Versions 'Trellis Whispers' #DVW353, Cheery Lynn Designs 'Fanciful Flourish' #B117S, 'Mini Fanciful Flourish Reverse' #B291, 'Tiny Fanciful Flourish' #B387, 'Gardenia Small' #B433
    Accessories:  Memory Box Stencil 'Texture Ornate' #88514, Versafine Onyx ink, Large Sponge Dauber, Diamond Stickles, PunchBunch Flower Making Kit, McGill Foam Mat, Pop Dots, Martha Stewart 'Branch' punch


    Wednesday, June 4, 2014

    Wedding Season . . .

    Hello Dear Friends ...
    The weather has been picture perfect around here lately and I'm having a difficult time staying in my 'cave'!  But, yesterday I decided I was going to play along in some of my favorite challenges and this is what I came up with.  Hope you like it!

    The current challenge at Classy Cards 'n Such is Weddings.
    Since I love VINTAGE design, I immediately started looking through all my vintage type goodies to come up with my main wedding image.  I decided upon this beautiful bride which comes from an older Graphic45 'Le' Romantique' design paper pack.  
    (Love this paper ... been hoarding it for awhile now! LOL!)


    Not only did I make a wedding card, but I made a TWISTED EASEL WEDDING CARD which satisfies two more of my favorite challenge blogs!
    Joan's Touch Challenge - make a twisted easel card, use patterned paper, any color and product from Joan's Gardens.
    Craft Hoarders Anonymous Challenge  - Use some sort of fancy fold on your card/project.

    Since I don't make a lot of square cards (extra postage due for mailing), I don't keep a lot of square envelopes on hand either.  BUT with my handy dandy We R Memory Keepers Envelope Punch Board, I was able to create not just an envelope ... but a MATCHING envelope to go along with my vintage wedding creation.  LOVE THAT!!

    Here are a few additional challenge to share in:
    Paper Take Weekly - Anything Goes / summer time theme (June Weddings)
    Try it on Tuesday Challenge - Feminine and Fancy
    Crafty Card Makers and More - One or more Flourishes
    Make My Monday - Wedding Theme*

    Thanks so much for your visit!
    I hope you enjoyed today's creation and will give this fancy fold & these challenges a try!
    As always . . .

    Recipe:
    Papers:  SU Very Vanilla, Graphic45 'Le Romantique'
    Accessories:  We R Memory Keepers 'Envelope Punch Board', Offray lace, Cloud9 Design gem stones, E6000 Spray Adhesive
    Dies:  Tattered Lace 'Kensington Corner' #D318, Quik Kutz 'Doily', Marianne 'LR0157 and LR0156', Spellbinder 'Blooms Three' #S2-046, Cheery Lynn Designs 'Tiny Fanciful Flourish' #B387, 'Congratulations' #B289, 'Wedding' #B446
    Stamp/Ink:  Penny Black, Versafine Onyx

    Thursday, May 15, 2014

    Playing with Stencils ...

    . . . at Joan's Touch!

    The new challenge this week at Joan's Touch involves playing with stencils.  Joan just came back from a 2 day certification class in Chicago and shared some awesome tips with us ... be sure to pop over and check it out!  I've done my 'shadowing' with inks vs paste but I still like the outcome and hope you do too!
    Here's this week's requirements ...


  • Use a stencil (would love it if you tried the shadow technique, but it is not a requirement
  • Combine 2 patterns of paper
  • Can be a card, a book, a note....
  • You must use a product sold at Joan's Gardens.  Also, mention that you are doing the card/project for Joan's Touch Challenge. It would be nice if you would add this link to your post: www.joanstouch.com


  • I'm so glad Joan's has brought this idea to light since I've seen it done in the past and had totally forgotten about it and I love how it looks.  This would be a great technique to use for MANLY card creations!

    Today I actually used a Martha Stewart stencil for my focus image along with 2 shades of Stampin' Up ink ... Summer Sun and More Mustard.  My pattern papers are from the DCWV Basics (2 sided) stack pack.  My choice of embellishments today are copper Kaiser pearls and my key embellishment is the Joy! Crafts die 'Cutting Keys 1' ... #6003/0039.  Oh, nearly forgot ... did a little doodling with a white gelly roll pen around my stenciled image too.

    A few other challenges to share in:
    Inky Chicks #29 - Clean and Simple
    Crafting From the Heart - Anything Goes

    Thanks so much for stopping by today!
    Truth be told ... I'm crafting with Joan and my other Midwest friends this weekend.  I'm actually in Niles, Michigan at the moment with Diane H. (Nellie's Nest) and all the gals are coming here tomorrow ... then we are all linking up at Joan's on Saturday!  Can't wait to see them again ... what fun we have crafting, talking and eating!  And, not always in that order!   LOL! 

    Friday, April 25, 2014

    The Beauty of Nature!

    Hello friends ... 
    WOW, we got off to a late start this morning and I've been running behind ALL DAY!!
    But, I was able to create a card for the current challenge at Joan's Touch which is ...
  • Use something from Nature
  • Purple and white
  • distressed edges
  • You must use a product sold at Joan's Gardens.  Also, mention that you are doing the card/project for Joan's Touch Challenge. It would be nice if you would add this link to your post: www.joanstouch.com

  • With purple being my favorite color ... of course I had to join in on Joan's challenge this week!
    I was inspired by her beautiful creation in which she used tulle for texture, so I decided to use 'cheese cloth' for texture on my card.  I saw this scrap piece of cheesecloth laying on the table and thought ... Why Not!

    LOVE the beautiful paper I used for my background panel.  I purchased it a short while back from Classy Cards n Such.  It's a little heavier weight so it die cuts beautifully ... and the colors are GORGEOUS!  Did you notice the beautiful sheen this paper has ... love that!

    Of course, one of my FAVORITE design paper companies is Graphic45!  The focus image is actually one of the floral images on the lead sheet of 12 x 12 paper in the Secrets Garden paper pack.  A little fussy cutting and matting turned it into the perfect NATURE focus on my card.

    There too, what would flowers be without butterflies?  I die cut/punched  several different sizes and shapes of butterflies for my neighbors baby shower recently and these two lavender vellum butterflies were the perfect embellishment.

    With using vellum for these butterflies, I thought the delicate look of pearls would be a nice accent.  But instead of using tiny pearls I created my own using Liquid Pearls for the center body section of the butterfly.

    Not sure if you can see it in the photo, but there is nice dimension on this card, created by popping up the white panel as well as the floral panel.

     Well, I think I've chewed on your ear long enough ... I'm sure you didn't need all those details but just in case there's a 'newbie' out there watching, hopefully I've helped in some little way!

    Here are a few other challenges I'd like to enter into:
    Crafty Catz Challenge #228 - Anything Goes
    Dazzling Diva Challenge #22 - Radiant Orchid or Anything Goes
    Miriam's Crafting Blog's 11th Monthly Challenge - Texture


    Thanks so much for stopping by!  Hope you have a FABULOUS weekend!
    The Adventures in Stamping is this weekend in Akron so guess where I'll be!?!  LOL!!
    Take care!
     
    Recipe:
    Papers:  white cs, So...Silk Fabulous Purple, Graphic45 Secret Garden dp, lavender vellum, SU lavender cs
    Accessories:  Zutter Distrezzz it All, cheese cloth, white liquid pearls, Thermo web 3d foam squares, Tim Holtz tea dye distress ink, large sponge dauber, Fiskars swivel craft knife, Martha Stewart butterfly punch, Spellbinder 'Fancy Lattice' Shapeability

    Tuesday, April 15, 2014

    Wedding Season Coming Soon . . .

    Good Day my Friends!
    It's time once again to share a card creation for the Dies R Us Inspiration Blog.
    Have you popped over to take a peek yet?  Oh please do ...
    My team mates are creating such beautiful cards using various dies 
    from the Dies R Us Store every day of the week to help inspire you!
    Please pop over and show them some love!


    What fun it was to create this Wedding Scene!

    First, let me give you the list of dies I used ...

    Frantic Stamper 'Wedding Day' #FRA-9121
    Memory Box 'Party Music' #98757
    Poppystamps 'Grand Gothic Iron Work' #850
    Cheery Lynn Designs 'Victorian Picket Fence' #B123


    The walls of the 'church' were created by embossing the upper portion of a white panel using the Sizzix Tim Holtz brick wall embossing folder and sponged over top with Tim Holtz Tea Dye ink.
    The  [ 'Party Music' ] music notes (there's always beautiful music at a wedding) were die cut from black card stock and popped up with pop dots.

    To create the 'stained glass' panel, I simply scribbled various pastel colors with my Spectrum Noir alcohol markers onto white vellum.  Die cut my 'Grand Gothic Iron Work' using thin gold metallic card stock and glued the reverse side of the vellum to the back side of my gold die cut.
     After the glue dries, simply cut away the excess vellum with either your scissors or craft knife.


    For the fencing, I simply die cut my 'Victorian Picket Fence'  with white card stock.
    BUT ... I did cut the lower portion off because it was a bit too high for the scene I was trying to create.  And, I also cut a small section out of the center, as an opening so they could walk into the church!

    There are SO MANY things you could do with this fabulous 'Wedding Day' couple. 
    I die cut the entire die with white card stock first,
    then die cut the groom again in black card stock,
    and the bride in ivory card stock and paper pieced over the white panels.
    A little coloring was done for the hair, face, headpiece, dress accents with alcohol markers.

    Tip:  You could add lace, tulle, pearls ... so many things for the brides dress.
    And you could make the grooms tuxedo any color you want. 
    If you know the wedding coloring you can coordinate your card to match the bridal party!

    A few challenges to share in:
    Party Time Tuesday #168 - Die Cut
    Pause Dream Enjoy Linky Party #8 - Anything Goes
    2 Cute Ink Digital Stamps Challenge - Celebration
     Classy Cards n Such #28 - Die Cuts
    Crafting From The Heart #14 - Anything Goes / Use Yellow
    The Crafty Bloggers April Challenge - Die Cuts or Embossing
    Joan's Touch Challenge - Any color, Dies Only (no stamps),  at least 2 layers, JG products
    The Paper Nest Dolls Challenge #8 - Anything Goes
    Through the Purple Haze Challenge #37 - Anything Goes

    Thanks so much for stopping by today!
    I hope you find inspiration in my work!
    Remember ... we'd LOVE for you to come visit us at the Dies R Us Inspiration Blog!
    NEW projects shared EVERY DAY Monday through Friday!!

    And, you'll want to be sure to check out the LONG LIST of dies for sale at very reasonable prices, at the Dies R Us Store.  More companies will be added to the list as time goes by!  Come take a peek!

    EXCITING NEWS!
    Beginning May 1, 2014 ... 
    Dies R Us will be hosting a new CHALLENGE BLOG!
    I hope you'll come join in our challenge fun!

    Have a FABULOUS DAY and PLEASE stop back again tomorrow!

    Sunday, April 13, 2014

    Joan's Touch

    Good Sunday Morning Friends!
    WOW! It was so beautiful yesterday that I spent most of the day outside trying to get some Spring cleanup underway.  Didn't get nearly as much done as I had hoped (when did I get this old & weak?) but hopefully will get out there once again today to do a little more.

    But before I venture outdoors, I wanted to share a card with you that I quickly (last day for challenge) made for the current challenge at Joan's Touch.  

    Here are this week's requirements:

  • Use a plaid, check or striped paper -
  • Put a border around an image
  • Use any color
  • You must use a product sold at Joan's Gardens


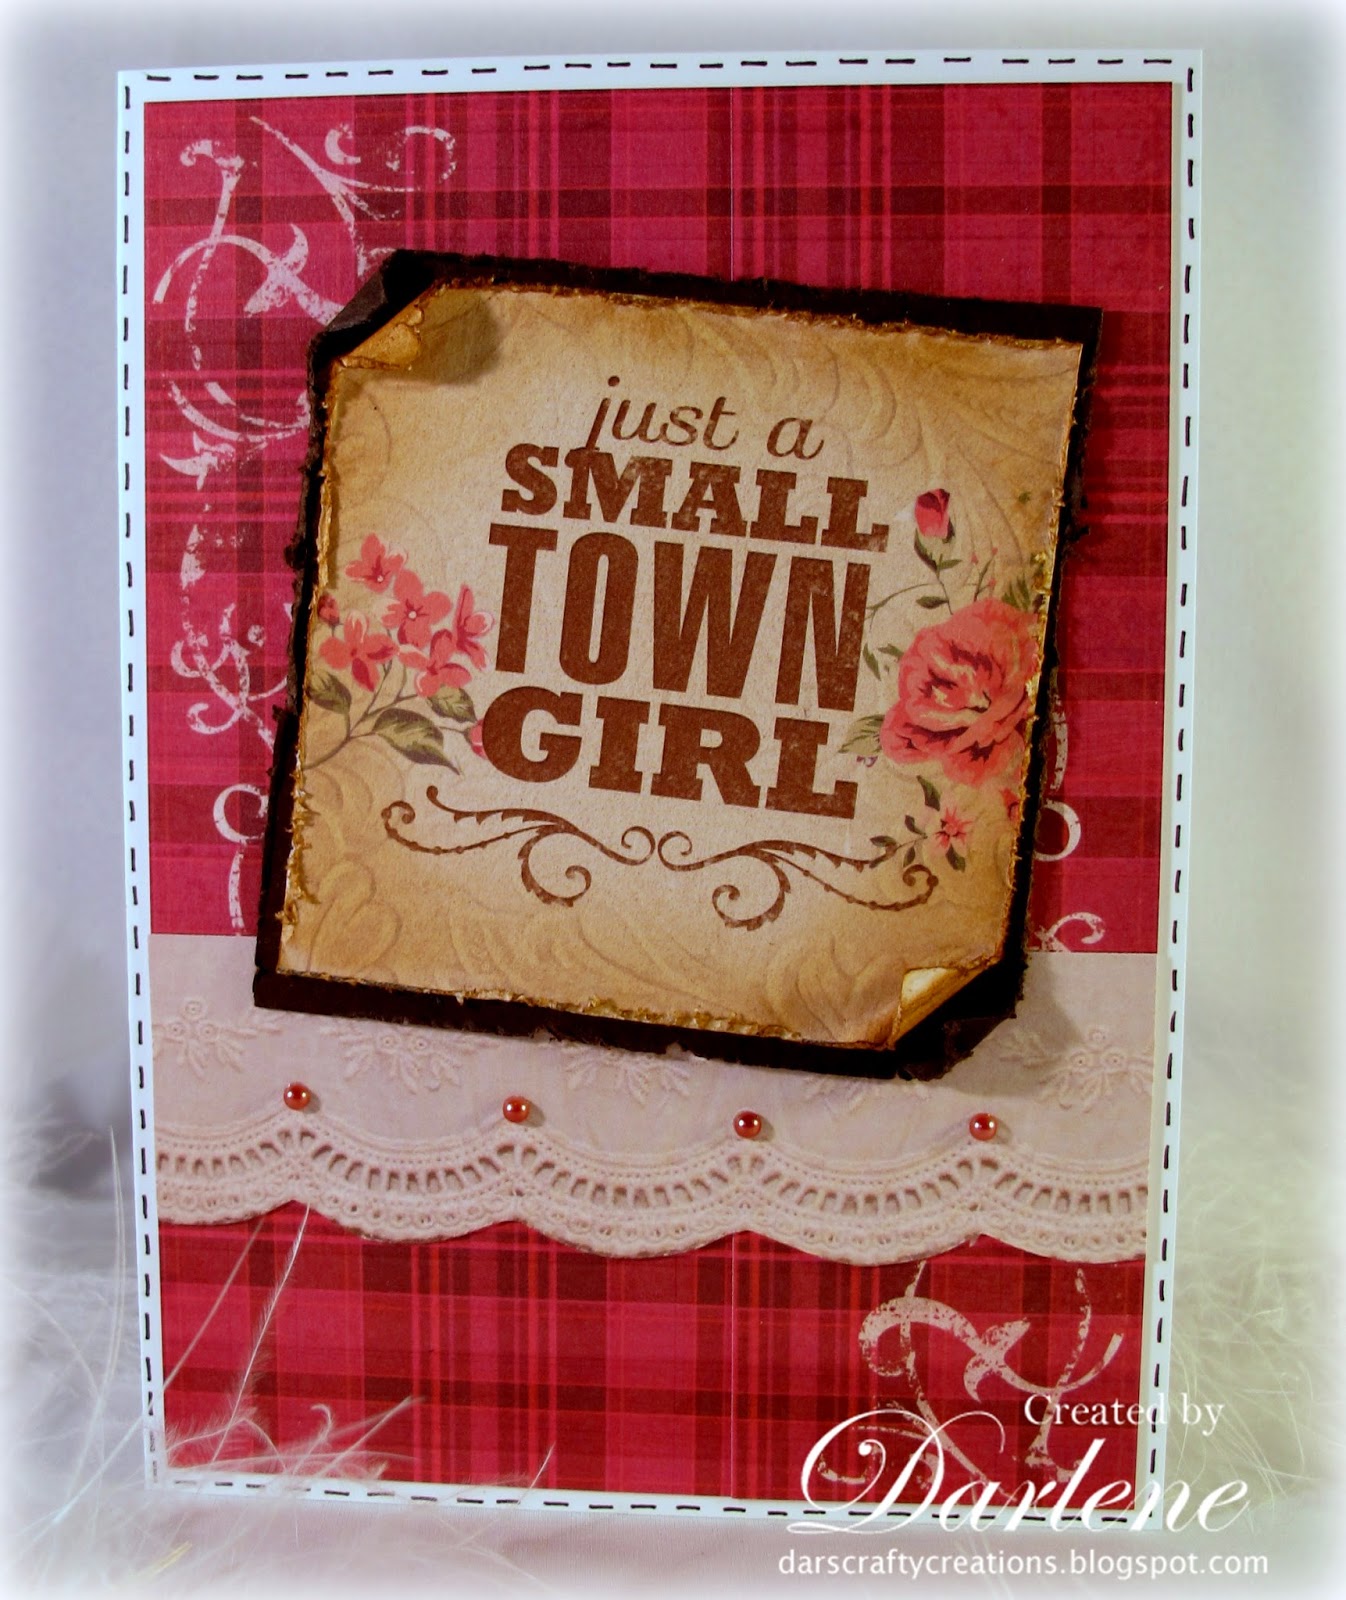
  • A while back I spotted this paper pack while out shopping and just knew it fit my daughter/granddaughter perfectly, so put it in my cart!  It is called 'Country Girl' and is by Paper House.  I believe I bought it at Hobby Lobby.

    A few challenges to share in:
    Sister Act Card Challenge #52 - Anything Goes
    The Stamping Boutique #12 - Distress It
    As You Like It Challenge - Favorite style of stitching (faux or real) ... Faux because I don't have my new sewing machine set up yet ... but once I do, my favorite will be real I'm sure!
    Aud Sentiments Challenge #104 - Sentiment for a Friend (born/raised in the country, this card would suit many of my life long friends)
     Southern Girl Challenge - Earn Your Stripes
    Flat Friends Challenge #19 - Include a Sentiment

    Now I'd better get breakfast made and get back outside. 
    Actually supposed to be in the HIGH 70s today ... but windy ... so we'll see how quickly I'm back in my cave.  LOL!  Thanks for stopping by and I wish you a FABULOUS day!!!

    Recipe:
    Papers:  White cs, Chocolate cs, Paper House 'Country Girl' dp
    Accessories:  TH Tea Dye distress ink, TH distresser, Kaiser pearls, Fiskars swivel craft knife, TH fine tip black marker for faux stitching


    Tuesday, April 1, 2014

    Need a chuckle???

    Yep!  I'm back with a 2nd post for today!
    It's such a beautiful day here in Ohio (actually washed windows today), and I probably should be doing more 'spring' cleaning but hey ... spring is just beginning so I have plenty of time!  Right???

    Besides, I wanted to share a cute card I made to join in the challenges
    at Classy Cards n Such (Silly or Fun Stamp) as well as Joan's Touch (pattern paper, use a stamp, corners).  Here's what I came up with ...


    LOL!  Oh I know SO MANY that could 'relate' to this card!!
    (myself included, lol)  What fun!

    The stamped image is Inky Antics 'Worldly Women #3'.
    I've colored her using Spectrum Noir alcohol markers but her dress is paper pieced!  The reverse side of the upper 'green' pattern paper from First Edition Paper 'Love Letters'.  The lower half paper is a scrap of Graphic45 'Secret Gardens'.
    The dividing ribbon is a dark green Offray satin from either JoAnns or Michaels.
    And the corner treatment is Cheery Lynn Designs B165 'Lace Corner Deco E'.

    A few challenges to share in:
    Loves Rubberstamps - Anything Goes

    Well the sun is still shining so I'm headed outside for a bit to see how much 'outdoor' spring cleaning I can do!  Thanks for stopping by and hope you're having a wonderful day!


    Thursday, March 13, 2014

    Vintage Butterflies

    Good Morning All!
    Another snowy, treacherous day in Ohio yesterday but it's supposed to warm back up today!
    Terrible 30-50 car pile ups on the Ohio Turnpike!  OMG ... come on Spring!!
    Anyways, today I'd like to share a card I made for the current Joan's Touch Challenge #4.

    The requirements are:
    • Use a circle ... perhaps a round doily
    • Colors - Peach and Teal
    • Use Butterflies and layer them
    • Use a product sold at Joan's Gardens

     I love, love, love Graphic45 design papers and here are a couple of my favorites ... Secret Garden and A Lady's Diary.    The image and tag are coordinating chipboard pieces that I've had since this design was released but have never used any of them ... UNTIL TODAY!!

    The doily is a Wilton paper doily and the butterfly punch is Martha Stewart.  I like that Joan required you to 'layer' your butterflies!  I never think to do that and they look SO COOL!!!

    I have also used the  Graphic45 Secret Garden Patterns & Solids paper pack for my butterflies.  Punched 3 times with a sheet of double sided 6x6 paper and reversed the center panel for more fun look.  A few mini Kaiser pearls (paper & pearls from Joan's Gardens) down the center give the butterflies a more 'finished' look also.

    I'd like to share my card with the following challenges:
    Butterfly Challenge #3 - Stitching (real or faux) and Butterfly
    Hobbybook Designer Challenge #1 - Make it Girlie
    Digi Choosday Challenge - All about the Girls
    Tuesday Throwdown Challenge #186 - Stitching
    Craft-Dee Bowz March Challenge - Anything Goes w/handmade Bow
    Craft Hoarders Anonymous Challenge - Vintage/Retro
    Crafting By Design March Challenge - Anything Goes
    Crafting By Design Challenge - Things with Wings

    Thanks so much for stopping by today!
    Hope the weather is BEAUTIFUL where you are today!
    It's goes from the teens to the 60ths through out the week here in Ohio, USA!  CRAZY!!

    Recipe:
    Papers:  White cs, Graphic45 'Secret Gardens', 'Secrets Gardens patterns & Solids', Graphic45 'A Ladies Diary'
    Accessories:  Wilton paper doily, Kaiser pearls, MS butterfly punch, Graphic45 'A Ladies Diary' chipboard embellishment, Peach satin ribbon, Craft-Dee Bowz bow maker, ZIP fine tip teal pen for faux stitching, pop dots,

    Thursday, March 6, 2014

    It all about the GREEN ...

    Top of the Mornin' to Ya! (AGAIN!)
    I mentioned earlier that I have a couple of cards to share with you today, and they are both of the 'Irish' influence.  My hubby is Irish ... his mom (God Rest Her Soul) was 100% Irish ... her parents last names were Gallagher & McDermott ... doesn't get much more Irish than that!  LOL
    Anyways ... on to my card share.

    The new challenge at Joan's Gardens is to use 
    Green & White, 
    an Oval shape, 
    an embossing folder (inked inside or not)
     and something from Joan's Gardens.

    I am not a cat lover but I have several friends who are so I made this card with them in mind!  How cute is this cat family die!  It's from Cheery Lynn Designs and is #B417.  The embossing folder I used today came from Joan's Gardens and is a Sizzix Tim Holtz Alterations folder (sorry don't have the number).  I did as Joan had suggested and inked up the inside of the folder (using Memento 'bamboo leaves' ink) before running it through my embossing machine.
    Other elements used on this card are:
    SU print pack dp, Green polka dot grosgrain ribbon, pop dots, Green ZIG pen for faux stitching
    Spellbinder classic oval dies, and JustRite 'Large Fancy Sentiments' (also from Joan's Gardens).

    A few challenges to share my creation with:
    Inky Chicks Challenge - Monochromatic
    Ruby's Rainbow Challenge - Shades of Green + 1 other color
    Crafting from the Heart #8 - Anything Goes/use dies
    Perfectly Rustics Challenge - Shades of one color
    Really Reasonable Ribbon Challenge - Show me the Green & Ribbon

    Thanks so much for stopping by.  Have a great day!

    Wednesday, February 26, 2014

    Floral Frenzie

    Hello Friends!
    It's time once again for a new challenge over at Joan's Touch AND Cheery Lynn Designs. 
    The new challenge at Cheery Lynn Designs is FLOWERS MADE WITH DIES. 
    And, this week Joan at Joan's Touch is asking us to use:
    • Three Flowers
    • Vintage Colors
    • Texture (tulle/mesh)
    • Something carried at Joan's Gardens

    WOW!  Talk about a pieced together creation ... LOL!
    But, I love when that happens.

    My base card w/background papers was already laying on my table from a previous project a few weeks ago that I changed my mind on and it worked PERFECTLY for what I was wanting to create today!
    I created the gardenia (I know they're supposed to be white ... sorry Diane!) flowers the other day using the awesome Cheery Lynn Designs Gardenia Floral strip die and my handy dandy flower making kit in hopes of joining in on these two challenges! 

    The leaves were die cut using the Heartfelt Creations Classic Leaf HCD736 die set onto olive green card stock.   Then I used my stylus to condition the petals and lastly spread a little Art Anthology Dimensional Crystal (Pickle is the color) onto each leaf.  LOVE the realistic look & feel to these leaves.

    Joan required something for texture ... there was a strip of cheesecloth (from last Halloween's projects ... eeeegads I need to clear my table a little more often, lol) laying off to the side of my work area and I thought YES!  That will work!!  So, I just bunched up a couple of squares to make a 'poof' and glued it down before adhering my flowers. 

    Did you notice my little ladybugs??
    I created them using the Susan Tierney Cockburn 
    'Susan's Garden Ladybug' kit - Viva Decor.
    I think they made an 'appropriate' touch to my flowery card!


    A few additional challenges:
    Cuttlebug Mania - Let's Feel It 
    Paper Minutes - On the Fly
    Crafting From the Heart - Anything Goes/Use Flowers
    Eureka Stamps - Add a Butterfly
    The Pink Elephant Challenge - Use the color Pink

    Thanks so much for stopping by!
    Hopefully you found a little inspiration in my work that you can use on your designs.
    Have a great day ... see you next time!

    Recipe:
    Papers:  Crafty Secrets digital design paper, Old Olive cs, White cs
    Stamp/Ink:  Stampendous, Versafine Onyx
    Accessories:  Cheery Lynn Designs Gardenia Flower die strip #B339, Cheery Lynn Designs Small Fanciful Flourish Left & Right #B117S & B291, Heartfelt Creations Classic Leaf die #HCD736, Art Anthology Dimensional Crystal 'Pickle', 'Susan's Garden Ladybug' kit - Viva Decor, K&Co 3d butterflies, Offray decorative ribbon, Cheesecloth,