Monday, November 30, 2020

Tutti Designs - Slimline Circles

Welcome Back my friend!

Today I'm sharing a card which was showcased October 27th on the UK Hochanda TV show.  In fact, I'll be sharing more creations through the remainder of November.  It's truly amazing what you can create with one basic shape die set.

My main focus die today is 
 

Slimline cards have been all the rage this year so I thought I use that style and my circle dies to create an 'ornament hanging' holiday card.  What do you think?


I've used my circle dies to create the 'inside' panel and 'outside' ring on my ornaments.  Some bakers twine was used for my hanging strings and I'm pretty happy with the outcome.  Once completed there were a couple little things I would change if I do it again but all and all ... I think it's pretty cute!
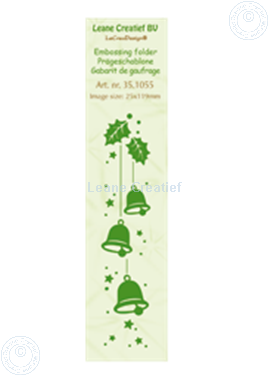
The 3D snow embossing folder is from my stash as is the die cut sentiment.  I've also used Stickles Waterfall glitter glue for the inside of my snowflakes for that little add touch of sparkle.
 
 
Please be sure to pop over to the Tutti Designs Store and check out all of the fabulous dies available. Need more inspiration?  The team has something new to share on the Tutti Designs Blog  EVERY DAY MONDAY THRUGH FRIDAY!  

Pop in often and see for yourself ... what a talented group of designers!!
For your convenience, here are all the Tutti Designs quick links you will need:

Wishing you all an AMAZING day ahead! 
As always, thanks SO MUCH for taking the time to stop by!


Friday, November 27, 2020

MORE Slimline Fun . . .

Hello Dear Friends ...
I hope you had a wonderful Thanksgiving!
Was very quiet here as we canceled our family gathering for this year but still had the traditional food  & love.  Knowing my kids are safe in their own homes meant more this year then getting together and running the risk of someone getting sick.  Crazy times but if all goes well, we will be back on track for a big family get together next year!!

So anyways ... now onto what I do on a daily basis ... CRAFT!

Needless to say I have had more then ample time to get creative this year and with some new goodies to play with I'm having a DANDY time crafting!  Let me show you what I'm talking about ...

Recently I've shared some of the SLIMLINE styled cards I've created and today I have a few more for you.  The first two are VERY simplistic using up old designer papers, etc ...


and then on the third one, I got a little more creative ... what fun!


Here I've used snow falling designer paper for the background and then tore some scraps of white card stock to create the foreground snow mounds.  My Dee's Distinctively 'Pine Tree Large' tree die was cut twice ... once in dark green and once in white ... then offset to create a shadow.  Various colors of Stickles was used to 'decorate' my tree. 

You might recognize the Santa I used ... he's the Art Impressions Twister Santa which I stamped, die cut then fussy cut to use him on his own vs as a twister (he was just too cute not to use!).   Santa says the tree needs a star so he has one all ready to get positioned atop this beautiful tree!  Here's a close up for ya ...

SO MUCH FUN!!!

Today's the day we are going to put up our Christmas tree.  Not as much inside decorating this year since we will not be having our annual neighborhood party or family gatherings but still have plenty of pretty lights & decorating to give hubby & I that warm holiday feeling.   Outside decorations will be done over the weekend then we will be all set to snuggle down & watch Hallmark!  LOL

Please stay safe & healthy my friends!
Wishing you all a FABULOUS weekend ahead!

As always . . .

P.S.   OH YEA ... Hubby & I will celebrate our 26th Anniversary tomorrow too.  What a blessing he is to me!!  LOL ... only took me 3 times to get it right! 

Wednesday, November 25, 2020

Sisterhood of Crafters - Any shape OTHER THAN Rectangle

Hello my friends!
Today I have a card for the new challenge over on The Sisterhood of Crafters!

Our theme, chosen by Jennifer this time around, is:

ANY SHAPE OTHER THAN RECTANGLE


So many different shapes I could have gone with today but when I spotted this die (which I've had for a very long time but had never die cut), I just had to go with a circle.

The die I'm referring to is the
Sue Wilson Frames & Tags - FLORA 
Sue Wilson Designs - Frames & Tags Collection - Flora

I've also used an OLDIE but GOODIE set ...
Spellbinder Class Circles (I think that's the very first die set I purchased way back in the day!) as well as the Memory Box 'Wrapped Stitched Circle Frames' die set and Tutti Designs 'Hello'
 Tutti Designs - Word Set - Hello

I hope you'll come join in our challenge fun at The Sisterhood of Crafters!
My 'sistahs' have created some fabulous creations to help inspire you ... 
be sure to pop over and check them out!


As always, thanks SO MUCH for taking the time to stop by!

Tuesday, November 24, 2020

Christmas in the Wild

Happy Tuesday All!

I recently purchased a few of the fabulous & fun Simon Says 3D Embossing folders and wanted to share with you today a card I made in probably 10 minutes time!  Hope you like it ...


This embossing folder is called Forest Border (#SF209).
Simon Says Stamp Embossing Folder FOREST BORDER sf209 Holly Jolly

 Now just by looking at the image from the store you can see how magnificent this 3D embossing folder is and can be used in SO MANY ways.  But today, my plan was to just run it through to see what it looked like so I grabbed a scrap of light blue card stock and did just that!  

WOW!  This looked so cool I just had to 'keep going'!

Next I sponged over the entire card with white craft ink and a small sponge dauber.  That looked good but not exactly what I was looking for so next I opened my drawer of daubers ... grabbed the one that had TH green ink on it and lightly sponged over top the trees in the foreground ... next I grabbed a sponge that had one of the TH brown/gold or yellow colored inks on it and lightly sponged over the trees in the background.  Okay ... I like that so far but needed to darken around the top and sides so grabbed a sponge with a little darker shad of blue and sponged around the upper/side edges.  

Next I needed some snow on the ground so grabbed a scrap strip of white card stock, cut it to length then tore the top edge.  A couple little die cut cardinal birds & a sentiment ... VIOLA this card is ready to go!!!


Quick ... Easy ... Beautiful and best of all ... 1 stamp mailable!!

 I have a few more of these 3D embossing folders that I'll be playing with in the week to come so 'Just Warning You' ... there is more to come!  LOL

 Thanks for taking the time to stop by and please ... be safe out there!

As always . . .

***  UPDATE ***

So after writing up this post and seeing the image on the packaging again, I just had to give it a try onto foil paper.  Though difficult to photograph, it came out gorgeous and took all of 5 minutes!  It took me longer trying to get a decent photo to share with you all ...  what do you think?


Okay, I'm done now!  Have a great day!!!  LOL

Monday, November 23, 2020

Tutti Designs - Squares

Welcome Back my friend!

Today I'm sharing a card which was showcased October 27th on the UK Hochanda TV show.  In fact, I'll be sharing more creations through the remainder of November.  It's truly amazing what you can create with one basic shape die set.

My main focus die today is 


By simply die cutting various sizes of my square dies from a variety of fall colors, I was able to create this beautiful & sleek Fall card.  I've seen fellow team mates doing cards similar to this and was so intrigued I just had to give it a go!!

I knew I wanted to use an Alphabet die set  I had in my stash to create the word FALL in the smaller squares but then I remember Tutti Designs has some awesome word sets and one just happens to be the word FABULOUS so I die cut it from two of the colors and offset them for a shadowing effect.  The die cut maple leaf is one I had in my stash so I did a little sponging/shaping and it became the perfect focus point for today's card.

TUTTI-246  Word Set - Fabulous

Please be sure to pop over to the Tutti Designs Store and check out all of the fabulous dies available. Need more inspiration?  The team has something new to share on the Tutti Designs Blog  EVERY DAY MONDAY THRUGH FRIDAY!  


Pop in often and see for yourself ... what a talented group of designers!!
For your convenience, here are all the Tutti Designs quick links you will need:


OH ... AND JUST A REMINDER

We now have a Tutti Designs UK Store ...
AND

CHECK 'EM OUT!!

Wishing you all an AMAZING day ahead! 
As always, thanks SO MUCH for taking the time to stop by!


Sunday, November 22, 2020

Having Fun with Twisters

 Hello and Happy Sunday Friends!

Today I have something a little different to share and was so much fun to create!  These are new to me but I know many of my crafting friends have been playing with them for awhile now (I'm getting older and slower ... what can I say? LOL)

These little gems are from the Art Impressions Company and called TWISTERS.

5348 - Santa Twister Set
Here's my first attempt ...


This is a view of the card pretty much in the 'closed' position (hard to make it close completely while standing since Santa wants to swivel).  But it does lay flat to go into your envelop for mailing.

Here he is with the card more open so you can see through it.

And here's the view from the inside ... isn't it cute!!!

I think these will be great for next years craft shows.  I have plenty of time to get them done and besides Santa, I have also purchased the Dog, Birthday Cake, Cat, and Witch.  There are more but I think that will keep me quite busy for awhile!  LOL

Not bad for my first attempt I don't think.  Will get a little more adventurous as I continue on!  LOL

Thanks so much for stopping by today  ...  I always love hearing your thoughts on my crafting projects.  And these days with the lack of personal contact ... your words mean even more!

As always . . .

Saturday, November 21, 2020

New Dies ... mean New Cards LOL

Hello my friends and welcome back to my blog!! 

As my title suggests, I received some happy mail the other day from Kat Scrappiness and just HAD to quickly put these two new slimline dies to use.  Here are the cards I created ...

This first card was so quick and easy having this beautiful 'Wrapped Up With A Bow' die!

Wrapped Up With a Bow Slimline Dies by Kat Scrappiness

Basically all I needed was my base card, a decorative background panel and a sentiment ... VIOLA!  I did add a few touches of Gold Stickles for sparkle and my die cut sentiment is by Frantic Stamper.


And for my second card, how cute is this village slimline die?

It's also from Kat Scrappiness and is called 'Holiday Village'.  

Holiday Village Slimline Border Die by Kat Scrappiness

I've once again simply chosen a background paper that 'fit the scene' and added as the background for my scenic die.  I've also used a very old Martha Stewart icicle punch to add along the top border and chose one of my older SU stamps for my sentiment. SIMPLE but BEAUTIFUL I think! 

Challenges to share in:

Cards for Galz Challenge #135 - Cute Christmas
The Holly & Ivy Christmas Challenge - AG Christmas
Crafy Catz Challenge #528 - AG Christmas
C.R.A.F.T. Challenge #577 - Christmas
Simon Says Wednesday Challenge - Christmas

I know I'll be using both of these dies on more holiday cards ... especially if I run out of time like I normally do and need some quick but beautiful last minute creations.

Have a wonderful day and thanks so much for taking the time to stop by!

As always . . .


Friday, November 20, 2020

A Pink & Brown Birthday . . .

Happy Friday All!

I spotted a couple of challenges the other day that I thought I could combine and create something fun!  I am ALWAYS in need of birthday cards so this worked out beautifully! 
Here's what I've come up with . . .


The challenges I'm referring to are:

Retro Rubber - They Said It's Your Birthday

One of the rules of this particular challenge is: Remember to use a stamp older than a year and you must include the age (or approximate age) of the stamp in your blog post.   Time goes by so quickly these days but I would have to say I've had this cute little Wild Rose Studio stamp at least 2 years (along with a couple others that are similar with this adorable little elephant).

RRCB 148
The other challenge I combined with is the new challenge over at Color Hues.


 A while back I was playing around and created this cute little sky panel using an old scallop edged die and the ink left over on one of my blue ink sponge daubers.  It was 'still' laying on the work table and I thought it would make the perfect backdrop of this adorable little stamp.  

So it would show through slightly, I stamped my image onto a vellum panel then colored it on the back side of the vellum.  I rummaged through several of my 6x6 paper pads and came up with this combination ... hope you like it! 

Wishing you a wonderful day and weekend ahead!

I'll have a couple more slimline creations to share with you over the weekend!  Would love to have you stop back and check 'em out!  As always ...


Thursday, November 19, 2020

Mailable Christmas Cards

 Hello Friends and Happy Thursday!

A couple cute & mailable holiday cards to share with you today!
I have recently been on a 'I need some new schtuff' kick and have ordered a variety of EFs, slimline dies, etc. etc. etc. and this cute Border Christmas Bells embossing folder is by the Leane Creatif .com.

Afbeelding van Border Christmas bells

As you will see, I've used it two different ways.
First I simply embossed a scrap panel of white card stock then colored atop the embossed portion of the leaves, strings & stars ... leaving the embossed bells just white.

The sentiment panel, light string and tree were extras laying on the work table so I simply die cut a scalloped circle to create my tree skirt and a few little packages.  Gold Stickles were added to the lights as well as the edge of my border embossed panel for a touch of sparkle.


CARD #2 is even more mailable since nothing is popped up other than the embossing on the border panel.  This time I used a scrap strip of red card stock then touched it up with a white gelly roll pen.  A holiday sentiment and a few snowflakes and this card is 'ready to go'!

Isn't it fun to see how different your cards can be and still be using the one same main element!

I hope you're having some crafting fun today!

A few challenges to share in:
Dragonfly Dreams November Challenge - Christmas / Winter
The Corrosive Challenge #11
- AG
The Paper Players Challenge #517 - CAS Any Holiday

HAVE A WONDERFUL DAY EVERYONE!

As always . . .


Wednesday, November 18, 2020

Double D Challenge - Winter Blues

Hello Dear Friends!

It's time once again for a new challenge over on the Double D Challenge Blog!
I'm happy to say I am hosting today's challenge and today's theme is:

WINTER BLUES

The design team ladies have come up with some amazing designs for your inspiration, be sure to pop over and check 'em out!  Speaking of inspiration ... here's the mood board I created ... hope it helps to inspire you!


Today I was inspired by the beautiful Blue Jay image in the lower left corner.
We have a lot of these birds as well as the gorgeous red Cardinals during the winter months here in Ohio so that's what has got my attentions today!  We enjoy watching the birds all year long and we always feed them extra in the winter months since it's a lot harder for them to find anything to eat when everything is frozen.  Here's what I've created for you today . . .


The image is a PRE-COLORED digital image available at TheArtsystamperShop (Etsy store) HERE.  Isn't it beautiful!


And, I've used a variety of dies to complete my winter scene.  Some that I haven't used in a very long time (or ever!  lol).

Sue Wilson Designs - Woodland Collection - Pine Cone & Greenery
Tutti Designs - Scalloped Stitched Nesting Ovals
Elizabeth Craft - Country Scapes Backyard 4 - Snow Decor (1079)
Joy! Craft - Vintage Flourish Berries (6003/0090)


For the center stripe & berries, I have taken the lighter shade
of blue card stock (a scrap) ... cut the size I wanted then the narrower
panel I sponged with Stampin' Up Pacific Point ink which I felt
was close to the darker shade on the bird.  I did the same with another
scrap of the lighter blue before die cutting the berries.


I REALLY like how these pinecones cut!  It's a two step process
and the dimension is fabulous!  I glued the two together at the center point
then added a piece of dimensional tape to the center before
adhering the the berries & branches.

We have this fabulous Precious Marieke - Winter Wear die offered as the prize to one lucky random winner.  Remember ... you gotta play to win!

  Precious Marieke - Winter Wear

So be sure to pop over to the Double D Challenge Blog to see all the details and amazing samples offered up by our VERY TALENTED design team ladies!!

Challenges to share in:
Simon Says Wednesday Challenge - Christmas / Winter
 Craft Rocket Challenge #76 - Christmas / Winter
 Pearly Sparkles Challenge #57 - Christmas / Winter Critters
 
  Thanks so much for stopping by! Hope to see you at Double D!

As always . . .