Thursday, August 29, 2019

You're Mermazing . . .

Welcome back friends!
Today I'm sharing a 'mermazing' creation for the Dies R Us Inspiration Blog!
 Excuse the pun ...
Summer is in full swing and the beautiful blue waters of the oceans are calling!  LOL
Oh how I'd love to be back in Bora Bora or Tahiti right now!  Ugh!
Anyways ... back to reality!

I have used two die sets from the Dies R Us Store today.

Impression Obsession - Dies - Mermaids

Little B - Dies - Mermaids


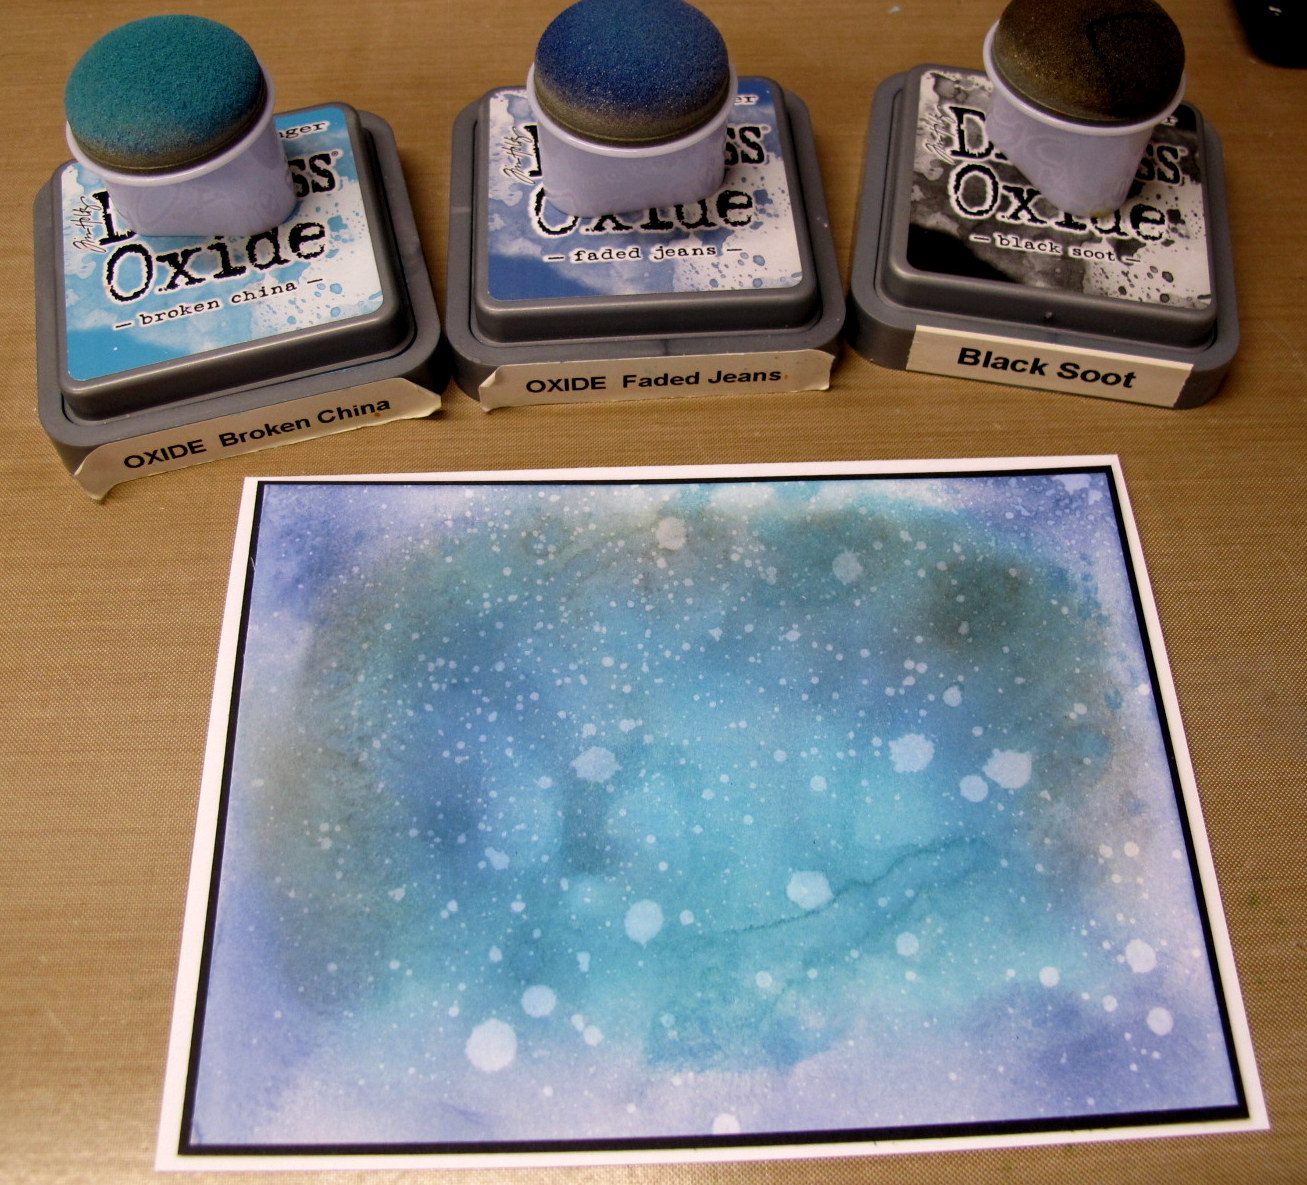
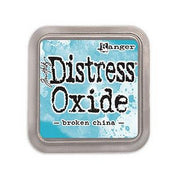
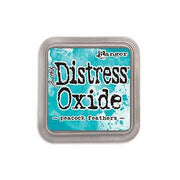
I have also used Tim Holtz Oxide Distress Inks  to create my background water.
Distress Oxide Ink Pad - Broken ChinaDistress Oxide Ink Pad - Cracked PistachioDistress Oxide Ink Pad - Peacock Feathers

I created my 'water' panel using the oxide inks, watercolor paper & water.  
For the rocks & seaweed, I die cut the entire die using green card stock then scribbled some brown onto a scrap of white card stock using my Spectrum Noir alcohol markers and die cut just the 'rocks' portion ... snipping off any of the seaweed and gluing the rocks over top the green die cut panel.

Next I started creating my scene, die cutting a few other little fishies from the Little B set.


There are several mermaid sets in the store ... just type MERMAID in the search block and choose the one that works best for you.  

Don't forget to come join in the fun at the Dies R Us Challenge Blog. There's a new challenge theme offered on the 1st and 15th of each month and one lucky randomly drawn winner will receive a gift voucher prize to the Dies R Us Store

For your convenience, all the important Dies R Us links are provided below.

click below for:
FRIENDS OF DIES R US PINTEREST PAGE

Thanks for stopping by ...
As always ...


Wednesday, August 28, 2019

Sisterhood of Crafters - Paper Piecing

Hello dear friends!
It's time once again for a new challenge over

 Our hostess today is Diane and the theme she has chosen is:

PAPER PIECING

Here's what I have to share ...
 I decided to do something a little different for my paper piecing today.
I die cut this fun Paper Rose 'Bunch of Balloons' from white
Paper Rose - Dies - Bunch Of Balloons
card stock ... colored in the ribbons and swirlies ... THEN die cut
just the individual balloons (snipping off any unnecessary pieces)
from various scraps of designer paper and glued them
over top the white card stock balloon panels.


I die cut my die a couple more times from white card stock and glued them all together to give added dimension to my Bunch of Balloons.  I also popped them up using 3M dimension tape, inside my frame.
I decided to create my own background panel using the colors that would match in with my balloons, using Tim Holtz distress oxide inks on watercolor paper.
 To 'frame' my balloons I turned to one of my new favorite rectangle die sets ... Memory Box Open Studio - Wrapped Stitched Frames. I've die cut two frames and glued them together.  Love the touch of dimension that adds.
 Memory Box - Dies - Open Studio - Wrapped Stitch Frames
Lastly, I needed a sentiment.  I thought immediately of using Happy Birthday but then didn't like the spacing situation so went with a one word sentiment ... Tutti Designs 'Celebrate'.
TUTTI-243  Word Set - Celebrate
 To coordinate with my background panel, I spotted this scrap of designer paper and decided this would be perfect!  I die cut 2 other white die cut panels which were glued all together for added dimension.


This was fun and I'm really happy with the outcome!  Thanks Diane (Nellie's Nest) for the great theme idea!  I haven't done any paper piecing in a very long time!  

I hope you'll come join in our challenge fun at The Sisterhood of Crafters!
My 'sistahs' have created some fabulous creations to help inspire you ... 
be sure to pop over and check them out!

**  UPDATE ** 
After writing up my post, I was cleaning up and spotted a few bits & bobs that I had cut from one of the white panels I used to add dimension to my bunch of balloons.  WELL ... can't let those go to waste so decided to add them to my card (I just can't leave well enough alone!  LOL)  
What do you think?


 See you at the Sisterhood!!

Challenges to share in:
Addicted to Stamps and More Challenge #356 - Anything Goes
ScrapyLand Challenge #120 - Anything Goes using product they carry
Simon Says Wednesday Challenge - Anything Goes
Watercooler Wednesday Challenge - All About Occasions (Birthday in this case)
Paperminutes Challenge #603 - Happy / Colorful

As always, thanks SO MUCH for taking the time to stop by!

Monday, August 26, 2019

Tutti Designs - Celebrate

Hello Dear Friends!
Today I have a wintry scene to share with you using dies from the July Release over


Today's card uses a die from the newer July Release and an older die for the sentiment.

Those dies are:


and

TUTTI-243  Word Set - Celebrate

I've simply added torn white card stock to create
a snowy base atop a panel of snowy designer paper to
make this scene come to life with these fabulous dies.


To make the white sentiment stand out from the base,
I have die cut it three times, glued them together, then embossed
using Ultra Thick Embossing Enamel.

Please be sure to pop over to the Tutti Designs Store
and check out all of the fabulous dies available.

Need more inspiration? 
The team has something new to share on the Tutti Designs Blog  
EVERY DAY MONDAY THROUGH FRIDAY!  

Pop in often and see for yourself ... what a talented group of designers!!
For your convenience, here are all the Tutti Designs quick links you will need:

Wishing you all an AMAZING day ahead! 
As always, thanks SO MUCH for taking the time to stop by! 

Thursday, August 22, 2019

Dies R Us Inspiration - Howdy

Welcome back Dies R Us friends!
Today I'm sharing a happy western themed card that I've created for one of my cousins who has loved horses for over 60 years.  She's about to go on another Wagon Train adventure and I wanted to wish her a safe trip!


The dies I've used today are:
Impression Obsession - Dies - Western Couple

Serendipity Dies - Howdy

Other product used is Tim Holtz Oxide Distress Inks

Distress Oxide Ink Pad - Broken ChinaDistress Oxide Ink Pad - Black SootDistress Oxide Ink Pad - Faded Jeans

I wanted to bring full focus to this beautiful silhouette scene so I've added dimension to die cutting twice and placing the two panels together using dimensional tape.


To create my background I've sponged three different colors of oxide ink onto a 4x6 panel of watercolor paper, spritzed with water and moved around before drying with a heat gun.  Then I added a little more color around around the outside edges before sprinkling with water and dabbing with a paper towel.  


I just love creating my own backgrounds and feel it made for a wonderful nighttime backdrop to this fabulous silhouette.  I think she's going to love it!!

Here's a couple photos of my cousin and her 'grandson' on the wagontrain last year.


Don't forget to come join in the fun at the Dies R Us Challenge Blog. There's a new challenge theme offered on the 1st and 15th of each month and one lucky randomly drawn winner will receive a gift voucher prize to the Dies R Us Store

For your convenience, all the important Dies R Us links are provided below.

click below for:
FRIENDS OF DIES R US PINTEREST PAGE

As always, thanks SO MUCH for taking the time to stop by! 

Wednesday, August 21, 2019

Double D - Pearls, Gems or Diamonds

Hello Dear Friends!
It's time once again for a new challenge over on the Double D Challenge Blog!
I'm hosting today and as you can see by my blog title ... the theme is:

Pearls, Gems or Rhinestones

Here's the mood board I've created . . . 


Be inspired by the images but remember to add some 
sort of pearls, gems or rhinestones also.

Here's what I've created:

I was inspired by the flowers & the pearls in the lower right corner of the board.
I started with a pink background which was embossed with a Cuttlebug embossing folder.  I've used Nuvo Gloss White Crystal Drops to create the pearls on each center of the embossed design. 
Nuvo Crystal Drops - Gloss White
I had a new floral die from the Dies R Us Store called 'Cattleya Orchid' by Scrap Man so that is what I decided to use for my floral accent.

ScrapMan - Dies - Cattleya Orchid

The leaves I have used are by Elizabeth Craft called Leafy Branch 4.

Elizabeth Craft Designs - Dies - Leafy Branch 4

And, my sentiment is by Creative Expressions by Sue Wilson
Sue Wilson Designs - Mini Shadowed Sentiments -Thinking of You


My framework was created using the Spellbinder 'Venise Lace - Hem Stitch Rectangles' die set.  I then popped it up using narrow strips of 3M dimensional tape.  After die cutting the sentiment panels, I also place a narrow strip of dimensional tape behind them so they would stand up and the lower portion of the letters would lay upon the frame.

Spectrum Noir alcohol markers were used in the coloring of my flowers.

 REMEMBER:  We have a fun prize to give away to one lucky player,
which will be chosen by Random.org
ALL are welcome to enter ... we will ship internationally!

So be sure to pop over to the Double D Challenge Blog to see all the details and amazing samples offered up by our VERY TALENTED design team ladies!!

 Thanks so much for stopping by! Hope to see you at Double D!
As always . . .

Tuesday, August 20, 2019

It's Artsystamper time . . .

Hello dear friends!

Today I'm sharing  another creation using beautiful digital images from
TheArtsystamperShop.  Bev has created some gorgeous designs that I'm having so much fun playing with.  This time I decided to go with a very CAS (clean and simple) design.  


By using a couple of Bev's gorgeous digital stamps & one of her sentiments, I've been able to create a quick and BEAUTIFUL card that I think anyone would love receiving!

I've created my panel by bringing her digital images into a new document in WORD10 which I've sized to a 4x6 panel.  This way I could manipulate the flowers in size and orientation as well as deepen the color on the larger aster and change the color of my butterflies to match my flowers.  I love that these images are available in both .jpg & .png format.  By using the .png file, I'm able to 'overlap' my images to create a scene as above.

This beautiful aster is included in the Aster Garden Paper pack ... do check it out!!


The sentiment & butterflies come from the beautiful Field Flower Silhouettes Nature set.


You'll certainly want to check out the TheArtsystamperShop and for inspiration, be sure to check out the Artsystamper Blog.  The design team ladies are amazing and are showcasing some amazing works of art ... be sure to pop over and see for yourself.


For your convenience in finding any of the Artsystamper products I use in my designs as well as inspiration from the design team, here are all the important links:

Artsystamper (Facebook)

Wishing you all an AMAZING day ahead! 
As always, thanks SO MUCH for taking the time to stop by! 


Monday, August 19, 2019

Tutti Designs - The Stockings were hung . . .

Hello Dear Friends!
Today I have a card to share using dies carried at the Tutti Design Store.

Today I'm using another die from the July Release and don't forget, we also have a new release for August ... be sure to check 'em out!!


What fun I had coloring and designing with this die!
I've used my alcohol markers for the coloring and added holiday 
sparkle here, there & everywhere I could!  LOL

I've used the 'Festive Stockings' die.

After die cutting and coloring, I decided to back it
with a white card stock panel, then mat it with black
to really make it POP!


Please be sure to pop over to the Tutti Designs Store
and check out all of the fabulous dies available.

Need more inspiration? 
The team has something new to share on the Tutti Designs Blog  
EVERY DAY MONDAY THROUGH FRIDAY!  

Pop in often and see for yourself ... what a talented group of designers!!
For your convenience, here are all the Tutti Designs quick links you will need:

Wishing you all an AMAZING day ahead! 
As always, thanks SO MUCH for taking the time to stop by!