Thursday, February 28, 2013

Vintage Easter Gate Fold Tutorial

Hello my friends!
I hope you're having a fabulous week and for those in the snow belt ... hope you're staying warm!!
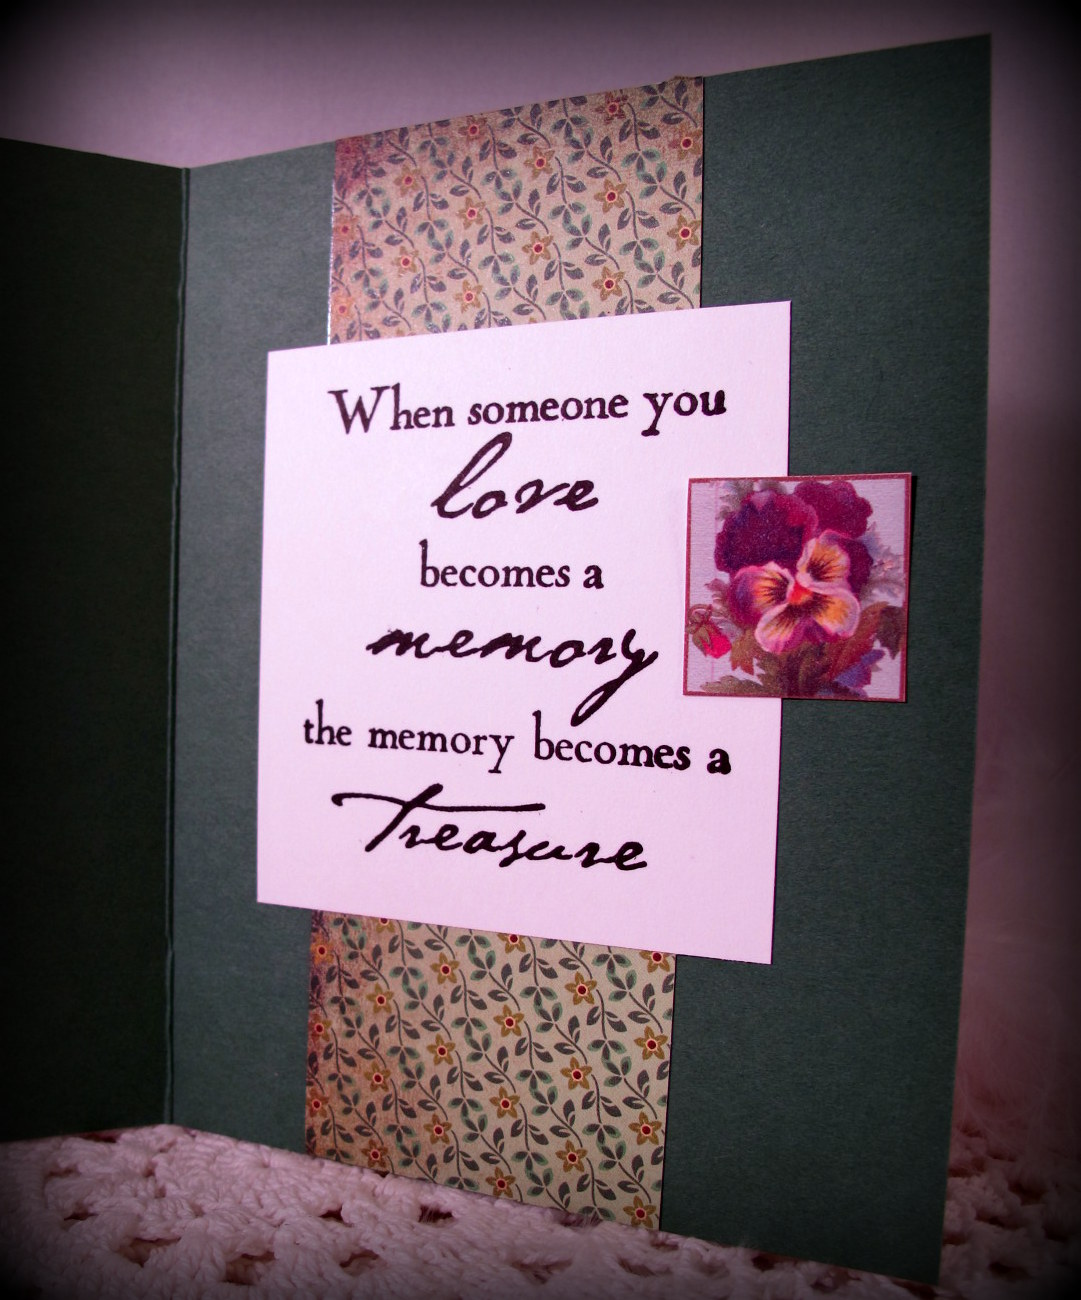
Inside View
 Sandy at Crafty Secrets showcased this card over on the Heartwarming Vintage Blog which I created using their Easter Printable called 'Pretty Vintage Easter Eggs'.  
 I've had a request to share a tutorial on how I made it and since I didn't think to do a tutorial when I created this card, I have made another card today and now have a tutorial to share with you.  
Let's get started . . .

 What you will need:

  • Cardstock for base card.
  • White cardstock for added panels.
  • Design paper (For both cards, I've printed my own design paper using Crafty Secrets 'Radiant' digital paper file.)
  • Your choice of Vintage Easter Egg Image.
  • Your choice of border punch.  
  • Tape Runner
 
 STEP 1:  For your base card, you will cut your cardstock 6 1/4" x 9".  (For a typical A6 card you would score at 4 1/2"), but we are making a Gate Fold card so we will score on the length of the paper at 2 1/4" and 6 3/4".

 Measuring up from the bottom place a pencil mark at 4".
Next you will want to CUT from your pencil mark to the top of your score lines (see below).


STEP 2:  For this next step you will need two pieces of white cardstock (or your choice of coordinating cardstock) cut 6 1/4" x 4 1/4".  Using the adhesive of your choice, adhere these panels to the FRONT Gate Fold panels (see below).


 By lining up your base card on your cutter, you can cut off the extra white cardstock at the same angle (see below).  This will give you 'over lapping' gate fold panels.

Next you will want to border punch both sides.

STEP 3:  Cut TWO panels of your design paper 5 1/4" x 4".  Lay your design paper on top of your left side panel leaving a small border around and place a pencil mark right below the border punch at top & bottom.  This will be your 'angle cut' markers (see below).

Repeat for the right side.

STEP 4:  For this next step you have options!
  On my 1st card I did not border punch the top panel ... this card I did.
For both cards I cut a 1 1/2" x 4 1/2" strip of white cardstock, border punched it and adhered it to the back of my card.
For both cards I utilized my scraps to create an inside panel and adorned it with the matching 'smaller' egg image provided on the sheet of images.

And here is my finished card.
I hope you like it and will give this tutorial a try.
There are a few steps but it's really easy!


Thanks for stopping by today and be sure to stop back on Monday (March 4th) for more Crafty Secrets creations.  Our MARCH LINKY PARTY will be underway and you'll want to get involved!  You will have an opportunity to win FREE Crafty Secrets/Heartwarming Vintage product just for entering a creation made with ANY of their products!!  More details on Monday . . .
(Ooops forgot to mention that I sponged Tim Holtz Tea Dye distress ink around the edges of my images after cutting them out with my Fiskars Swivel craft knife.)
 
Till then and as always . . .


Wednesday, February 27, 2013

Sisterhood of Crafters Challenge

Happy Over-the-Hump Day Everyone!
Yep it's Wednesday already and that means time for another fun challenge at The Sisterhood of Crafters!  

Today it all about 
BIRTHDAYS!

We all need extra birthday cards in our stash so I took advantage of the situation and went a little CRAZY in my creating!  Here are a few samples to hopefully help spark your creativity and of course ... be sure to pop on over to our challenge blog and check out what my 'sistahs' have created to inspire you too!

 I had fun using up scraps on this creation!  Plus I had this adorable Sassy Studio Designs image already colored and ready to be turned into a card.

Recipe:  Foo-la-la design paper, hot pink cs, Inkadinkado stamp, Spectrum Noir markers, Cheery Lynn Designs olive branches die, Prima flowers, MS Trellis border punch, Spellbinder circle dies, Paper Piercing and Faux Stitching

Other challenges:
Sassy Studio Designs - Stitch It Up
Broken Box Stock - Birthday


For my second card, I created by simply using a Sizzix EF on the background black panel and a cute little digi sentiment from Shelly's Images called "B is for Birthday"
 But then as I looked at it laying on my worktable, I thought it needed just a LITTLE BIT MORE so I added a few little flowers ... what do you think?
I was REALLY trying to keep it Clean & Simple (CAS) but I have such a hard time with that style ... always looks like it's missing something and before I know it I'm back to adding flowers, bling, another paper panel ... well, you know what I mean!  So I think I'll just STOP HERE on this creation!

Other Challenges:
Lady Anne's Challenge - Anything Goes (must use a sentiment)
 Cute Card Thursday - Simplify


Lastly, I created a Gate Fold card using another Sassy Studio's Design image (called Professor S) and something I LOVE the look of but don't do often enough ... paper piecing.  The design paper I chose to use is Basic Grey 'Curio' 6x6 paper pack.

Inside View
 A peek at the inside reveals the use of the same design & paper pack as the card front.  Spellbinder Labels 2 was used for my die cut panels.  Spectrum Noir alcohol markers were used for my coloring and the 'Happy Birthday' sentiment is a rubber stamp from The Stamp Pad Co. and the inside sentiment is Impression Obsession.

Other Challenges:
BasicGrey Challenge - Anything Goes
Card Makin Mama - Happy Birthday
Sweet Pea Stamps - Use a digi
Aud Sentiment Challenge - Inner Sentiment Inspiration

Okay, Okay ... I'm sure you've seen enough for one day!  But I do hope you will come join in the "Birthday" fun at The Sisterhood of Crafters!  You will have until March 10th to get your project entered.  Hope to see you there!  Thanks so much for stopping by today ... hope you're having a fabulous week and as always . . .

Tuesday, February 26, 2013

Fulfilling a Request . . .

Happy Tuesday fellow bloggers!

I had a request recently for a variety of Sympathy Cards and since one of my friends nearly cleaned me out of all the cards I had in my stash, I got busy yesterday creating cards with this request in mind.  

 This first card was created using BasicGrey 'Sultry' 6x6 paper pack for my background panel.  The scallop panel was in my scraps and don't recall the mfg name.  My focus image comes from a sheet of floral labels which is a part of the collection on the Crafty Secrets 'Typography' CD#3 that I printed out.  Then I stamped an appropriate sentiment on it.  Embellished with satin ribbon, Prima flowers with Stickle centers and the greenery is from Martha Stewart 'branch' punch and PunchBunch 'Birch leaf' punch.

Inside View - Stamp: Stampin' Up 'Close As A Memory'


I followed basically the same paper/image idea for this card as I did for my first card.  This BasicGrey paper is from the 'Origins' paper pad, Stamp is Impression Obsession and I've added butterflies created with the Cheery Lynn Designs DL112 Exotic Butterflies Small dies.

Inside View - Stamp: Verses Rubber Stamps


This is one of the quickest cards I've ever made!
Image from same Crafty Secrets CD#3, Impression Obsession Inc Stamp, SU corner punch, BasicGrey 'Origins' paper pad
Inside View - SU 'Close As A Memory'


 This last card was created using that same SU set called "Close As A Memory".  My background panel is purple vellum which I've embossed using the Sizzix 'Swiss Dot' EF.  Flowers were stamped using Tim Holtz Dusty Concord distress ink and matted using Spellbinder Classic & Scallop Oval dies.  My flourish is from Cheery Lynn Designs - B117S Fanciful Flourish Sm and I created my flower using that same purple vellum.  I used PunchBunch Cherry Blossom & Big Sky punches.
 
Inside View - Stamp: Verses Rubber Stamps
Well, I think this is a good start on replenishing my Sympathy card stock but will continue to add to it a couple cards a day for the next week or so as time permits. 

Thanks so much for stopping by today!  Please come back tomorrow when The Sisterhood of Crafters has a new challenge to share with you and I will be your hostess!  See you then!


Monday, February 25, 2013

NEWS to share . . .

Happy Monday fellow bloggers!  

EXCITING NEWS to share with you today!  

The lovely Holly Young over at Squigglefly has asked me to join their team 
and I was honored to say YES! 

Challenge Badge
So ... let's get started!  This week's challenge is GET IN SHAPE!
Now I must admit, I don't make very many 'shaped' cards so this was a bit of a stretch for me but a truly FUN ONE!!!   I've used the fun image named Plant A Seed of Love as my focus image.

I've used my new Spectrum Noir Alcohol markers for the coloring (still practicing) and sponged around the outer edge using Tim Holtz broken china distress ink.  I used the largest Spellbinder 'Beaded Circle' die for my base card and a Spellbinder 'Classic Circle' die for the main panel.  Kaiser pearls were my only embellishment and a SU 'Bermuda Bay' marker was used for the handwritten sentiment.

Inside View
I hope you'll take the time to pop on over to Squigglefly and check out the amazing artwork the rest of the Holly's Hobbyists DT has to share with you today.  For links to ALL the DT members at Squigglefly, please click on the tab right below my header.

Other challenges:
CAS on Sunday - Making the Rounds
Challenges 4 Everybody - Anything Goes


Time to get busy on projects ... I got a bit behind with being down with that nasty flu bug and I'm STILL playing catch up!  Hope you are healthy & having fun!  Till next time . . .
And as always . . .

Saturday, February 23, 2013

Joan's Gardens Challenge

Hello my friends!  
Are you having a nice weekend so far?  
I sure hope so!

I'm headed over to Pennsylvania shortly to pay my last respects to a high school friend's Mom who passed away ... but before I go I wanted to share with you a creation I just made for the current challenge at Joan's Gardens.  This week Joan has asked us to use the following:

Polka Dots
Vellum
Oval

I am SO GLAD I do the challenges at Joan's because she always makes me 'think outside the box' ... for instance, using vellum!  I have various sized sheets of various colors and NEVER think to use them!!!  After looking at how this card came together ... maybe I need to put this vellum pack out in plain sight so I use it more ... I really like how quick, easy & pretty this card came together!

Recipe:
Paper:  White and Black cardstock, Teal vellum
Stamp:  Verses Stamps
Ink:  Versafine Onyx 
Accessories:  Cuttlebug Swiss Dot EF, Spellbinder Labels 10 dies, Cheery Lynn Designs B117S Fanciful Flourish Small, McGill P/N 64005L Star Flower Blossoms punch

The little black hearts in the center of the flowers are the remnants from cutting out the large Spellbinder Heart Circle for another project which just happened to be laying on my work table (can't waste anything ya know! LOL) .

A few more challenges:
Broken Box Stock - Birthdays
Card Makin Mamas - Birthdays
Lady Anne's - Anything Goes Friday (must use sentiment)
Clearly iStamp - Black & White with pop of color
Crafty Catz - Dies & Punches

Well, I'm running out of time so I'd better close for now!  Thanks SO MUCH for stopping by and I hope you've found inspiration in my work!  Enjoy your weekend and tell those around you how much you love them ... you never know when you won't get the chance again!!!

As always . . .

Friday, February 22, 2013

Kenny K's Krafty Krew Challenge

Happy Weekend my friends!  
I hope you are staying warm & happy!  Pretty cold here today with ICE this morning but they say it's going to warm up a bit over the weekend and I'm hoping they are right!!

While working on some DT creations this evening, I spotted this Kenny K image that I had colored a few weeks ago and decided it was time to turn it into a card.  So, I popped on over to Kenny K's Krafty Krew to see what the current challenge was.  Low & behold, it is GOING ROUND IN CIRCLES and the 'ole creative juices started flowing!  A little fussy cutting and this adorable image looks like she's ready to belt out a chorus of "Happy Birthday Mr. President!"  LOL!

Remember I JUST got my Spectrum Noir markers and am still trying to get used to them so the coloring could be better!  But hey ... I'm trying and sooner or later I'll get really good at it! (I hope!) LOL!

The background paper was a scrap from my box and it didn't have a name on it (sorry!).  I used Spellbinder 'Heart Circles' & 'Classic Circles' as well as Cheery Lynn Designs B165 Lace Corner Deco E.  Dimensional tape was used to pop her up a bit and I love how quickly it came together!  Good thing, since there are only 19 hours left to enter the challenge!  Yikes!  I need to hurry!

Whew!  Made It!!

Other Challenges:
Crafting 4 All Seasons - Punches & Dies


Well, that's it for me this evening!  Back to those DT creations and maybe a little TV time with hubby!  Hope you all have a FABULOUS weekend and as always . . .

Thursday, February 21, 2013

Shelly's Images Challenge

Hello friends!
Time for another fun challenge at Shelly's Images!  
Today's theme is:  SEW HAPPY!


And, we are featuring Shelly's digi image called 'BLUE BIRDS'.

I decided to make an altered composition book for someone moving into a new home.  This could help them keep organized by keeping notes on all those MANY things that need taken care of while making a move into a new home.  I've even added a pocket on the inside panel for a few envelopes in case they need to quickly snail mail a message to their realtor or family member.

The background paper used on this project is digital paper from the Crafty Secrets 'Barber Shop Digital Kit'.  After printing out my image in a large format, I colored it using Prismacolor Markers and SU Watercolor Pencils/Blending Pen. Once colored, I scanned it & saved as a .jpg file as well as a .png file.  Once I did that, I used Microsoft Word to add my image directly onto my digital paper then printed.

Other products used on this Altered Composition Book are:
Papers:  Medium Blue cardstock, Brown cardstock, garden green cardstock
Accessories:  Creative Memories Corner Rounder, Martha Stewart Icicle Border Punch (used for grass), Cheery Lynn Designs B123 Victorian Picket Fence die, Cheery Lynn Designs B117S Fanciful Flourish Small, Recollections purple paper rose, Purple Zig Marker for faux stitching, ScorTape

A few other qualifying challenges:
Crafting By Designs - Anything Goes
Crafting for all Seasons - Dies and Punches
Creative Moments - Shades of Blue
Ruby's Rainbow #48 - In the Garden
Perfect Sentiments - Floral Fantastia
Through The Classroom Door - Anything Goes

I hope you'll stop by and join in our challenge fun!

Tuesday, February 19, 2013

FEATURED in Papers & Pixels

Hello blogging friends!

Whew!  This flu bug sure is taking it's sweet ole time leaving me!  Although I'm not having to deal with all those yucky symptoms, I'm still without much energy and just trying to get through each day in hopes that the next will be better than the last.  


In all this FLU MESS ... I totally neglected to announce that I've been honored once again by being published in the February Edition of Paper & Pixels Online Magazine!  HOW EXCITING!!
This magazine is just jam packed with wonderful projects, instructions and helpful hints!  You'll want to be sure to check it out and get your copy!

Here's a sneak peek at what my project is about:


And some information to help get you started!

How to get your copy of Papers and Pixels:

Current magazine subscribers will receive a separate email with the download link.  Newsletter readers and everyone else can purchase a copy in our Shop for a $1.50.

And remember:

Visit the Papers and Pixels blog and/or facebook page each and every month on the 10th through the 14th for sneak peeks of what you’ll see in the next edition.  Sneak Peeks are also posted in the Forum.

Whew!  I hate to say it, but that's it for me today!  
Feeling a bit tired so I think I'd best go lay down for awhile!
I hope you are staying healthy & happy!  Till next time!
and as always . . .

Monday, February 18, 2013

My beacon of light . . .

Hello my friends ... I hope you are off to a fabulous start this week!

Sorry I've been MIA but like SO MANY others, the flu bug got me!  And of all times ... Valentine's Day Evening!  Yep ... hubby actually thought he had poisoned me somehow since we opted to not go out for dinner (too crowded) and he made some of my favorite dishes for our dinner and it was VERY NICE!  In fact, he even surprised me and created one of my favorite pies ... Egg Custard!

Do you see the 'heart' he made in the center???
Obviously, I didn't when I took this photo ... it was only when I started cutting us a slice for dessert that I noticed it!  How sweet was that!!!  THIS MAN ... is truly MY BEACON OF LIGHT and I thank God every day for bringing him into my life!!

Being the good wife I am ... I shared my flu bug with this dear, sweet man and now HE is dealing with all the same symptoms I had.  Hopefully he won't be down for too long and I will try to take care of him as well as he took care of me!  (Uugh!  I hate being sick!)

BUT on a good note, I was finally able this morning to complete the card I started last week for the current challenge at Craft a Scene: Let Your Light Shine (use a lighthouse).

I decided to create a 5x7 tag card which it turns out will be needed for a funeral at the end of this week.

Here are all items used on this card:
Papers:  White & black cardstock, 
Stamps:  Stampscapes 220G 'Light, Rocks & Waves', Our Daily Bread 'Light of the World'
Inks:  Versafine Onyx, Tim Holtz 'Tumbled Glass', 'Broken China', 'Stormy Sky', 'Scattered Straw' distress
Accessories:  Scor-Pal, Spectrum Noir alcohol markers, Tim Holtz Alterations Movers & Shapers Tag die, Spellbinder Labels 9 die, large sponge daubers, Offray gold ribbon, Ex-Press It foam tape

I'm still practicing with my new markers but chickened out and colored the sky with sponges & inks ... but the lighthouse, rocks, & water were done with the markers so I guess that wasn't too bad.  I sure need a LOT MORE practice to actually get the 'highlighting' thing perfected!  Baby steps they tell me!  LOL!

A few other challenges:
Creative Creations #4 - Inspired by a Song (You Light Up my Life - Debbie Boone)
 Eureka Stamps - Inspired by a Song (You Light Up my Life - Debbie Boone)
Forever Friends - Anything Goes
Lawnscaping Challenge - Stamp a Scene
MyGrafico Challenge - Anything Goes
Squigglefly - Use a Sentiment

Thanks so much for stopping by today!  I think I need to go take a little rest ... starting to feel a bit weary and don't want to overdo it!    

Have a fabulous day and as always . . .

Thursday, February 14, 2013

Playing with digis . . .

Hello my friends ... I hope you're enjoying a Happy Valentine's Day!
Hubby & I have decided to wait until the weekend to go out for dinner (hopefully a little less crowded then) and he has promised to make Fettuccine Carbonara for our dinner this evening ... YUMMMM so good!

SO ... while I'm waiting for that delicious meal I thought I'd share with you a card I made yesterday just playing around with my new DIGITAL images from Crafty Secrets, and that is the DAS-L21 Garden Girls Digital Art Stamps.  

Now mind you, I have this same stamp set from when it was offered as a Clear Art Stamp Set, but I am SO HAPPY it is now DIGITAL.  It is so easy to move things around on the screen to where you want them positioned and what different sizes you want them to be in order to create beautiful scenery card creations.   The possibilities are ENDLESS!!

Would you believe I put this scene together in about 10 minutes on the computer?  Really!  Then just printed it out the size I wanted for this card.  NOW, the coloring on the other hand, TOOK FOREVER!  I'm working on practicing with my new Spectrum Noir alcohol markers and as you can see, it's going to take more work to get the 'shading' thing perfected!  But, that's okay, I'm still very happy with the outcome of this creation and hope you like it too!

If you aren't familiar with Crafty Secrets products ... or if you are familiar but haven't had the time to check out all the new exciting things going on in the company lately ... well now's your chance.  Pop on over to see what Sandy is sharing with us today at the Heartwarming Vintage Blog or check out any of the following links.
OH and I nearly forgot to mention the great  BIG Clear Art Stamp Giveaway at Moxie Fab  by Cath Edvalson, Trends Editor for Paper Crafts Magazine.  With a chance to win the Cherish, Sing For Joy, Mini Frames, Price Tags and Lacey Patterns stamp sets.   
Just leave a comment there (not here) to be entered to win all 5 Clear Art Stamp Sets
OH WOW!  You will REALLY want to jump on over there!!!

Well that's it for me right now ... 
I can smell good things coming from upstairs so I'd better get my crafting completed.
BIG SMILES AND