Showing posts with label Craftshow. Show all posts

Friday, August 19, 2016

Another busy day . . .

Happy Friday Afternoon Blogging Friends!
Yesterday I shared with you a few photos of what's going on in
my Crafting Cave in preparation for this years Fall Craft Fairs.  Some
of you requested seeing these items when they were completed
so today I spent the day decorating and packaging
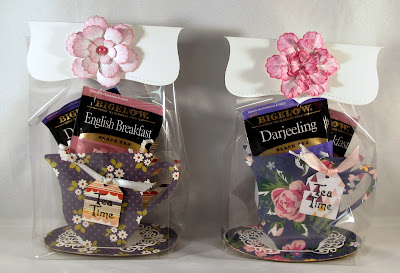
the Ghiradelli boxes and the Tea Cups.

Here ya go . . .

As I stated yesterday, each little box holds THREE Ghiradelli chocolate squares.
(When creating an 'edible package like these, 
be sure to verify the shelf life date on the candy before packaging!!)
BEFORE
AFTER

Here's a peek at the tea cups once filled and then again packaged...

 Each tea cup contains TWO different Teas and TWO different DOVE'S Chocolates

I will be making more Christmas tea cups for my November show 
but for the September show I decided to use 'everyday'  patterns that 
can be used for a variety of occasions ... here's a peek . . .


Thankfully, I still have a few weeks before show time
and already have a good head start on my goodies inventory!  

As soon as I get a few of the tissue box covers completed, I'll be back to share!

Challenges to share in:
Morgan's ArtWorld Challenge - Anything But a Card
Jo's Scrap Shack Fun-Day Friday - Anything Goes
 C.R.A.F.T. Challenge - Christmas
Fab 'n' Funky Challenge #316 - Anything Goes
Holly Jolly Christmas Challenge #78 - Anything But a Card (Christmas)
Craft-Dee Bowz August Challenge - Anything Goes with Handmade Bow

But that's it for today and probably the weekend since I'm headed to Pennsylvania tomorrow afternoon for my  high school multi-year class reunion. 
I'm not even going to admit how many years ... LOL!!
HOLY MOLY ... where has the time gone?  
Dang!  Old age can sure sneak up on a person!  LOL!!

Till next time and as always . . .


Sunday, September 21, 2014

Crafting like a crazy lady . . .

Happy Sunday Evening All!
What a busy weekend it's been ... I'm feverishly working on having enough 'goods' for two separate craft shows this week and was asked if I'd post a few photos of some of the goodies I'm working on.

 Over the past few years, I have noticed that besides my cards, people seem to enjoy a few other things I have to sell.  I.E.  Hershey Bar Pouches ... Gift Card Holders ... Hershey Nugget Boxes and the Tissue Box Covers.  Above are the pouches for the Hershey Bars (had to run to buy the candy before I could finish them).  Happy to say they are now filled ... just need to add a little 'something' to the front of them.  Click Here for an older post that shares the tutorial on making these pouches.  They are great stocking stuffers

Next are the Gift Card Holders.  
Earlier in the week I share a post showcasing the starts of my gift card holder and fingernail file holder.  You can see that post here.  And above you will see that I got a lot more done this week.  Actually, 65 in all, and below are some individual photos ... click on the image for a closer view.


 Some are rather simplistic in design and others have been embellished with various holiday die cuts.  But all include an envelope and are packaged in individual bags.

Now ... as far as the nugget boxes, I have a couple dozen made and ready to sell ... and as you can see by the photo below ... more nuggets are sorted and ready to be packaged!  Now to find the time to make more boxes before the weekend show!  LOL!!
Grandson, Jonathan popped in for a little visit today so I put him to work sorting these out for me.  He didn't mind ... especially when his grandfather told him that he was allowed to eat any that were left over that didn't fit into the 8 per pack (2 of each) ration!  LOL!!


It's going to be a busy next couple of days ... making sure I have everything in order for Wednesday's show.  But I'm having fun along the way and that's what counts!


I'm really looking forward to this first show.  It's a private show at a local country club and really don't know what to expect ... so it going to be INTERESTING and should be GREAT FUN!  I love meeting new people and talking about my love of paper crafting!  I always have to chuckle when they ask me "Did you make ALL these cards?" and watch their mouth drop when I proudly say "YEP!"

Let's see if I can find a couple challenges to enter into tonight:
 Crafting When You Can Challenge - Christmas Come Early
Hobby Cutz Challenge - Not a Card
Art by Miran Challenge - Anything Goes

Well, that's it for me!  I guess I'd better see how many Tissue Box Holders I have  ... and how many more I think I might need!  But, I think that's a job for tomorrow!  LOL! 
Getting a little too late tonight and besides ... it's almost Pittsburgh Steeler Football time!!

Hope you've had a fabulous weekend!

Saturday, September 13, 2014

WOW! Where did summer go???

Happy Weekend my Friends!
What are you working on today?

With my first Fall Craft Show only a week and a half away, I'm busy, busy trying to be sure I have enough goodies available to sell.  Besides my cards, I try to have a few 'little items' for folks to purchase for those folks that they want to give a little something too but not spend a lot of $$$. 
So, today I'm working on gift card holders and finger nail file holders.  
Both were great sellers at past shows.


  I decided to makes these in 'mass production' form this year. 
These gift card holders will fit in a 5" x 3 5/8" envelope.
  •  Cut my base cards (4 15/16" x 8 1/2"), score at 3" & 6 1/2".
  •  Round all edges with Creative Memories corner rounder.
  •  On the lower portion, (card holder panel) edge with a gold Pilot Marker.
  •  Punch the 'easy pull' opening in the bottom panel using a circle punch.
  •   Stamp my name/info on the back.
 TIME TO DECORATE THE FRONTS
  •  Go through my holiday scraps to find pieces large enough for front panels.
  •  Top Panel - 4 3/4" x 2 3/4"
  •  Lower Panel:  4 3/4" x 1 3/4"
  • Corner round the edges to match base card.
  • Scor-tape left & right sides of lower (card holder) panel.
  • Embellish front panel to your liking.

The Fingernail File Holders were a great hit last year so I'm making a few more and a couple different sizes this year!  This is another fabulous project to use up those scraps!!!

I shared a tutorial on making these holders awhile back and if you're interested, you can click HERE for those instructions.  I purchase my emery boards at a local beauty supply house but I'm sure you can find them other locations such as Walmart, Target, etc.  
To display this handy little item, I have decorated a couple Bushes Beans cans with holiday pattern paper.  Another great use for those scraps that keep piling up!


Here are a few challenges I'd like to share in today:
Bloggers Challenge - Alter It (Bushes Beans cans)
Craft for the Craic - Something with Circles on it (sentiment circles on nail files)
Fussy and Fancy Friday Challenge - More than one fold
Dream it up Challenge - Christmas and the Holidays

Well, enough chit chat ... I'd better get back to work!  Hope you have a wonderful weekend and thank so much for stopping by!  I truly enjoy your visit & comments!

As always . . .

Sunday, August 10, 2014

Craft Show Goodies ...

Happy Sunday All!
It's Sunday afternoon and I'm in my cave working on some 'goodies' to sell at this years Fall Craft Shows.  Besides my card creations, I like to have a few things that people might enjoy giving as gifts to those people you don't want to spend a lot of money on but would really like to let them know you are thinking of them and appreciate all they've done for you through out the year.  
i.e.  Mailman, Hairdresser, Teacher, Manicurist, etc.

Today I'm working on a few more Post-It Note covers and I was asked to share a little tutorial on how they are made.  They are really quite simple and you could decorate them for ANY occasion!


Here are a few that are READY TO GO!
And, here are 18 more that are cut and ready to be put together/decorate!


**POST-IT NOTE COVER TUTORIAL**

What you will need:
Post It Notes
Cardstock
Patterned Paper
Strong Adhesive (to adhere Post-It Note to inside back cover)
Magnet Discs (mine are Basic Grey purchased at Joann.com)


These magnets are self adhesive, nice and flat and plenty strong!


You can decorate these in SO MANY ways!
I've kept my decorating pretty clean and simple since I'm thinking they'll be carried in a purse and although they would look fabulous, anything like a homemade flower would get destroyed if their purse is anything like mine!  LOL!! 
Keeping it relatively flat will make it easy to be tucked down inside a pocket of their purse so they will know exactly where to go to find it!


I'm meeting up tomorrow morning with a couple (non-crafting) friends for breakfast, and, they've agreed to come over to the house afterwards and give me a hand with some of my craft show projects!  LOL!  They don't know what they're in for!  But we'll have fun!

A few other things I'm working on are:

More of the larger notepad covers (3x5) ...

Some tissue box covers with matching cards ...

And these fingernail file covers ...
Mind you, I WILL be covering/decorating the soup cans too!  LOL!!


I have several more fancy fold (tri-shutter, side step, front step) cards cut and ready to decorate but of course that is something I'll continue to do as time permits.  But all in all, I think I'm doing pretty well with getting things made in time for my first show which is a private show at a local Country Club on September 24th.

Want to see where all this fun will be taking place?  
Yep!  We'll be hangin' out in the CAVE!

Other things on my Craft Show ToDo List are:
Christmas Gift Card Holders
Christmas Tags & Wine Bottle Tags
Hershey Nugget Boxes (holds 8 Hershey nuggets)
Hershey Surprise Pouches (holds the full size bar)

WOW!  With that being said I'd better quit chit-chatting and get busy!  LOL!
Enjoy the rest of your weekend and here's wishing you a FABULOUS week ahead!
As always ...
Much Love and

Monday, August 4, 2014

Crafty Secrets August Linky Party and DT Challenge

OMG!  It's AUGUST already!!
Hello my friends and all you Crafty Secrets Lovers!
It's time once again for a new Linky Party over at the 

Before I share my project & tutorial with you, I'd like to extend a warm welcome to our newest Design Team Members.  We are very excited to be having these ladies joining in our challenge/linky party fun and I know you're going to be inspired by the variety of styles these ladies create with!
Diane Hover of Nellie's Nest
Shantaie Fowler of Inking Pink
Melody Brouthers Clement of Paper Melody's
and
Gloria Stengel of Scraps of Life
(Gloria was our July Guest Designer and has agreed to stay on 
for another 3 months and hopefully longer!)
WELCOME LADIES!

Now, onto my project/tutorial . . .

Although YOU can create ANYTHING using Crafty Secrets products to enter our monthly challenge, the design team follows a theme and this month it is Fall/Back to School.

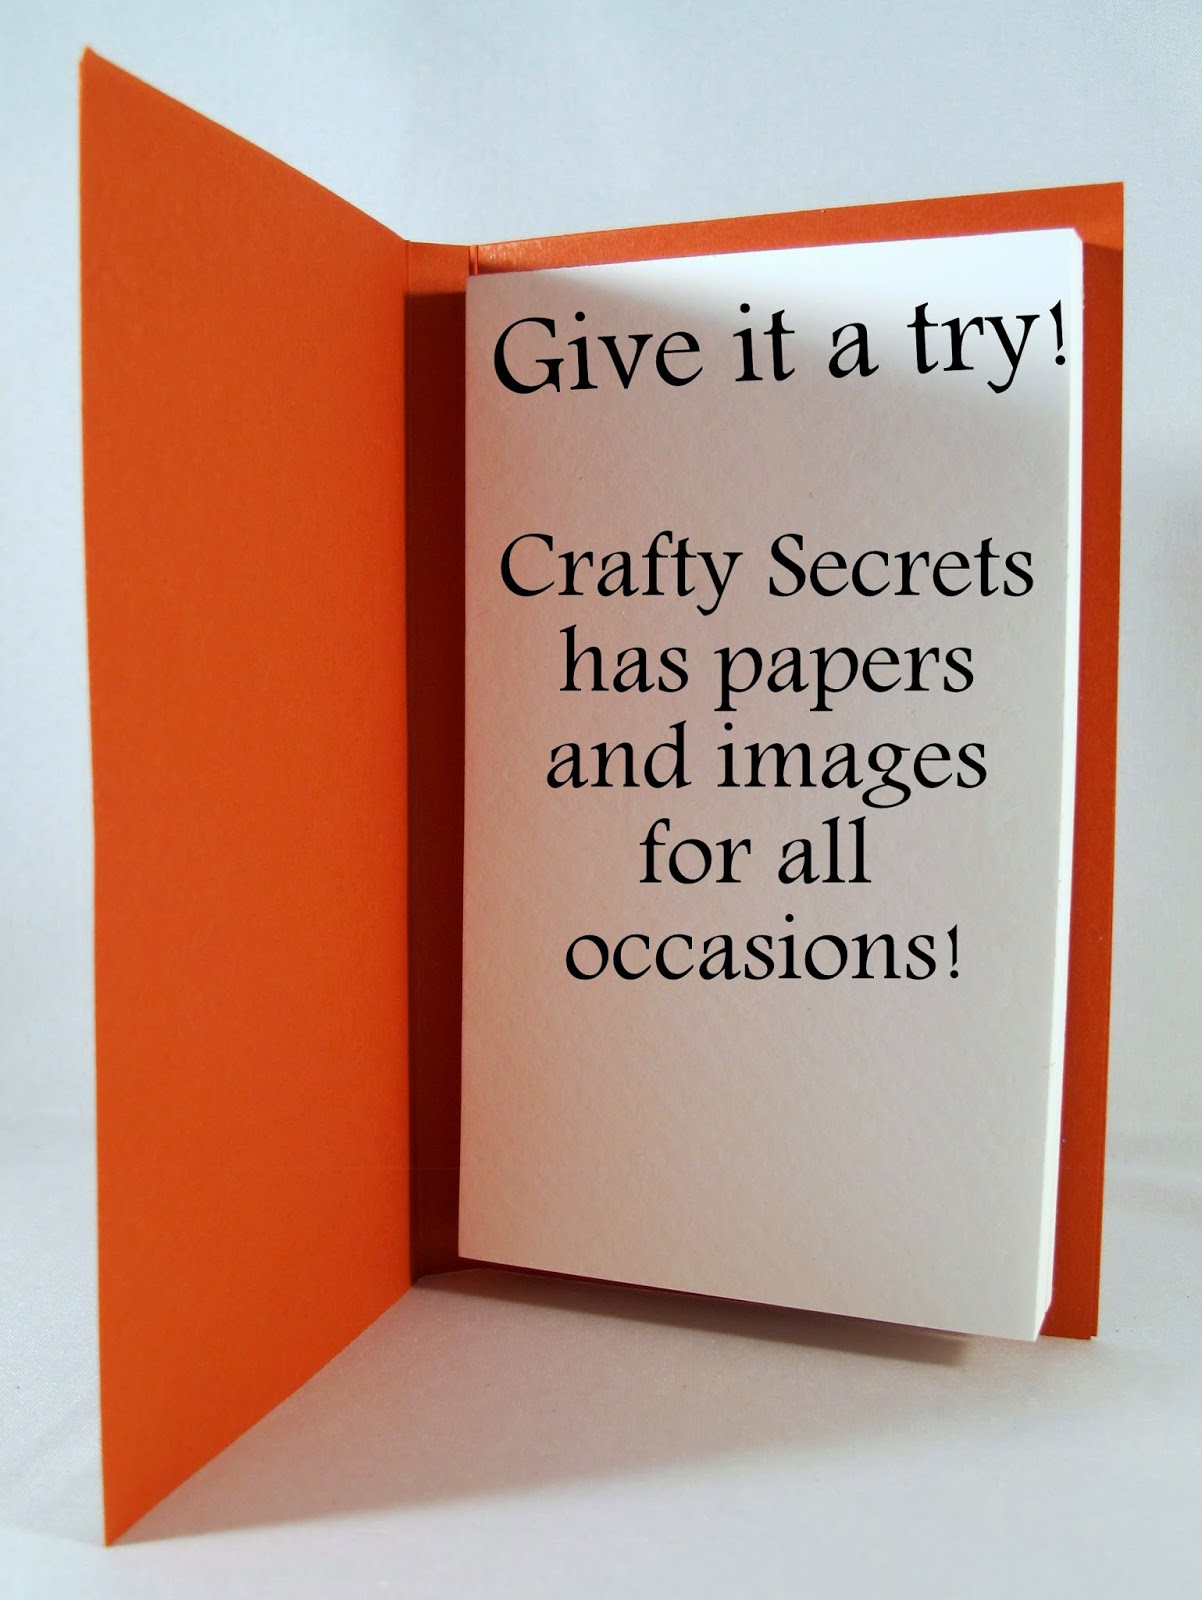
I've started working on projects for my upcoming Fall Craft Shows and decided to make some Post-it Note Booklets as well as some larger Note Pad Booklets.  So I thought I'd share the larger 'Note Pad Booklet' with you today!  
The Crafty Secrets products I have used today are:

Note pads are 3" x 5" size.  You can find solid or ruled page packs
at most any store that carries stationery supplies.

TUTORIAL
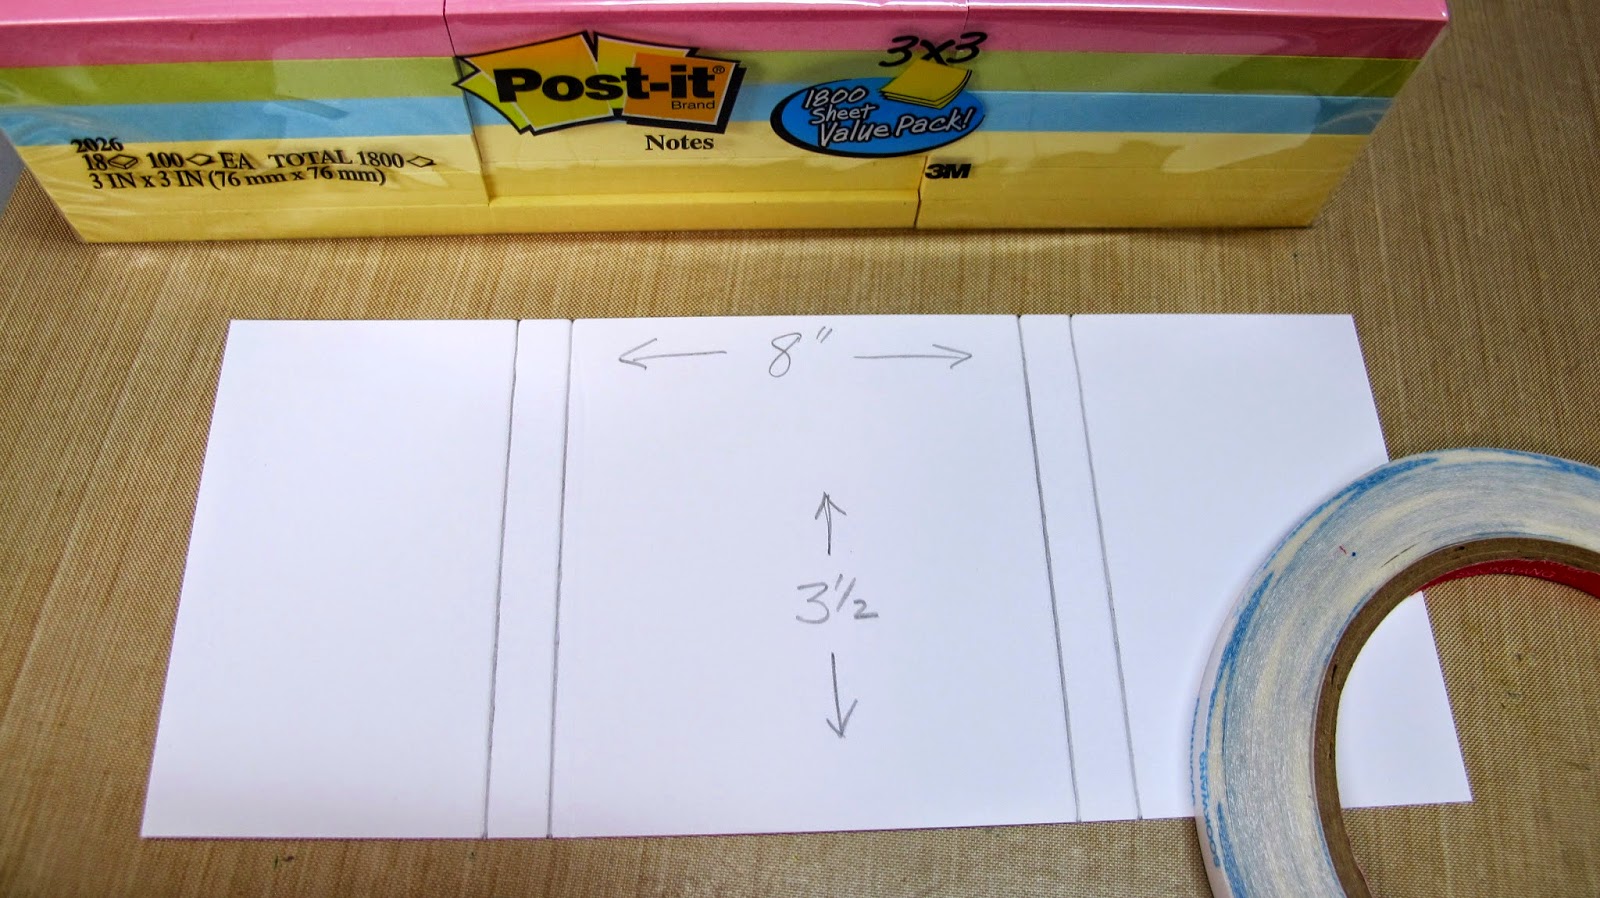
STEP 1:  Cut your booklet base of at least 80# cardstock 
6 7/8" x 5 1/2"  
(you can get 2 booklets out of one sheet of 81/2 x 11 paper).

STEP 2:  Score on the length (6 7/8") side at
3 1/4" and 3 5/8"
This creates your 'book binding'.

 STEP 3:   Apply adhesive to the back side of your 
paper pack and adhere it to the inside
of the back panel of your booklet.

STEP 4:  EASY ... PEASY!
Now comes the fun of DECORATING!
 

You can decorate these note pad booklets as elaborate or as simple as you desire!
I'm keeping mine relatively simple since I'm sure the ladies 
will want these to carry in their purse ... you never seem to have a piece of scratch paper when you need it!!  LOL!  These will take care of THAT problem!


With all the different themed papers, images, and ephemera Crafty Secrets carries, you could create some fabulous, personalized gifts for the upcoming holiday season.  

Here's one for this upcoming school season.  Your child's teacher would love having one of these on hand to jot down those last minute notes ...


So much fun!

Remember, to come join in our challenge fun!

EVERYONE who plays wins a $6 gift voucher to THE STORE and a change to be the BIG $50 WINNER!!!  If you are new to Crafty Secrets, there are freebies available to help get you started (scroll down the sidebar of our blog) ... PLEASE come play along!

Challenges to share in:
Craft-dee Bowz - Anything Goes with a Bow
All Crafts August/September Challenge - Anything But a Card
Artistic Inspiration Challenge - Anything Goes/Back to School
 Crafting From the Heart -  Anything Goes
Butterfly Challenge - Summertime Butterflies


Okay ... how about ONE MORE???
The front panel on this one is from the Birds & Botanicals Images & Journal Notes Booklet.
The possibilities are ENDLESS!!!

Sorry about the LONG POST ... so much to share ... but I'm glad you stuck with me!


Need inspiration ... as well as our 'newbies', be sure to check out the rest of the team ... amazingly talented ladies!
HAPPY CRAFTING!