
Happy Monday Morning my friends
and Happy November!
Did you remember to turn your clocks back yesterday??
Before I share today's creation with you, I want to express a warm welcome to a NEW MEMBER of the Crafty Secrets Design Team ...
Cherry Nelson
please be sure to check out her work and show her some love.
Before I share today's creation with you, I want to express a warm welcome to a NEW MEMBER of the Crafty Secrets Design Team ...
Cherry Nelson
please be sure to check out her work and show her some love.
Now ... as you know (and I have mentioned more than I'm sure you wanted to hear, lol) I have spent a lot of time lately working on projects for the Fall Craft Shows I participate in. I may have shared this with you last year (didn't take time to look back) but hopefully you won't mind me sharing this project/tutorial with you once again. These were a huge hit at the craft show I did this past weekend ... they make wonderful stocking stuffers.
I'm talking about Hershey Bar Pouches. Crafty Secrets has some AWESOME Christmas images and digital papers available that work perfectly for this project. Here's a few of the ones I made for the show:

Let's get started!
HERSHEY BAR POUCH TUTORIAL
Products you will need:
- 8 1/2" x 11" solid color cardstock
- Crafty Secrets Digital Design Paper
- Crafty Secrets Images (booklet or digital)
- Scor-Tape (or Red Line tape)
- Circle or Slot punch
- Satin or Organza Ribbon
- Embellishments (i.e. holiday die cuts, glitter, stickles)
- FULL SIZE (1.55 oz) HERSHEY BARS
- Scoring Tool
STEP 1:
Cut your base pouch card stock 7 1/2" x 6 1/2"
Laying your cardstock on your scoring board with the 6 1/2" side along the top ... score at 3" and 6" ... this leaves 1/2" along the end for the closure.

STEP 2:
Along the bottom and the 1/2" panel, place a strong adhesive such as Scor-Tape or Red Line Tape.
You can either adhere your pocket together now ... or wait until you've added your decorative front panel.

STEP 3:
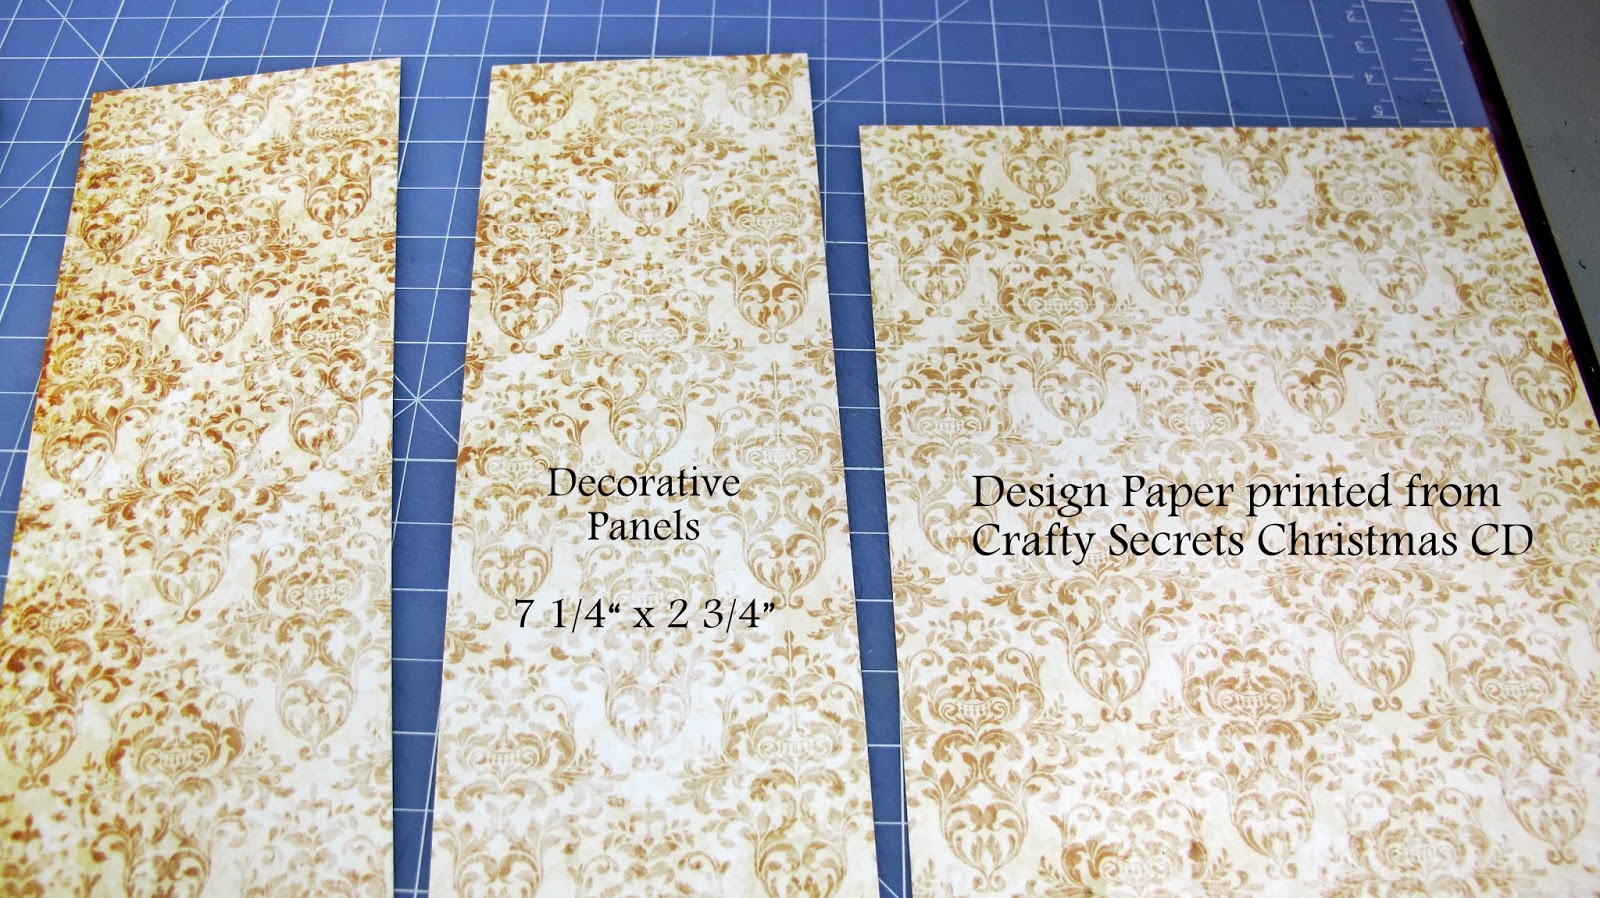
I have printed my own design paper using one of the many beautiful selections available
You can chose to decorate both sides or just the front ... choice is yours!
The decorative panel is cut at 7 1/4" x 2 3/4".

STEP 4:
Next you will need a hole at the top for your ribbon. You can use what ever circle or slot punch you have available. I've used a 1/2" circle punch but a slot punch works great too. Be sure not to punch the hole too close to the top or it will tear through when you are tying your Hershey Bar inside.

STEP 5:
Cut your ribbon at 30".
I have used organza ribbon but you can use what ever ribbon you like best.
Run it through both holes ... one side to the other.

STEP 6:
After decorating the front of your pouch ... as plain or fancy as you'd like,

slip the Hershey bar inside (between the layers of ribbon) and push down to the bottom of the pouch.

FINAL STEP:
Tie a bow on the top.
Pull up with the bow/ribbon to expose the hidden Hershey Bar inside.

 These pouches are great fun to create and with all the amazing images/sentiments and papers available at Crafty Vintage Girl, there is no end the fun themes, designs you can create!
How awesome would these be for your Trick or Treaters on Halloween (that is if you don't get 200 kids like I do ... lol).
Even an awesome Masculine treat for that special guy in your life or even your husband ... LOL I'm kidding ... just seeing if you're still with me! LOL!
Well, that's it for me today!
I hope you'll give this fun project a try and if you do, drop me a comment or email letting me know. I'd love to visit your blog and see what you've created!
A few additional challenges:
613 Avenue Create #44 - Anything Goes no Twist
Challenges 4 Everybody # 32 - Anything Goes
A Gem of A Challenge - Christmas is Coming
Allsorts Challenge - Christmas Cheer
Crafty Calendar Challenge - All Things Christmas
And, don't forget to check out the AMAZING creation/tutorial my team mates have to share with you! Here are their links:
Vicki Chrisman Design Team Leader
Cherry Nelson - New DT Member!
Until next time and as always ...

A wonderful tutorial and such a wonderful idea for a festive and yummy gift.
ReplyDeleteHugs
Desíre
{Doing Life – my personal blog}
Yes these are wonderful ways to hold a treat....and they are so fun to make (and eat, too)...great way to decorate them using the Crafty Secrets products!! Once again, you outdid yourself!!
ReplyDeleteI bet these are a real hit at your craft show. So pretty! Clever you!
ReplyDeleteThanks for reminding me about these pouches, Darlene. They are perfect for the Crafty Secrets booklets images. I may need to make a few for Christmas and use up some of my stash.
ReplyDeleteWhat a super idea Darlene - I have never seen these before and my mind is whirling with the possibilities! Thank you for the tutorial and thank you for playing “Anything Goes” at our house!
ReplyDelete~ginny, DT for 613 Ave. C
Personal blog: RubberMAD at GettyCollection.com
These are all gorgeous and such a great idea. Thanks for sharing the tutorial.
ReplyDeleteThanks for joining us at Crafty Calendar Challenge this month and good luck.
Jo x
Great little idea. thanks for sharing your tutorial.
ReplyDeleteWhat a wonderful idea! Love this!
ReplyDeleteFun project, Darlene!
ReplyDeleteThis is such a clever idea! Love it!
ReplyDeleteBeautiful creation, thanks for joining the allsorts challenge this week Tracy x
ReplyDeleteThese are fabulous! Such a brilliant design and I love the festive images.
ReplyDeleteThank you for taking part in A Gem of A Challenge this week
Sue xx