Wednesday, November 21, 2012

Busy, Busy, Busy ...

Hello my blogging friends!  I had fully intended to share with you another crafting project today but since hubby & I are hosting Thanksgiving tomorrow we had a few things to get done first!  

After a leisurely breakfast and dropping off a pint of homemade cranberry relish to a friend who is a waitress at the local Friendly's Restaurant, it was time to get started (note the time on the clock ... nearly 10am)

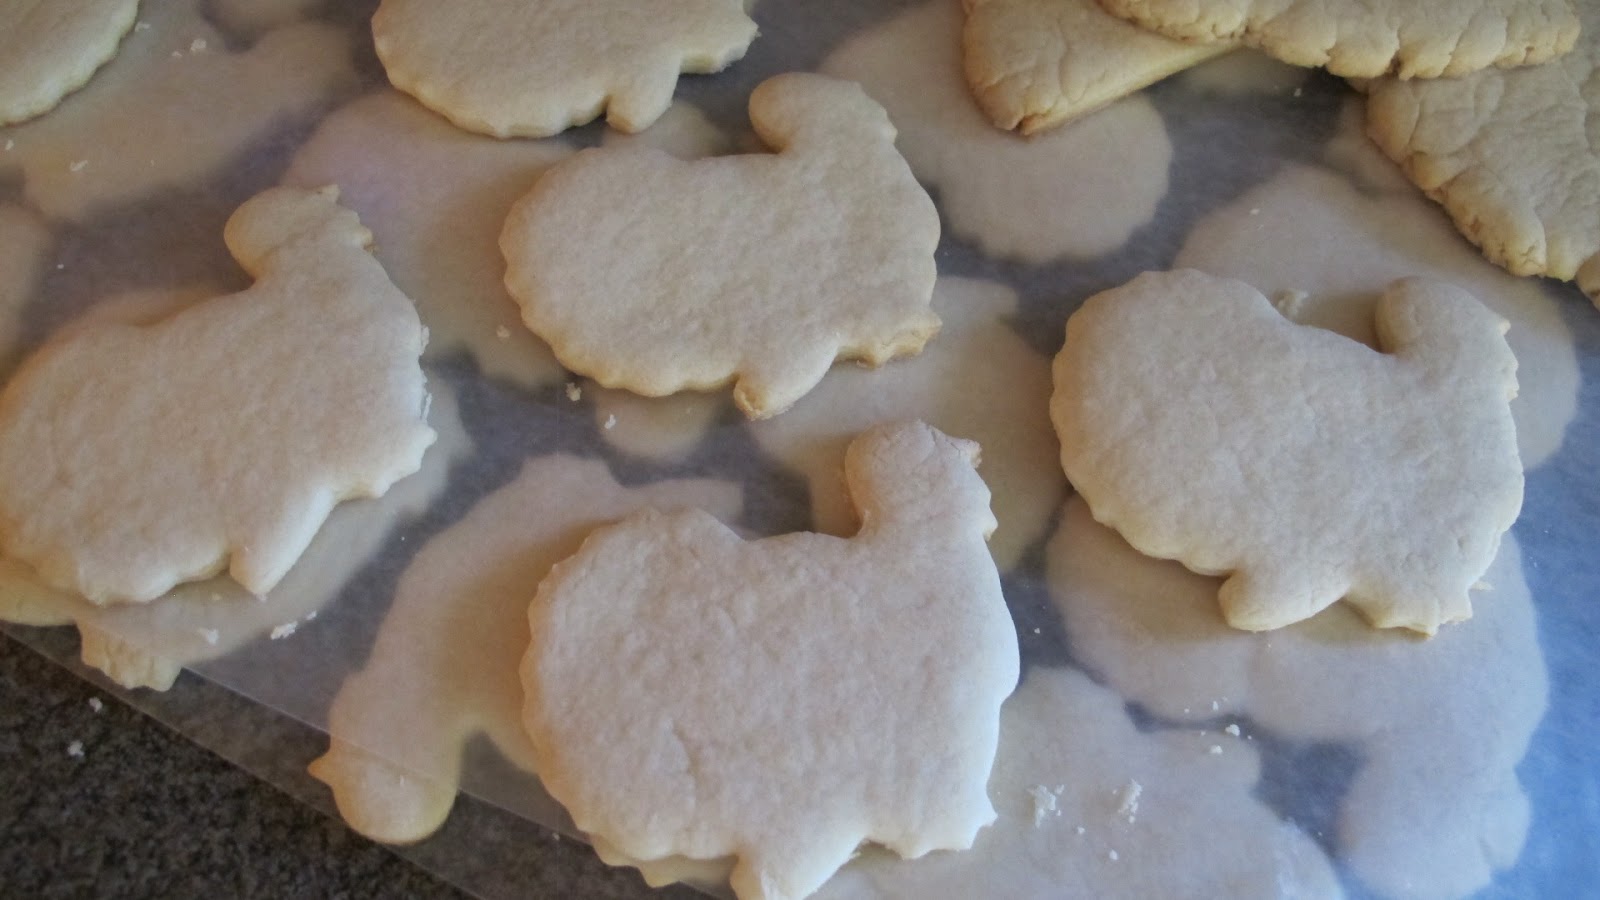
Yes ... I'm fortunate enough to have a husband who loves to cook and pitch in on holiday cooking/baking!  He wanted to make turkey shaped sugar cookies so I let him get started first before I dove into making the pies.  They came out really cute and taste good too!

Okay ... now it's my turn!
I wanted to make 2 pumpkin & 1 cherry pie for our Thanksgiving Dinner dessert.
Boy, I don't know who makes the bigger mess!  
ME or HIM?????  LOL!!!
Now keep in mind ... there will only be nine of us at the dinner table ... and already we have sugar cookies & pies for dessert.  Then my daughter mentioned these yummy cherry/pistachio scones my husband made last year so of course, we aim to please and after finally locating the recipe, Mark was ready & willing to get those started.  Now on these scones, it's a team effort . . . he whips it all together in the food processor and I do the kneading/cutting & baking.  They are SO GOOD!!!
I have added the recipe for these scones on my RECIPES & HOME CANNING page if you'd like to give them a try!  Okay ... so baking is done!  Now on to cleaning up & getting the diningroom ready!


 I thought I'd better put a few other decorations around (other than just in one room, LOL) so got the mantle decorated in the living room too!  Now you do realize we are hosting a Christmas Party here on Dec. 16th so this time next week, I'll be putting Fall/Thanksgiving away and getting started on all my Christmas decorating!  YIKES ... when am I ever going to find to craft??  
NOT TO WORRY ... I do have priorities you know!!  LOL!

WELL ... that's it for me today!  It's nearly 8:00 P.M. and I'm ready to put my feet up and enjoy a little TV with hubby!  In the morning Mark will take care of the turkey & stuffing and I will gather together the other dishes needed to complete our feast!!  
SO LOOKING FORWARD to spending the day with my family!
I hope you are able to enjoy your family tomorrow too!

BLESSING TO YOU ALL and 
HAPPY THANKSGIVING!!

Tuesday, November 20, 2012

Crafty Secrets Altered Tablet

Hello bloggers!  For those of us in the USA, it's a busy week of getting ready for Thanksgiving on Thursday, but before I get too involved in cleaning, baking & cooking, I wanted to share with you how I made an Altered Tablet for Crafty Secret last week.

Crafty Secrets is coming out with an AMAZING Digital Christmas line of papers, images & ephemera and I couldn't wait to start playing!  Here is the project that was just recently showcased on the Crafty Secrets/Heartwarming Vintage Blog:


The first thing I did was CREATE my patterned paper using the 'robin_holly.png' file (from the new CD5 Christmas CD) into a Word document.  Once I inserted the image, I began to copy & paste it all over the page and changing the sizes of the image to fill in the blank spots to create the paper.  Once I've positioned the image where I wanted it for my paper, I then changed the color theme (in Word) to Sepia and changed the orientation to landscape for this project.  I printed it on both sides of the 100# white cardstock paper and you'll want to be sure to use a little heavier paper than your cards since it will be open & closed more often than a card would.
(L) pattern after turning & changing color (R) original color print

 The tablet I am using measures 5" x 8" and is 1/4" thick.
By simply adding a little extra onto the top & sides ... plus the 1/4" for the thickness of the pad, that is your cover!  It nice to also cut a small piece of paper 5" x 2" to cover the flap on the top of the tablet.  Using a strong adhesive like red line tape or Scor-Tape, adhere your tablet to the inside 'back' panel of your paper.  Then fold front flap over like a book cover.


 Another nice thing to do is make a coordinating or accenting panel for the inside cover which can house extra notes, receipts, envelopes, stamps ... whatever you need. 

 Here I've simply embellished and adhered a red 5" x 3 1/2" panel on THREE sides with 1/8" Scor-Tape ... leaving the top open.  You can either fold done one top corner or cut off an angular piece.
 

 For my front cover embellishment, I have simply printed, cut & matted the robin_holly.png file in its original colors, did a little 'fussy cutting', added a touch of ribbon and a computer generated sentiment.


Every year since we moved into our home here in Akron, Ohio (almost 10 years now) we have held a Christmas Party on a Sunday afternoon in December for the neighborhood.  Everyone is so busy with kids & work that there's so little time for neighborhood fellowship!  Each year I make something for each of the ladies who come to the party ... sometimes monogrammed cards, sometimes homemade scarves ... it's just whatever strikes my fancy.  
WELL TODAY I decided these altered tablets would be this years project.  I just sent out the invitations today so I'd better get busy creating!  And with these beautiful new digital papers to create with, it won't take me any time at all!


I'll share them with you as I get them made ... I think they'll be a wonderful gift!

I'd also like to share this project with the following challenges:
Through The Craft Room Door - Anything Goes
 Tuesday Alchemy - Anything But A Card
 Artistic Inspiration #16 - Anything Goes
The Crafty Blogger's Network #5 - Christmas Anything Goes (3rd entry)
Mygrafico Challenges #140 - Anything Goes
Paper Playtime #89 - Anything Goes
Paper Pretties Monday Challenge - Anything But A Card
Victorine Originals Challenge #47 - Anything Goes

 Times a wasting!  I'd better get hopping!!
Till next time!

Saturday, November 17, 2012

I've been PUBLISHED!

WOW can you believe the holidays are RIGHT AROUND THE CORNER!!

I AM THRILLED to have the opportunity to once again share a tutorial in this month edition of Paper & Pixels Magazine.  If you're not familiar with this online crafting magazine, you will want to check it out!!  It is jam packed full of helpful articles on every facet of paper crafting & MORE!  The magazine is an amazing deal.  Only $1.50/issue and there are usually over 80 pages of great inspiration and wonderful tutorials.  The magazine features a wonderful balance between digital artwork and traditional paper crafting...thus the name, Paper and Pixels!

So run right over and download your edition of this month's Paper & Pixels Magazine.


 Here's a sneak peek at the tutorial project I'll be sharing:


 Thanks SO MUCH for stopping by today and for letting me 'blow my own horn' a little!  I am so honored to be considered for a second article in this fabulous magazine and can't wait to actually get my hands on my copy and soak up all the amazing ideas and inspiration it will offer.

Enjoy your weekend and as always . . .

Friday, November 16, 2012

I love a Vintage Christmas . . .

. . . and today, with the help of some amazing digital products from Crafty Secrets, I have a new Vintage Christmas Canvas wall hanging to share with you!

Have you checked out Crafty Secrets lately?  OH MY GOSH ... there is SO MUCH going on over there!  A lot of your favorite papers & stamps have now been turned into DIGITAL IMAGES and are SO MUCH FUN to create with!  I just love the flexibility 'digital' printing provides!

Look at some of these beautiful digital papers . . .

and some of the printable that are available . . .
 
Aren't they FABULOUS ... perfect for ALL your Christmas projects!

OKAY ... now that I've shared a SMALL PORTION of these beautiful papers & printable available, here is what I created working with this new collection.  

What started out at a blank 11x14 canvas . . .

Turned into this BEAUTIFUL WORK OF ART!
I can't wait to hang it on the wall for the holidays!


Here is a list of some of the files I used for this creation:
From the soon to be released CD5-Christmas . . .
Paper:  br_christmas poem
Pngs:  Bingo Santa, Girl w/umbrella, Santa Tag
Template:  Winter Birds Box CS01 template

Of course, there was a bit of 'fussy cutting' done and a few other embellishments added to complete the look I was after, but all and all ... 95% of this creation is all Crafty Secrets/Heartwarming Vintage products!  Be sure to pop on over and see what all the excitement is about.  

 
Here's a list of links you will definitely want to check out:

Our Websites, Gallery, Store

Thanks SO MUCH for stopping by today and please come back again soon when I will have more creations to share with you using these wonderful Crafty Secrets digital products!

A few other challenges I'd like to enter this creation into are:
Divas by Design - Anything Goes
Just Keep On Creating - Christmas
My Mum's Craft Shop - Winter Wonderland
TandaStamps - Anything Christmas
Whimsy Stamps - Traditional Christmas Colors
Through The Craft Room Door #44 - Anything Goes
Tuesday Alchemy # 40 - Anything Goes
 Lady Anne's Challenge - Anything Goes
Craft my life:All crafts Challenge - Anything but a card
The Crafty Bloggers Network #5 - Christmas Anything Goes
Forever Friends - Anything Goes
Mygrafico - Anything Goes
Stamps & Fun = Creativity - Anything Goes
Tammy's Scrappin' Corner - Anything Goes
My Time to Craft - Vintage
 One Stop Craft Challenge - Anything Goes
Southern Girls Challenge - Christmas Projects

As always!

Thursday, November 15, 2012

Shelly's Images Challenge

OH SCRAP!

No, no ... nothings wrong ... this is the theme for our challenge at SHELLY'S IMAGES this week! LOL!  Wait till you see what the design team has created ... I tell you, they are sure keeping me on my toes these days ... these ladies are really hard to keep up with in the craftiness department!

Today we are featuring another fabulous Shelly's Images digi image ... called "NOEL".

With our theme being SCRAPS, I simply opened my huge bin of scrap holiday papers and dug in.  Actually, I colored my image first ... this time using ZIG markers since they had a fine point ... THEN picked out my papers.  The snowflake embellishments are self adhesive felt from Joann's and the corner holly die is by Cheery Lynn Designs (B184) purchased at Joan's Gardens.


What a fun challenge this has been!  I think I will challenge myself to use MORE of these SCRAPS for my upcoming holiday creations!  I hope you'll come join in the challenge ... 

Here are a few additional qualifying challenges I'd like to enter:
Platypus Creek Digitals: Christmas Red & White
Stamping Sensation - Traditional Christmas
Avadares Challenge - Christmas
 

Thanks for stopping by and till next time ...

Wednesday, November 14, 2012

The Sisterhood of Crafters Challenge

Hello my friends!
It's time once again for a new challenge at The Sisterhood of Crafters and I hope you'll come join in the fun!  Today's challenge is an easy one!  With Thanksgiving only 1 Week away, we need to hurry and get those cards in the mail so we are asking you to create with this in mind . . .

THANKSGIVING
CELEBRATING THE HOLIDAY!

We are thrilled to have Shelly Images as our sponsor this challenge and one lucky winner will receive a $9 gift voucher to Shelly's Images store.

Since I am fortunate enough to be a member of the Shelly's Images DT, I am delighted to share not just one but three different cards with you utilizing various SI images & sentiments.  
CARD #1 - Having this image PRECOLORED saved me a lot of time and I don't know that I could have colored it as beautifully as Shelly has with her copics!  I did add the yellow chalk out around the image but that was it as far as coloring.  The turkey is a Cricut cut, the corners were made with the SU photo corner punch and the paper is Karen Foster.
Using "Thanks Sentiment2" image.
   CARD #2 - This beautiful sentiment pretty much says it all!  I simply die cut it with my Spellbinder classic ovals & scallop ovals.  The design paper was a scrap piece (DCWV I think) and the fall ribbon was also in my stash.  A slight sponging of Tim Holtz 'brushed corduroy' was added to the sentiment panel to mute the brightness of the white cardstock.  A Kaiser bronze pearl was also added to the center of the flourish.
Using two images "Pumpkins" and "Thanks Sentiment".

CARD #3 - For this last card I have actually used another piece of the same Karen Foster dp used on my first card.  The striped paper panel is from DCWV.  Corners are from the SU photo corner punch and scrap cardstock.  Three embellishment adorn this creation ... buttons (Bucket O'buttons), Kaiser pearls & Doodlebug Designs Doodle Twine.  OH ... and I've used the COLORED VERSION of the Pumpkins image (so time saving)!

Here are a few additional qualifying challenges I'd like to enter:
Chalk-Ah-Lot Cafe - Thanksgiving (Card #1 around the image)
 Creative Inspirations Paint - Turkey, Turkey
 One Stitch At a Time - With Thanks
Outlawz CAS Challenge - Thanks (Cards #1 and/or #2)
 Pile It On - Let's Be Thankful
Scrappy Frogs Challenge - Give Thanks
Sentimental Sunday - Thanks/Thanksgiving (Card #3)
Card Makin Mamas - Thanksgiving / Thank You Cards
QKR Stampede - Turkeys Strut Your Stuff (Card #1)
Sweet 'n Sassy - Thanksgiving

NOW it's your turn to come on over to The Sisterhood of Crafters and share your Thanksgiving creations with us.  You have 2 weeks to play and have a chance to win this fabulous prize.
Hope to see you there!
Have a wonderful day and as always ...

Monday, November 12, 2012

Won't Be Long Now . . .

Hello fellow bloggers and thanks for stopping by today!
WOW!  I couldn't believe it was 72 degrees yesterday (actually got a little sunburn), which gave me one last chance to complete all my outside work before YOU KNOW WHAT hits!  Leaves are all taken care of, grass is mowed for the last time, equipment is moved around to have the snowblower easily accessible and even had one last Pizza & Beer Party on the deck before putting the deck furniture away for another year.  Sure felt good to be out in the sunshine!


I've been wanting to take part in the Craft A Scene Challenge so I finally took a few moments and put this card together.  The challenge is 'Troubled Skies' and I've used Tim Holtz inks and Stampscapes 018E Cloud (Cumulus) for my troubled sky.  My image and sentiments are from the Crafty Secrets Clear Art Stamps 'Winter Wishes-SL46' and 'Christmas Express-SM47'.

Here's a close up showing the snow in the sky and on the icicles.  I have such a hard time getting a good picture to show the added sparkle in my cards ... guess I need to spend more time figuring out the settings on my camera!

Other qualifying challenges:
Dream Valley Challenge - Anything Goes
Great Impressions - Celebrating the Season
 Joanna Sheen Challenge - Cold & Frosty
Quirky Crafts Challenge - Layer It Up & Let It Snow
Robyn's Fetish-IDIC #133 - Anything Goes
Crazy4Challenges - Inspired by one of your favorite Christmas Carol 
(Let it Snow! Let it Snow! Let it Snow!)

Okay ... time to get busy!  With being outside playing all day yesterday, the inside of my house is protesting!!  LOL  Guess I'd better show it a little attention (or even a lot!)

Have a fabulous day and as always . . .

Friday, November 9, 2012

Joan's Gardens Challenge #41

Hello all!  Are you ready for the weekend?
They are saying it's going to be in the 70's here in NE Ohio and that means this will probably be my last chance to get the remainder of my outside work done before the snow flies!  So, just in case I don't get any crafting time in over the weekend, I wanted to be sure and create for one of my favorite challenges tonight!

Here's a card I 'quickly' created for the challenge at Joan's Gardens.  This week is a very easy challenge ... use Red, White & Green on your card!  It doesn't get  much easier than that!


I actually was able to use up some of the red & green scraps I had laying around on my crafting table from all the creations I made for last week's craft show!  

Here are the items used on this card (those in red were purchased at Joan's Gardens) . . .
  • Cheery Lynn Designs DL143 -Ornamental Wreath & Bow
  • Cheery Lynn Designs B186 Merry Christmas Set 
  • Cheery Lynn Designs B184 Holly Corner 
  • Cuttlebug EF 
  • Red Stickles 
  • Christmas Red and Green cardstock
  • White cardstock
I hope you'll come join in the fun at Joan's Gardens and be sure to check out all the awesome products she has available at her store.

Here are a few qualifying challenges I'd also like to enter into:
Crafty Catz Challenge - Anything Goes
Southern Girls Challenge - Christmas Projects

 Well that's it for me tonight!  Thanks so much for stopping by and I hope you have a wonderful weekend!

Thursday, November 8, 2012

Just A Note ... to say Thanks!

Hello my friends!
Just a quick post to share with you a little of what I've been doing the past couple of days.

From last week's craftshow I was asked to create 25 kids kard kits for a lady who thought the children in her class would LOVE making these for their families.  So I got busy and found all the supplies needed and happy to say they are ready for Mr. Mailman.

Here is the finished card . . .

I also completed 100 Christmas Cards for my cousin but will hold off sharing them with you since some of my family (who will be receiving this card) also follow my blog... don't want to spoil the surprise!  However I can tell you the front of the card is a BEAUTIFUL photograph my cousin took outside her home last winter right after a driving snowstorm!  On of those storms where the snow actually blows sideways ... the sky & snow in this photograph are GORGEOUS!

One other thing I completed today ... that I CAN share with you ... are Thank You gifts for my daughter to give two of her neighbors.  My daughter had surgery in October which was supposed to be 'not that big of a deal' ... but as luck would have it, things made a turn for the worst and the surgery turned out to be MAJOR vs MINOR!  Well, long story short ... my daughter is NOT one to 'sit around' and ended up doing MORE THAN SHE SHOULD and to keep her off her feet so her body could heal, her doctor put her on strict bed rest.  Luckily two of her neighbor ladies were kind enough to lend her a hand with meals and served the family feasts fit for a King ... or in this case, Queen!
She had commented she wanted to do something to express her deep appreciation for their kindness and I offered to whip up a few paper crafts along side anything else she might have in mind.  I suggested a Tissue Box Cover and a box set of Note Cards for each of the ladies.

 One of the ladies (Becky) likes bright, happy colors ... like rainbows!  
I found this paper at Flower Factory and thought it would be perfect!  A little fancy cutting and a computer generated sentiment and this set is ready to hopefully make her smile!


The other lady (Linda) is very much a 'country girl'.  
She has a small farm and loves country living. 
I also found these designer papers at Flower Factory.  A touch of SU ribbon and another computer generated sentiment and Viola!

It warms my heart to know my daughter & her family have people in their neighborhood who care and are willing to lend a helping hand! 

Speaking of saying thanks ... I can't thank YOU enough for showing me support in your following and comments.  It truly means the world to me ... so, THANKS!
P.S.   Prayers go out to those living on the East Coast who not only are trying to get back to normal after last week's Hurricane Sandy, but have now been hit with a Nor'Easter!  Hang in there ... brighter days are ahead!

Tuesday, November 6, 2012

Joan's Gardens Challenge #40

Good Morning my friends!  WOW is it getting Brrrr Cold outside!  In the 20s last night ... but wait ... it's going to be in the 60s over the weekend!  And we wonder why we are all getting sick with colds/flu ... 

Anyways, I'd like to share with you a couple of cards I have made for the current challenge at Joan's Gardens.  This week she & Selma are taking it easy on us and have made the challenge an ANYTHING GOES ... as long as it is WINTER based.  So here we go ...


Recipe for this card:
Paper:  Christmas Red cs, White cs
Stamp:  Paintbox Poppets  (Christmas Miss)
Ink:   Versafine Black
Accessories:  Prismacolor markers, ZIG markers, X-PressIt High Tack Foam Mounting Tape 1/4", Sizzix embossing folder, QuickieGlue, Deco Art Glamour Dust, Fiskars swivel craft knife

 I wish my photo would show you how pretty this card really is with all the 'sparkle'!
Items highlighted in RED were purchased at Joan's Gardens.

This next card came together so quick & easy!  I JUST received this new Stampendous stamp from Joan's Gardens and couldn't wait to ink it up!  As you know I LOVE Vintage style and this stamp really called out to me.  
I stamped the image on white cardstock using Tim Holtz 'brushed corduroy' distress ink.  Then after distressing the edges using my Zutter Distrezz-it All.   I used the same TH ink and sponged around the edges as well as on the front ... just up to the oval.  I then used ZIG red & green markers to color in the poinsettas.  My background doily is from the Wilton Cake isle of Joann's and after inking with the same TH distress ink, I have crumpled it up and attached it to the back of my image.  Once placed on my card which has a background paper from the KaiserCraft 'turtle dove' paper pack, I added gold Stickles around the oval and highlighted the flowers on the doily.


 Another little touch of sparkle is on the roof tops where I used Quickie Glue and Deco Art Glamour Dust.  I cropped & darkened this image to hopefully show you the awesome effect this gave my card.

Other qualifying challenges are:
Through the Craftroom Door #43 - Anything Goes
Anything Goes Challenge #79 - Anything Goes
Bearly Mine Challenge #60 - Anything Goes
Everybody-Art Challenge #212 - Embossing
 Loves Rubber Stamps #25 - Anything Goes
Papertake Weekly Challenge - Anything Goes (Optional Extra - Christmas)
Sweet Stamps #90 - Christmas
Card Mania Challenge - Embossing
The Crafty Blogger - Christmas Anything Goes
Oo La La Challenge #117 - Christmas

I hope you've enjoyed seeing these two cards and have even drawn a little inspiration from my work!  Hubby & I are headed up to Brunswick, OH shortly to Hollo's Paper Company.  That is where I can buy my cardstock (all colors/weights) for $1.50 a POUND!  I have a couple large orders to fill before Christmas so I'm headed out to get the paper & envelopes I need in order to get started. 
Have a fabulous day!