Thursday, September 14, 2017

Another 2017 Craft Show Goodie . . .

Hello All!
If you follow my blog, you know I'm preparing for this Fall's Private Craft Show at one of the local Country Clubs.  This is basically the same group of ladies I see at their Spring show, so I always try to have a few new 'goodies' for them to purchase along with my usual supply of cards, tea cups & tissue box covers.  

Earlier in the week I spotted this stack of gold boxes with clear covers that I've had in my stash for a good 5 years and thought 'Now what could I do with these that would be different?'  Well, here's what I've come up with:


A holiday gift idea of 4 note cards with envelopes & 5 wrapped Hershey Milk Chocolate Nuggets. Oh yea ... and I made the cute little snowman guys too!  I spotted them on THIS YouTube video.  Easy and SO CUTE!!

Okay ... back to my gift boxes.
Here's a photo TUTORIAL for you.

Product used:
 
4 1/2 x 5 3/4 gold box with clear lid

4 - 4 x 4 envelopes
4 - 3-3/4 x 3-3/4 blank note cards (card stock cut 7 1/2" x 3/4")

2 sheets - 6 x 12 patterned paper
(These papers are actually left over pieces from last years holiday projects!
So, I'm cleaning up some scraps along the way!  HOORAY!!)
You can use 1 sheet of 12x12 patterned paper for everything to match!

Peel & Stick Felt Stickers (decoration of your choice)


Step 1:  Cut  panel for the inside of your box 6 1/4" x 4 3/8".  Score at 1", 1-1/2" and 2" and fold to create a 'mountain divider' to separate note cards from chocolates.

AFTER SOME TWEAKING:  To cover the entire bottom of your box and have a taller 'dividing' panel, cut your paper at 7 5/8 x 4 3/8 ... scoring along the long side at 1 1/2,  2 1/2 and 3 1/2.
 

Step 2:  Adhere to the bottom of your box with double face tape.  Add a strip of double face tape (I used Scor Tape) to the middle of your 'chocolate side' to keep the nuggets securely in place.


Step 3:  Use the remaining paper that you used for your box bottom 
to cut 1 card panel & 2 wrappers
card panels are: 3 -1/2"  x 3 -1/2"
wrappers are:  3" x 1" 

TIP:  In order for FIVE nuggets to fit in the box,
 you will need to alternate them top side up and bottom side up.  
So be careful in your wrapping to be sure the
wrapper 'joining' is always on the bottom of your nugget piece.


Step 4:  From your other patterned paper, cut 3 card panels each 3 - 1/2" x 3 - 1/2"
and 3 wrappers each 3" x 1"

Adhere patterned paper to your note cards and decorate as you wish.


Step 5:  Inside your box place your envelopes & note cards on the one side.
Next remove the paper cover from your Scor tape and carefully position your nuggets.
Remember to alternate them (using the different colored papers helps to remind you of this fact).  They are a tight fit but if you position them as in the photo below, keeping the 2nd one down LAST, you can squeeze them together and they will stay due to the Scor tape.


Step 6:  Put the clear lid on and decorate with ribbon, etc. to finish.
I have chosen various ribbons I have from Really Reasonable Ribbons


VIOLA!!


I hope you've enjoyed this little holiday project!
Now I need to get back to work ... I still have another 15 boxes to do!

Challenges to share in:
Sweet Stampin Challenge - Anything Christmas
 The Merry Christmas Challenge #34 - ATG Christmas
The Holly and Ivy Christmas Challenge #14 - ATG Christmas
Thanks for stopping by and as always . . .

Wednesday, September 13, 2017

Oh Boy!!

Happy Wednesday Everyone!
It's time for a new challenge at the Sisterhood of Crafters and today,
Agata is our hostess.  She would like us to create with the theme
What makes you say "OH BOY!"

(Could be a masculine creation, a baby card,  a pregnancy announcement, even a new job!  
Something that would make you say OH BOY!)


I went with a baby boy card since I just got in some new adorable dies
for baby cards and couldn't wait to use them.

My DCWV (dots, stripes & plaids) designer paper is simple but has a touch of sparkle that adds extra texture.  And the dies I have used are:

Yvonne Creations 'Train' ... Die Versions 'Stork' (DV-615)... Sue Wilson 'It's A Boy'


Be sure to pop over to see what the 'Sistahs' have created to
inspire you.  Then, come join in the fun.

Challenges to share in:
Crafty Creations Challenge #350 - ATG
Crop Stop September Challenge - ATG using product carried in their store.
Day Dreamer Challenge #2 - ATG
Scrapy Land Challenge #73 - ATG using product carried in their store.
 Stampotique Designs Challenge #282 - Only Blue

Our challenge will run through Sunday, September 24th
and you can enter up to THREE new entries.

Hope to see you there!!

Thanks for stopping by and as always . . .


Tuesday, September 12, 2017

Young Love . . .

Hello Everyone!
Today, as my design team card for the Dies R Us Inspiration Blog,   I have a cute card to share that could be used for a variety of occasions!     OH! and did you know they have a DT Call out for this team?  If you're interested, you'll have to hurry ... ends this Friday, Sept. 15th ... details HERE.


It actually all started with this Tim Holtz Oxide Distress Inks background panel that I had left over from an earlier card.  From there I started looking through my dies and spotted this cute couple.  I thought the colorful panel would make a good 'sky' for their silhouette and viola ... my card was born!


I really wanted the focus to be on this adorable couple so other than my colorful panel representing the sky, I kept my card pretty clean & simple by simply scoring at 1/4" & 1/2" on all four sides of my card front.

The dies I have used are:

Die-Versions - Whispers - Lovely Kids


Impression Obsession - Dies - Clouds


Impression Obsession - Dies - Split Tree


Tutti Designs - Dies - Nesting Stitched Rectangles

I hope you've enjoyed what I've shared today!  And, don't forget to come join in the fun at the Dies R Us Challenge Blog.  There's a new challenge theme offered on the 1st and 15th of each month and one lucky randomly drawn winner will receive a gift voucher prize to the Dies R Us Store.  For your convenience, all the important Dies R Us links are provided below.
click below for:

Challenges to share in:
Crafty Sentiments Challenge - Dies and/or Punches
 Cuttlebug Mania Challenge - ATG with Die Cut and/or Embossing
Lemon Shortbread Challenge #50 - ATG
Try It On Tuesday Challenge - My Friend

Thanks so much for stopping by today and as always . . .


Monday, September 11, 2017

Thinking of You . . .

Hello Everyone!

Over the weekend my friend Diane (Nellie's Nest) guided me to the current challenge at the  'Just Us Girls' Challenge Blog where they are using the 'Block Watercolor Stamping' technique.  Now I had viewed this video by Jennifer McGuire before but didn't take the time to try it.   Diane & I both decided to give it a whirl and what a fun & quick technique it is!  With this sentiment on the front, I feel this card could be used for Sympathy, Get Well, or even for someone who has just gone through these terrible hurricanes in the south and are now having to rebuild their lives.


 For my first card I used Tim Holtz Distress Inks Mermaid Lagoon, Fossilized Amber and Cracked Pistachio.  My flower stamp is by Inkadinkado called Meadow and my sentiment is by Stampendous.  I popped up my water colored panel by adhering two cereal box panels (which were cut a 1/4" smaller) to the back of my water colored panel.  This saves on using so much of my dimensional tape on a larger panel such as this.

 The butterfly accent was an extra I had cut from scraps of other watercolor papers I used on past projects (can't waste that pretty paper you know!  lol)


This second card is a bit more dramatic!
I used the same Tim Holtz Distress Inks but switched out the Fossilized Amber for Abandoned Coral.  The stamp sets used are the same.  As you can see, I've used two different clear blocks for this technique.  I also sprayed this panel and let it run a bit before drying it with my heat gun.

I like how they both turned out ... now to remember this technique for the future!

Challenges to share in:
HeARTful Stamping Challenge -  ATG + a stamp (9/17)
The Artistic Stamper September Challenge - Take a little colour
Creative Craft Cottage Challenge - Get Well / Thinking of You
House of Cards Challenge - Add Text and/or colors  (TEXT)

Thanks for stopping by!
Hope you're off to a great start to your week!
Prayers going up for all those dealing with the Hurricane Irma devastation!

As always . . .

Sunday, September 10, 2017

If the shoe fits . . .

Hi Everyone!
Today I have a fun card to share but oh my goodness,
I must have 'been in a mood' when I put this one together!  LOL


Hmmm ... wonder what had me stirred up this day?  LOL
You must admit ... there are times when you'd like to send a card like this to someone who's not being very nice!  LOL  But of course I never would, so I'll just keep this card on my desk to remind MYSELF ... NOT to be a witch unless I'm dressing up for a Halloween party!  

This awesome Witch Shoe is from the August Release at Tutti Designs!

No automatic alt text available.

My design today is pretty self explanatory!

As stated, my sentiment is computer generated and I've die cut it using a Sue Wilson 'Pierced Flags' die.  A few little Nuvo White Crystal Drops was all that was required to accent this fabulous shoe.  

Please be sure to pop over to the Tutti Designs Store and check out all of the fabulous dies in this latest release.  And, of course, you'll want to browse through the store to see what other dies you need to have on hand.
Need inspiration? 
The team has something new to share on the Tutti Designs Blog EACH and EVERY DAY!   Pop in often and see for yourself ... what a talented group of designers!!
For your convenience, here are all the Tutti Designs quick links you will need:
 Thanks for stopping by!
As Always . . .

Saturday, September 9, 2017

2017 Fall Craft Show Goodies + Tutorial

Happy Weekend Everyone!

The past week or so I have finally gotten serious about creating for an upcoming show I have on the 20th at the local Country Club.  It's the same group of ladies I see for both Spring & Fall shows so besides having a variety of cards available for them to thumb through, I try to have a few little extra goodies.  They are always looking for the tissue box covers and tea cups I have for sale and they are usually on the look out for some smaller gift giving goodies.

Here is the EXTRA little goodies I've come up with this year (so far):


 Tea Lights

and

Chocolates


Both in everyday designs and holiday designs.


I spotted the original tutorial for the box HERE then expanded on her idea and turned it into a 'window box'.

Here's the details if you'd like to try it yourself!
 

Are you like me and save that clear packaging some dies come in?  Well if you do, you're in luck because they make fabulous WINDOWS!!

I use a pair of kitchen (heavy duty) shears to cut off the thick edged sides, then square them up on my cutter.  That way,  when you need 'windows' (works great for shaker cards too), you simply have to cut them to the size you need ... VIOLA!

I used 1/8" Scor Tape around the edges to adhere my windows to my boxes. 

 This small rectangle box will hold 3 tea lights or 5 Hershey Nuggets (if you position every other one upside down).  

TIP:  You can get THREE boxes out of one 12x12 sheet of heavier grade designer paper.  I've used double sided paper since it is usually a heavier grade.

1.  Cut a piece of cardstock 3 1/2" x 12".  Score on all four sides at 1".  Score on the long side at 5 1/2" and 6 1/2".  

 2.  Before folding, cutting & assembling my box, I created my window.  To do that,  I cut a scrap piece of white card stock 3 1/4" x 1" and used that as my window template.  Using a pencil, I outlines my template and cut out the opening with my Fiskars swivel craft knife.


3.  After cutting out the window, I adhered my clear window panel ( which was cut at 4" x 1 7/16")  to the 'INSIDE' of the lid end of your box.  NOW you can fold on the score lines, cut up to the score lines to create the gluing tabs and assemble your box.


Decorate as you wish!

You can make a tag, or simply use pretty ribbon and a charm as I have.  Your choices are endless ... be creative!   In fact, for the everyday tea light boxes, I used some fancy buttons I had in my stash.

 I hope you've enjoyed this tutorial and will give it a try! 
Makes a great little gift for that someone special you don't want to spend a lot of money on but want them to know they hold a special place in your heart!  After all, it shouldn't be about how much you spend on a person ... it's the fact that you just want to show them that you care!!

Challenges to share in:
Scor-pal More than One Score Challenge #41 - Bags & Boxes
The Merry Christmas Challenge #33 - ATG Christmas
Creates and Makes Challenge #14 - ATG
The Holly and Ivy Challenge #14 - ATG

 Thanks so much for stopping by today! 
Have a great weekend!
As always . . .

Friday, September 8, 2017

What's Up?

Happy Friday All!


Before getting busy with more projects I need for an upcoming show (will share photos soon),  I wanted to join in a couple of challenges I spotted in blogland.  First is the Simon Says STAMPtember Challenge 'Stamp It' , secondly is the new challenge at The Rubber Buggy Challenge Blog


and lastly is the challenge at City Crafter Challenge Blog ... PICK ONE!


 Obviously as you can tell from my card photo, I picked the BLUE swatch and created the background panel using the Tim Holtz Oxide Distress Inks.  The stamping portion was created using a stamp/die set I've had in my stash for awhile and FINALLY got around to creating with it.  That is the Sizzix - Tim Holtz 'Bird Talk 2'.
 

I created the banner using the Sue Wilson 'Stitched Flags' CED4317 set, but I modified it a bit since I wanted it to be longer.  I simply die cut the one end just 3/4 of the way then flipped it around, reinserted the die so it fit in the grooves of the first cut and die cut it only to where they joined but NOT cut through at the end.  I also added a little 'curve' to my flag banner using the handle of an artist brush.

My thoughts & prayers are still with all those folks devastated by Hurricane Harvey and also now with everyone in Florida who are about to feel the wrath of Hurricane Irma!  I have family in FL who have chosen to 'wait it out' ... I pray they made the right decision!!

Other challenges to share in:
 Aud Sentiments Challenge #188 - ATG + Sentiment
Little Red Wagon Challenge #410 - Give Us Your Background
Scrapy Land Challenge #73 - ATG with dies at store

I hope you are having a good Friday!
As always . . .
Recipe:
Papers:  White cs, White watercolor paper, Sky blue cs
Inks:  Tim Holtz Oxide Distress Inks 'Peacock Feathers & Broken China', Versafine Onyx
Accessories:  Sizzix Tim Holtz 'Bird Talk 2' stamp & die set, Cloud 9 Designs Rain Drops, Sue Wilson 'Stitched Flags', Embossalicious 6x6 embossing folder, large sponge dauber, Heartfelt Creations POP UP DOT

Wednesday, September 6, 2017

The Season of Magic . . .

Hello Friends!
It's time for a new challenge over on the Double D Challenge Blog!
Diane is our hostess today and her theme of choice is:
GLITTER
and here's the gorgeous inspiration board Diane has created ...

Once again Diane has come up with another fabulous theme that truly challenges me!
You see, I am what they call 'Loose Glitter Challenged!'
Anytime I try to use the many little jars of loose glitter I have in my stash, it ends up EVERYWHERE!
And I mean EVERYWHERE!!!  (just ask my husband, lol)

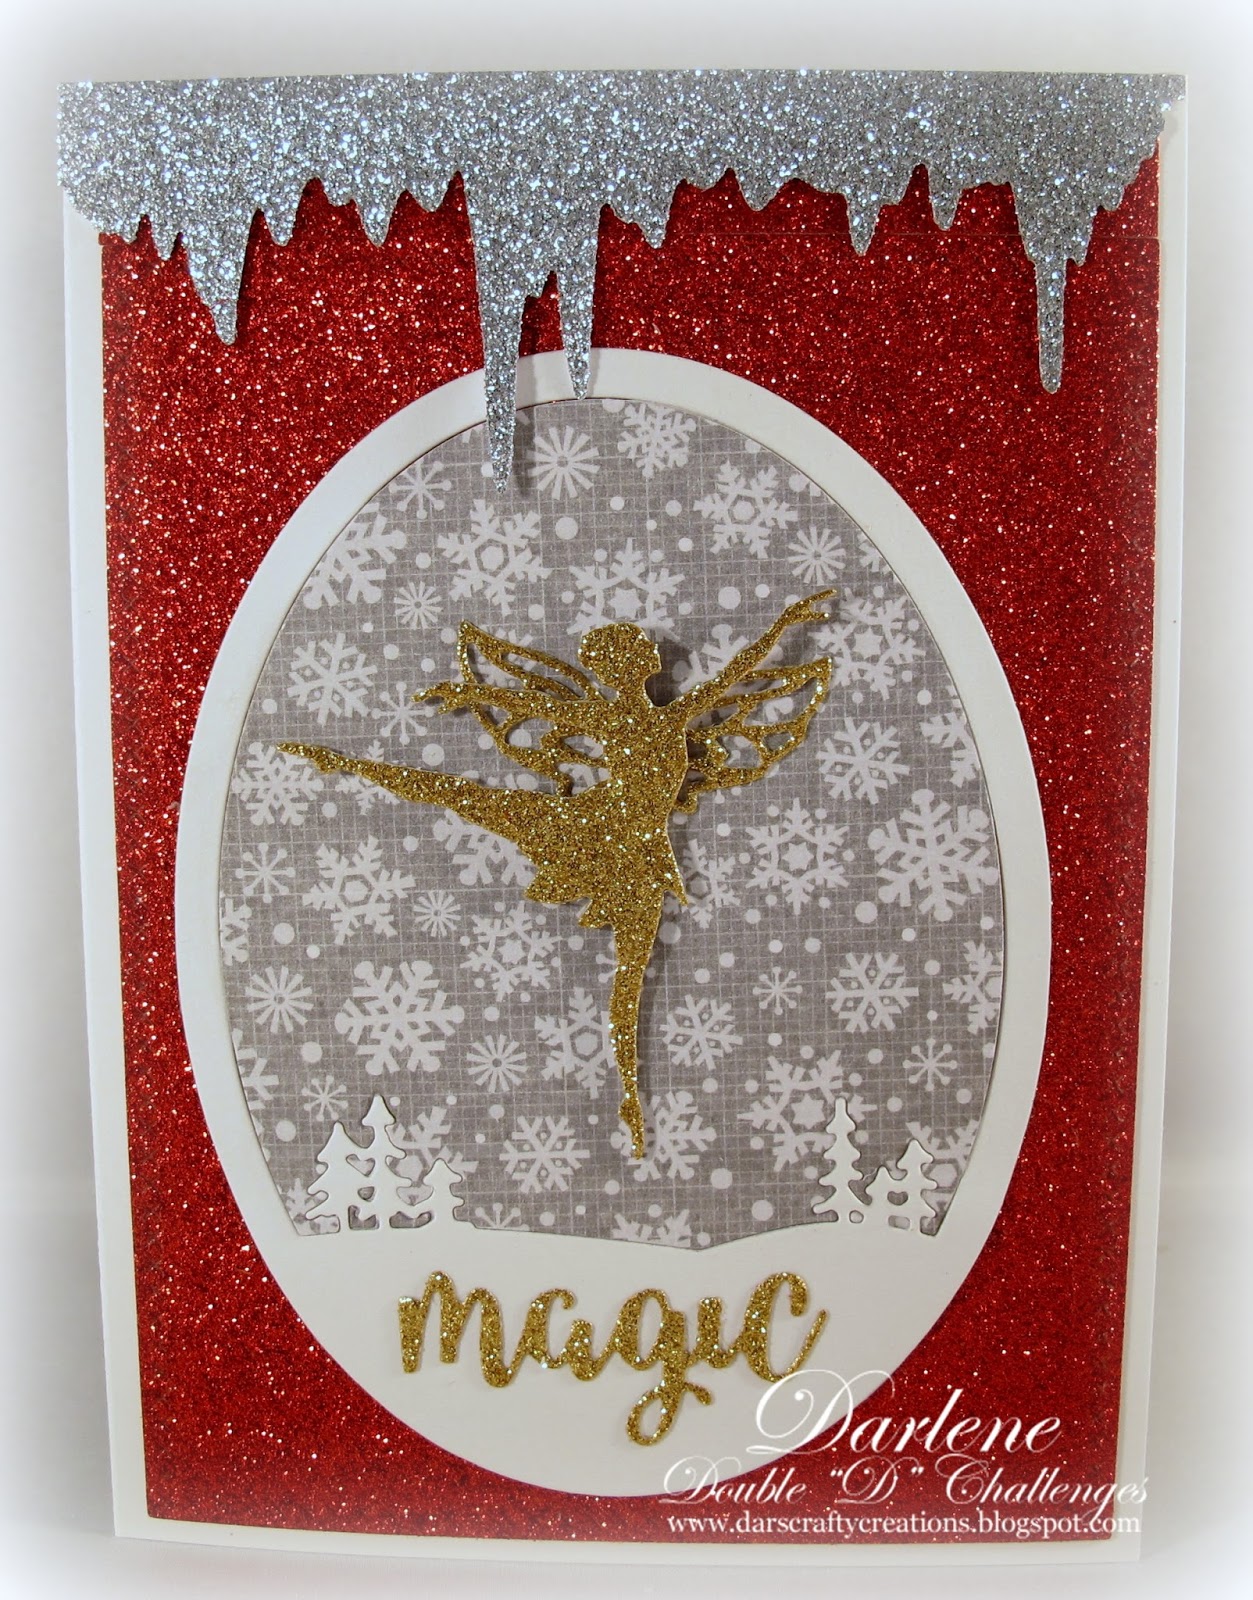
So today I've cheated a bit by using Glittered Cardstock!  But at least I don't have little bits of sparkle from one end of the house to the other!!    Here's my card ... hope you like it!! 


The Glittered Cardstock I'm referring to is by the Paper Studio and was purchased at Hobby Lobby.  The price was right and SO MANY COLORS ... WOW!!   And it die cuts beautifully! 


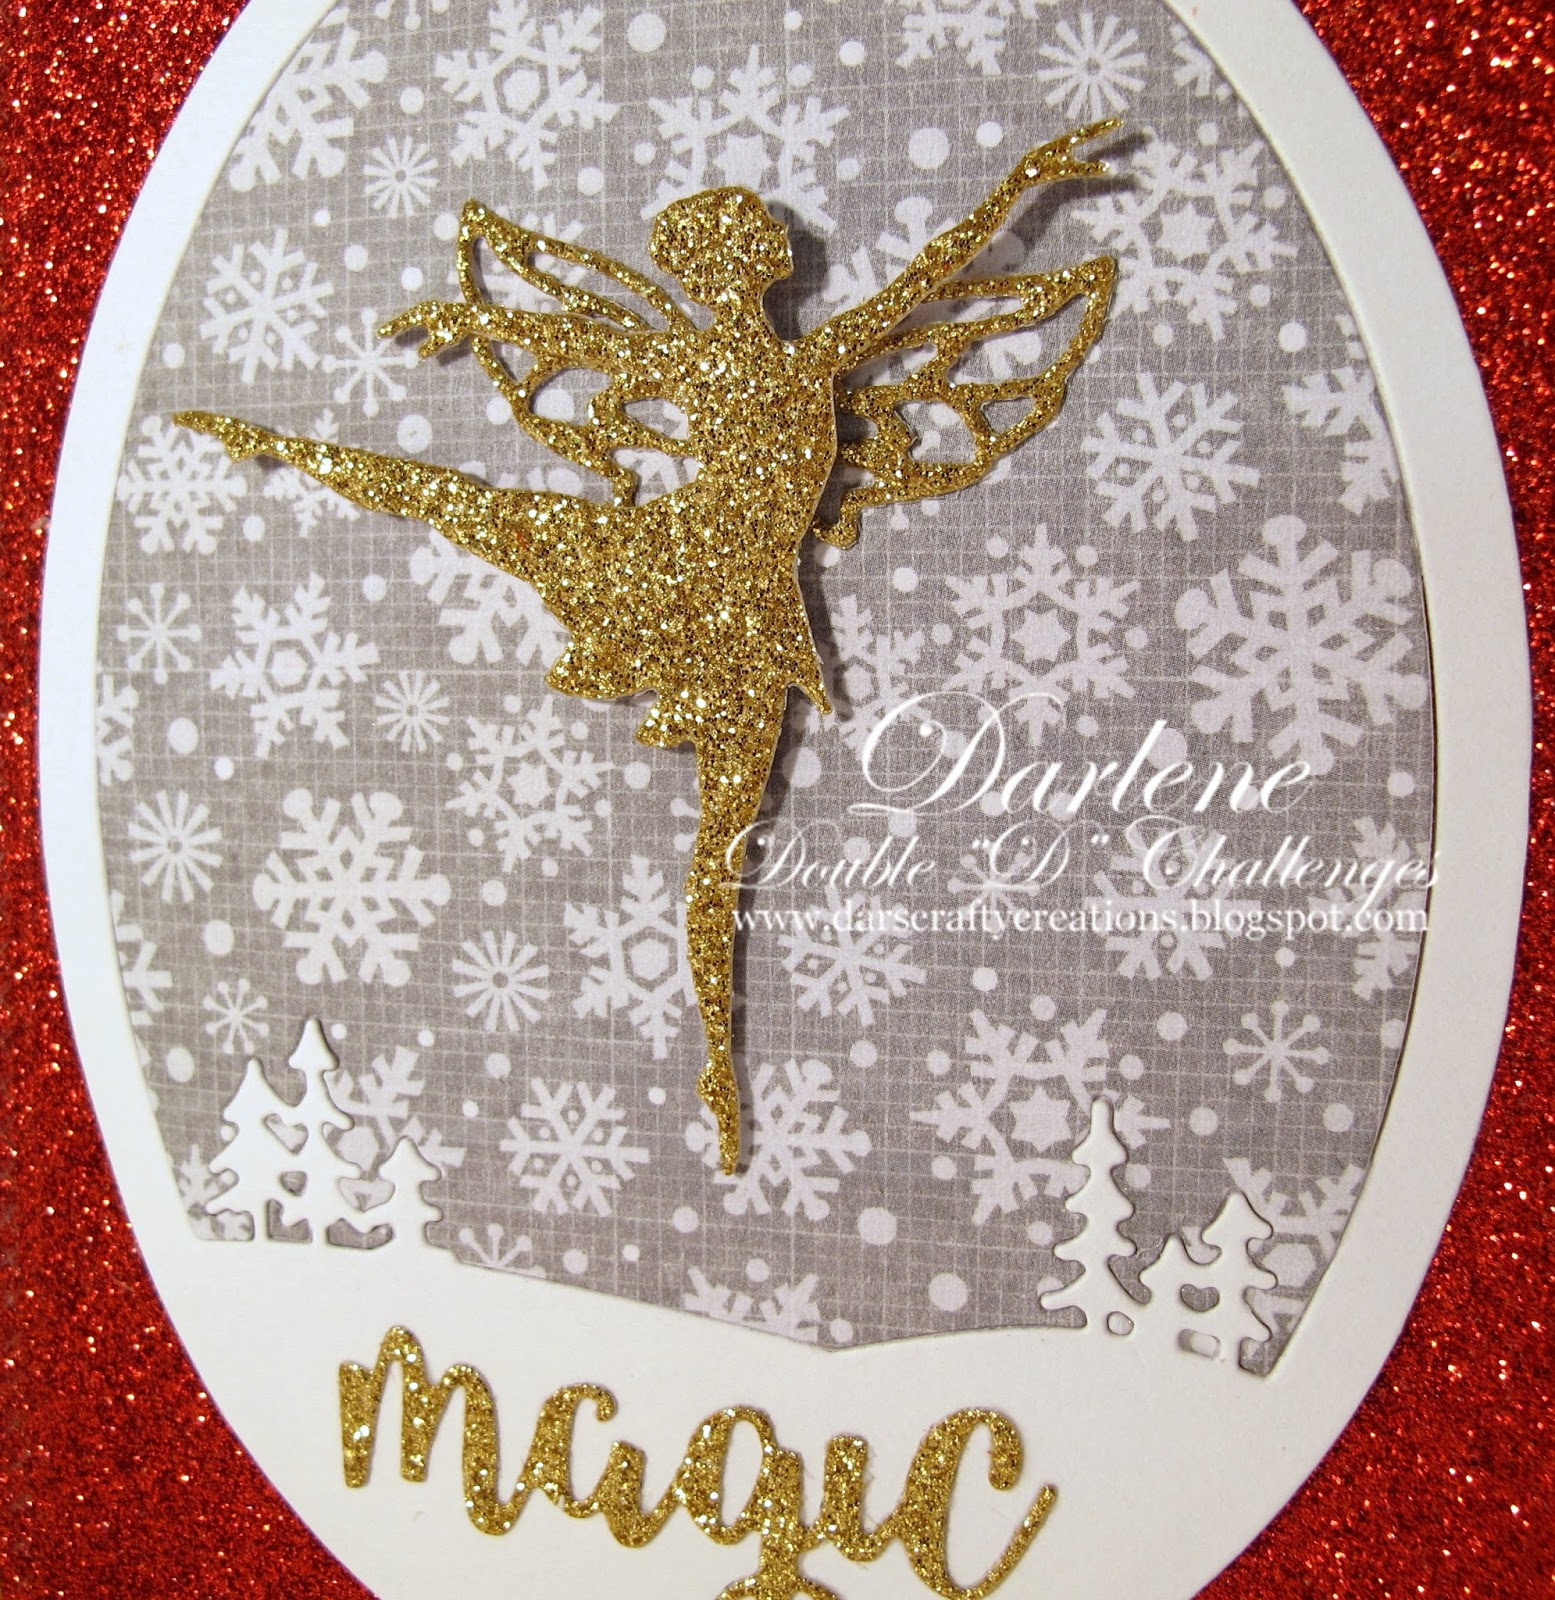
Since I didn't go the extra mile in using loose glitter, I spent a little extra time on my focus image.  The 'background' to the Memory Box 'Gentle Horizon Oval' die pops out.  So I got the bright idea to die cut another panel using a snowy designer paper (from the scrap box ... YAY) and reinsert it to give my Poppystamps 'Magic' ... 'Winterland Fairie'  a snowy sky to create her magic in.


By using a small portion of a silver glitter sheet and the Precious Marieke 'Icicle' die, I think my card looks magical and I hope will bring a smile to the recipient this holiday season. 

Challenges to share in:
Crafty Creations Challenge - ATG
Creative Moments Challenge #126 - ATG
Scrapy Land Challenge #73  - ATG with a die
 The Merry Christmas Challenge #33 - ATG Christmas
 The Holly & Ivy Christmas Challenge #14 - ATG Christmas
Tuesday Throwdown Challenge #359 - Punches and/or Does

I hope you'll come join in our challenge fun!
Here's what Diane has up for grabs to one lucky random draw winner. 

Sparkle Die and Stamp set


You gotta play to win!!
Hope to see you there!
As always . . .