ATTENTION PLEASE

** ATTENTION PLEASE - FYI**
AFTER DECEMBER 2026, our Two Old Bats and Sisterhood of Crafters Challenge Blogs will be closing their doors.

Sunday, June 24, 2012

YEA!!! WE DID IT!!!

Happy Sunday Everyone!

I'm THRILLED to say that with the help of two of our FABULOUS neighbors (Travis & Christy), I was able to pull off a SURPRISE RETIREMENT PARTY for my hubby, Mark!

YEP ... we got him!!  
(The look on his face here is ... what's going on??  He saw Christy with the camera!
Next photo shows ... he figured it out!!)
It was a small party just with the neighbors, a few close friends & of course our kids ... but it was awesome!  Christy & Travis went to a lot of work and were SO SWEET to open their home to us so Mark would not suspect anything!  And I can't thank them enough!!

 Here's ME saying "YES, WE DID IT!"

 (l-r) Son-in-law Frank, daughter Carolyn, best friend Lona, granddaughter Morgan and grandson Jonathan

Some of our FABULOUS neighbors!
Oh ... and did you notice they have NOISE MAKERS?  
Yep, when Mark walked in they all blew their noise makers and cheered!!  WHAT FUN!!


I may have paid for the party goods, but Christy & Travis did all the work in setting everything up and making it so festive!  Mark was VERY PLEASED and I am SO THANKFUL for all their hard work!

And here's the happy RETIRED COUPLE!
I am so looking forward to spending the REST of my life with this GEM of a man and so pleased that with the help & kindness of our neighbors, I could bring this smile to his face!  We are truly blessed!!

Happy Retirement Mark!  
Now it's time to RELAX & HAVE SOME FUN!!

Thanks for stopping by everyone ... I'll be back to crafting fun early next week!
Hugs,
Darlene

Saturday, June 23, 2012

Tri-Shutter Tutorial

Happy Weekend Everyone!

I know several of you are familiar with the Tri-Shutter Fold card and like myself, most of you have probably found the directions over on Splitcoast Stamper.  BUT ... I have had several requests for it and since there are folks who don't belong to SCS ... I thought I'd share it here on my blog with you. 

I have made several of this type of card for this fall's craftshow ... it always carries that WOW! factor.

LET'S GET STARTED!
You can created TWO Tri-Shutter cards from
ONE 12x12 sheet of cardstock
(at least 80# weight or more is best for this style).  

For your base you will need to cut your 12 x 12 paper
at 5-1/2" x 12".
Then with your 12" length across your Scor Pal,  
score down at 2", 4", 8", 10".

Next you will need to TURN your paper,
and 1-1/2" in from each side you will CUT 
between the 2" & 10" Score Lines.

(HINT:  I score my line first ... then use my craft knife and cut down through the score line.)

Now accordion fold your score lines ...
REVERSE the fold on the middle panel ...
It will look like this, looking DOWN on it ...


Now it's time to choose & cut your design panels.
 (HINT:  I have made myself a template and marked the dimensions for the inside panels on each section ... that way I don't have to read over again & again from my notes or remeasure each time.)

I had a friend (waving Hi  to Bette!) ask me about the tri-shutter card I made for the guys with fishing as the theme ... so, that is the one I will showcase for you today.  (Keeping in mind my tutorial shows BLUE cardstock as the base but that was only because the color would show up on camera better than white.)

(Fishing embellishments are from Archiver's)

So there you have it!
These are so easy to make and SO MUCH FUN!  You'll be hooked on them (like me!) in no time at all!  LOL!!  Hope you enjoyed this tutorial and if you make one, please let me know ... I'D LOVE TO SEE IT!

Have a fabulous weekend!
HUGS
Darlene

Thursday, June 21, 2012

Joan's Gardens Challenge

Evening friends!
It's STILL 90 degrees outside so I've been playing in my 'cave' all day!  
Thursday's to me, means two fun challenges ... Shelly's Images which I posted this morning (scroll down to view) and Joan's Gardens which I am about to share with you now!

Here are this week's requirements:
Create an Oldies but Goodies kind of card.
Use Blue on your card
Use some kind of corner embellishment
Make your card for a friend

Here's what I came up with . . .

This lovely trio is a rubber stamp by Art Gone Wild, called "Friends Forever" and the sentiment stamp is by StampingSensations.com.  The 'fence' is also a rubber stamp by Art Impressions.

Art Impressions 'Girlfriend' stamps are actually what Joan & Selma are showcasing today and you really should go take a peek at their cards ... these images are a 'hoot' and the cards designed by these two talented ladies are fabulous.

My background paper is from Colorbok and my corner treatment was created by die cutting on white cardstock one of the Cheery Lynn Designs (B165) Lace Corner dies then laying the die on red cardstock and cutting out around it to make a 'mat' for my white panel.  Also, after stamping & coloring my image, I cut it out with a swivel craft knife and positioned the ladies behind the fence.  Don't they look like a nice group of ladies you'd just like to stop by and chat with for awhile!!??!!

I hope you enjoyed this card ... I know I had a lot of fun creating it!
Today, I also made 12 cards for a friend of my daughter's who has cancer but still tries to send cards to her friends & family that have been supportive of her (my daughter & family being one in that group).  Maybe one day next week I will share those with you ... don't want to put you into CARD OVERLOAD tonight!  LOL!  Hugs to each of you and stay safe & COOL!!
Darlene

Shelly's Images Challenge


Hey there everyone!  So glad you stopped by today!

Before moving on to today's challenge at Shelly's Images, I'd like to announce the winner of a Shelly's Images Gift Voucher chosen from my commenters list from last week's challenge ... DRUM ROLL PLEASE ...


TONYA
Congratulations Tonya ... please contact me at akadafney@yahoo.com
and I email you your winner's voucher!
Now on to another fun challenge at Shelly's Images and today's FEATURED image is a fun one called 'ROOSTER'.  Growing up on a small farm, this image brought back childhood memories and I truly enjoyed coloring & creating with this image.


The challenge theme for today is:
SHOW US WHAT YOU GOT!
(anything goes)

I decided to make a "Z-Fold" card today and how fortunate was I to find this Rooster Design Paper at Michael's last week (on sale 6 for $1 - 12x12)!  I colored my rooster with SU watercolor pencils and blender pen.  It's very faint but I also sponged a little TH 'broken china' ink around the outside edge.

Here's what my card looks like open.  I simply die cut another circle (same size as the gold mat circle) to use on the inside for my sentiment.  The sentiment stamps are from the Crafty Secrets 'Down On The Farm' clear stamp set.  I've colored Mr. Rooster also with SU watercolor pencils.

I hope you'll come join in our challenge fun this week at Shelly's Images. 
And, if you need inspiration, wait till you see what my team mates have created for you!

See you there!
Darlene

Wednesday, June 20, 2012

Challenging myself . . .

Happy Wednesday Blogging Friends!

Last evening while I was playing around in my 'cave' ... I decided to check out the Tuesday Challenges over on Feline Playful and see how many I could put into ONE CREATION!  


I decided to start out with an empty Cricut cartridge box (thanks Stephanie for sending these to me) and as I started to decorate it,I looked through the challenges listed and kept some of them in mind.  Wasn't sure where I was headed but here's what I ended up with ... I'm pretty happy with the outcome!


Products used in this creation are:
Papers:  Gift wrapping paper, olive cardstock,
Accessories:  K&Co. Chipboard bird & butterfly, Michael's satin ribbons, Prima flowers, Rafia, Wild Orchid Flowers, Cheery Lynn Designs (B117S) Fanciful Flourish die, (B147) Olive Branches, (B119) Tropical Leaves, Hat Pin, Jewelry beads, Clear gems, Dew Drops


The 'paper' is actually wrapping paper that came in the mail as a gift from one of the organization that we send money to from time to time.  The first challenge that I spotted was FLOWERS so I thought this would be a great starting point.  Here are the Tuesday challenges I used for this creation . . .
Bearly Mine - Flowers
Clear It Out Challenge - Anything Goes - Use 2 or more ribbons
ColourQ #142 - Soft Sky, Island Indigo, Crushed Curry, Cameo Coral, Vanilla
Creative Card Crew #13 - Easy as 1,2,3 (1-Bird, 2-Ribbons, 3+ Flowers)
Lady Bug Crafts Ink TLT - Double Trouble (2 of something)
LEJ Designs - Recycle Something (cricut box & wrapping paper)
Paper & Such - Feathered Friends  -  listed but shows challenge is closed
Papertake Weekly - Bingo! (ribbon-free-blooms)

I'm sure there are other challenges this creation qualifies for ... I will be sure to check them out and add them here later in the day.  But, for now, I'd like to share a couple other things with you.

EDIT:  A few more qualifying challenges for my altered Cricut box
 The Cheerful Stamp Pad - In the Garden
Crafty Cardmakers #70 - NO cards, tags or ATCs
Lollipop Crafts #83 - Flowers in Bloom [2nd entry]
The Crazy Challenge - Recipe (ribbon, gems, dies) [2nd entry]
 There She Goes Clear Stamps - Winged Things (Bird and Butterfly)
UnstampaBelles Challenge - Ribbons
Use Your Stuff #38 - Make it by hand (decorative pin)
Creative Belli Blog - Anything But A Card
Divas by Design - Diecuts
Simon Says - Anything But A Card
Stampavie and more - Things with Wings


As you can see (if you are a follower of my blog), I'm hooked on FANCY FOLD cards at the moment.  Especially the Tri-Shutter style!  So last evening I also made TWO more ... this time BABY was my theme.  Here's a peek . . .

 One for 'Baby Girl' . . .
My flower is homemade using the same designer paper and the PunchBunch 'Begonia' punch purchased through Joan's Gardens.

 And, one that could go either for 'Baby Girl' OR 'Baby Boy'
Again, the flower was homemade using the same punch but this time I used #65 pale blue paper and inked the edges with TH 'broken china' ink before conditioning and creating my flower using the McGill Flower Making Kit also purchased through Joan's Gardens.

Qualifying challenges for my Baby Tri-Shutter Cards:
Crafty Creations Challenge - Baby
Tammy's Scrapin Corner - Ribbon or Bows
Great Impressions - Punches & Dies (3rd entry)
Stamptacular Sunday Challenge - Fancy Folds
Something else real quick before my timer goes off telling me I need to get upstairs and get the pork chops started for dinner ...
I'd like to share with you a couple photos I took this morning as I gazed out into our back yard!

Yep ... Mallard ducks!  The most I've ever seen in our yard at one time!
1-female and 7-male


And then a few hours later, this little guy shows up!  
A BLACK SQUIRREL!!
We have several (in fact, 5 new babies) gray squirrels in our picnic area, but this guy came from across the way where I've seen a few black squirrels ... but RARELY in our woods!  Guess he must have gotten the word that I filled all the feeders yesterday!  LOL

OKAY ... my timer just went off so I'd better get upstairs!
Thanks so much for stopping by today and letting me share my creations and life with you!
HUGS,
Darlene

Tuesday, June 19, 2012

A little RAIN would be helpful!!!

Is it HOT where you are??
After a BEAUTIFUL SPRING, we are already getting into the HEAT & LACK OF RAIN of summertime!  And it's not even officially SUMMER YET!!!

Are you like me ... watering daily to keep your flowers alive and praying for rain to get the yard green again??  There was a little rain predicted yesterday ... so before the weather forecaster LIED to me again, I went out a took a few photos and WATERED all my potted flowers.

Want to see what I'm working so hard to keep alive (like so many of you are I'm sure!)?

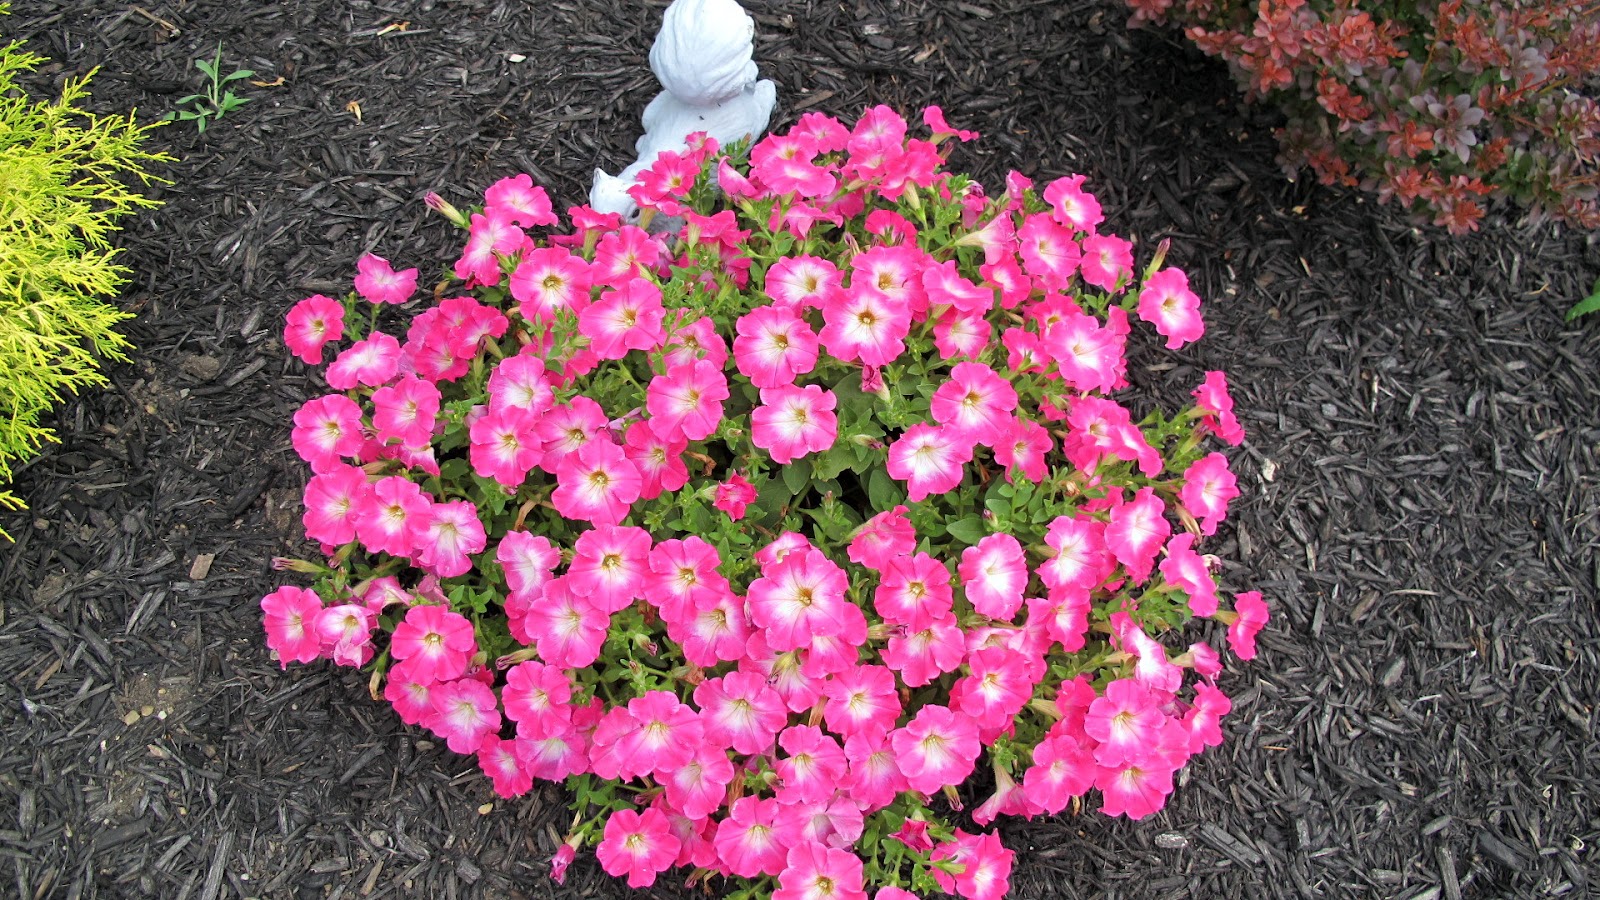
This is a planter my sister built for me several years ago ... it's on the North East end of the house and the wave petunia's seem to love it there!  The little white flowers on the ends are Bicopa.

 Here is the South East front corner of my house.  This is part of the re-landscaping we had done last fall and I have added a few extra flowers ... wave petunias, pin cushion plants, along with the roses & lavender which was part of the landscaping.


It's amazing how well the wave petunia's do in the front of my house ... it's so hot in the afternoon but as long as I keep them well watered they seem to do okay.  In fact this is the first time I've planted them right in with the landscaping versus just in the pots on the front porch.

 YEP ... more wave petunia's in the large pots on the front porch! 
I love being able to see them when you come up the driveway!!

Ssshhhh ... don't tell anyone, but I even put four tomato plants in amongst the flowers!  We live in a housing development that doesn't allow in ground gardens ... pot gardens only.  But I grew up on a small farm and we always had fresh garden vegetable and I love my home grown tomatoes!  Sssshhh ... this is our secret!!  Okay??

Okay ... back into the cool 'crafting cave' to create.  
I hope you enjoyed my little home/flower tour!  I'm very proud of our home, gardens & picnic area ... so beware ... you'll probably see a little more as summer goes on!  

Stay cool & happy my friends!!
Hugs,
Darlene